-
Performance Upgrades - Maintenance - Modifications - Problem Solving - Off-Road - Street Trucks.
Covering the Explorer, ST, Sport, Lincoln Aviator, Sport Trac,
Mercury Mountaineer, Mazda Navajo, Ford Ranger, Mazda Pickups, and the Aerostar.
Featuring H.I. - Human Intelligence.
Register Today It's free!
- Forums
- Generation Specific Forums
- 2002 - 2005 Explorer Mountaineer 3rd Generation
- Modified 2002 - 2005 Explorers
You are using an out of date browser. It may not display this or other websites correctly.
You should upgrade or use an alternative browser.
You should upgrade or use an alternative browser.
How to: 3rd Gen BODY LIFT. Install.
- Thread starter RoadBully
- Start date
Elite Explorer members see no advertisements, no banner ads, no double underlined links,.
Add an avatar, upload photo attachments, and more!.
Kovalchuk
Well-Known Member
- Joined
- June 1, 2008
- Messages
- 261
- Reaction score
- 1
- City, State
- OTTAWA, ON
- Year, Model & Trim Level
- 2003 XLT Loaded
driver rear, i ordered a new one last night. wasnt as expensive as i thought it was going to be. like 80 bucks.
You replaced one coilspring only?
RoadBully
Explorer Addict
- Joined
- January 8, 2008
- Messages
- 1,116
- Reaction score
- 4
- City, State
- Saint John, NB
- Year, Model & Trim Level
- Explorer XLS '02
I got the lift in today, looks like there are some extra parts I might not need?
Also there were 14 spacers, I counted 10 total on mine, right?
Yup, there are extra spacers and bolts for the box on the ranger.

You'll only need 10.
jutgin
Well-Known Member
- Joined
- December 6, 2007
- Messages
- 560
- Reaction score
- 1
- City, State
- Chattanooga, TN
- Year, Model & Trim Level
- 2002 ST
ok I was looking at the steering extension today and it looks like it disconnects from the top side near the firewall? Although the existing bolt looks off centered so I'm wondering how that will line up with the extension piece? Maybe this will make better sense Friday when I get started. Any help or pics from u guys that have done this?
RoadBully
Explorer Addict
- Joined
- January 8, 2008
- Messages
- 1,116
- Reaction score
- 4
- City, State
- Saint John, NB
- Year, Model & Trim Level
- Explorer XLS '02
ok I was looking at the steering extension today and it looks like it disconnects from the top side near the firewall? Although the existing bolt looks off centered so I'm wondering how that will line up with the extension piece? Maybe this will make better sense Friday when I get started. Any help or pics from u guys that have done this?
It's about a foot down from the firewall.
pretty much right in the center of the shaft.
RoadBully
Explorer Addict
- Joined
- January 8, 2008
- Messages
- 1,116
- Reaction score
- 4
- City, State
- Saint John, NB
- Year, Model & Trim Level
- Explorer XLS '02
hmm now i;m confused. theres nothing directly in the center on mine. it would either have to be the top or the bottom. the top being near the firewall
If it helps... its where one shaft slides into the other.
jutgin
Well-Known Member
- Joined
- December 6, 2007
- Messages
- 560
- Reaction score
- 1
- City, State
- Chattanooga, TN
- Year, Model & Trim Level
- 2002 ST
ok yea it helps, i just got to thinking it looks like it comes apart near the gear box too but im pretty sure i know which one to take apart. i'll know if it fits!!
guitarfrk741
Well-Known Member
- Joined
- January 21, 2007
- Messages
- 308
- Reaction score
- 0
- City, State
- Baton Rouge
- Year, Model & Trim Level
- '02 4.0
be prepared to do a fair amount of grinding on the extension both on the tab and in the slot..i'm actually goin throug all the lift parts in a few days to make sure all is still well so i'll try to grab a picture of it for you if you still need it..
you might also wanna get abunch of extra washers bc some of the bolts are a little long and dont torque down all the way
you might also wanna get abunch of extra washers bc some of the bolts are a little long and dont torque down all the way
jutgin
Well-Known Member
- Joined
- December 6, 2007
- Messages
- 560
- Reaction score
- 1
- City, State
- Chattanooga, TN
- Year, Model & Trim Level
- 2002 ST
be prepared to do a fair amount of grinding on the extension both on the tab and in the slot..i'm actually goin throug all the lift parts in a few days to make sure all is still well so i'll try to grab a picture of it for you if you still need it..
you might also wanna get abunch of extra washers bc some of the bolts are a little long and dont torque down all the way
OK will do thanks for reminding me. I'm ready to start Friday night.
RoadBully
Explorer Addict
- Joined
- January 8, 2008
- Messages
- 1,116
- Reaction score
- 4
- City, State
- Saint John, NB
- Year, Model & Trim Level
- Explorer XLS '02
OK will do thanks for reminding me. I'm ready to start Friday night.
We'll be waiting for pics.
jutgin
Well-Known Member
- Joined
- December 6, 2007
- Messages
- 560
- Reaction score
- 1
- City, State
- Chattanooga, TN
- Year, Model & Trim Level
- 2002 ST
Got alot taken apart tonight. Few concerns after reading the directions, which I know are for a ranger but same parts mostly. So here's a list of the things mentioned that I'm not sure if I could be concerned about:
Ground straps, tranny shift cables, air bag fuse, brake lines, air intake, radiator, fuel filler.
Thats all I can think of now, what did you guys do with these? Are they an issue or does everything have enough slack to not worry about?
Am I the only one that had to take out my middle seats????
Ground straps, tranny shift cables, air bag fuse, brake lines, air intake, radiator, fuel filler.
Thats all I can think of now, what did you guys do with these? Are they an issue or does everything have enough slack to not worry about?
Am I the only one that had to take out my middle seats????
RoadBully
Explorer Addict
- Joined
- January 8, 2008
- Messages
- 1,116
- Reaction score
- 4
- City, State
- Saint John, NB
- Year, Model & Trim Level
- Explorer XLS '02
Got alot taken apart tonight. Few concerns after reading the directions, which I know are for a ranger but same parts mostly. So here's a list of the things mentioned that I'm not sure if I could be concerned about:
Ground straps, tranny shift cables, air bag fuse, brake lines, air intake, radiator, fuel filler.
Thats all I can think of now, what did you guys do with these? Are they an issue or does everything have enough slack to not worry about?
Am I the only one that had to take out my middle seats????
You do not haveto take out any seats... :thumbdwn:
and the only thing in that list is the Fan shroud for the rad fan, 3" need to be trimmed off of the bottom of it.
that's it.
Why did you remove your seats?

jutgin
Well-Known Member
- Joined
- December 6, 2007
- Messages
- 560
- Reaction score
- 1
- City, State
- Chattanooga, TN
- Year, Model & Trim Level
- 2002 ST
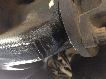
There isnt a break in the carpet, it's one piece and pinned tightly under the seat mounts, I barely had enough room to slide my hand flattened out under there. By the looks of your pic yours is split there? Do you have the 3rd row seats? I do.
And the fan shroud is attatched to the radiator, so how would one need fabbing but the other doesnt move?
And the fan shroud is attatched to the radiator, so how would one need fabbing but the other doesnt move?
RoadBully
Explorer Addict
- Joined
- January 8, 2008
- Messages
- 1,116
- Reaction score
- 4
- City, State
- Saint John, NB
- Year, Model & Trim Level
- Explorer XLS '02
There isnt a break in the carpet, it's one piece and pinned tightly under the seat mounts, I barely had enough room to slide my hand flattened out under there. By the looks of your pic yours is split there? Do you have the 3rd row seats? I do.
And the fan shroud is attatched to the radiator, so how would one need fabbing but the other doesnt move?
The fan shroud is two pieces... the bottom section slides out.
it needs to be trimmed because the rad is attached to the body, and of course the fan is attached to the motor, so one moves and one doesn't
Of course it's not a problem to move up the top of the fan shroud... but when the bottom section moves with it, it runs into the fan itself.
So you just need to trim the bottom section.
And that's probably the difference, mine doesn't have the 3rd row seats...
Hope that helps for the fan shroud situation.
Ben
jutgin
Well-Known Member
- Joined
- December 6, 2007
- Messages
- 560
- Reaction score
- 1
- City, State
- Chattanooga, TN
- Year, Model & Trim Level
- 2002 ST
Ok cool My brain must have been fixed on the radiator mounts being attatched to the frame for some reason. So as long as the hoses from the radiator doesnt get into the pullies or belt I should be good. Did you have to tie back any hoses?
Other than that it should be easy to trim the plastic shroud.
Maybe pics tomorrow night!
Other than that it should be easy to trim the plastic shroud.
Maybe pics tomorrow night!
RoadBully
Explorer Addict
- Joined
- January 8, 2008
- Messages
- 1,116
- Reaction score
- 4
- City, State
- Saint John, NB
- Year, Model & Trim Level
- Explorer XLS '02
Ok cool My brain must have been fixed on the radiator mounts being attatched to the frame for some reason. So as long as the hoses from the radiator doesnt get into the pullies or belt I should be good. Did you have to tie back any hoses?
Other than that it should be easy to trim the plastic shroud.
Maybe pics tomorrow night!
Didn't need to tie anything back,
Everything slid down through very easy.
the pullies and such come no where near the rad... no worries.
Elite Explorer members see no advertisements, no banner ads, no double underlined links,.
Add an avatar, upload photo attachments, and more!.
jutgin
Well-Known Member
- Joined
- December 6, 2007
- Messages
- 560
- Reaction score
- 1
- City, State
- Chattanooga, TN
- Year, Model & Trim Level
- 2002 ST
Cool man, I appreciate all your help and engenuity. When I first got on here I only dreamed of doing a body lift and spacers like your making. Now here we are!
And I'm still thinking 35's, I am prepaed to trim fender wells.
And I'm still thinking 35's, I am prepaed to trim fender wells.
Featured images


Featured images
Similar Threads
- Replies
- 6
- Views
- 2,185
- Replies
- 363
- Views
- 185,241
- Replies
- 7
- Views
- 2,879