Well I've been gathering information and giving information here for a while now and just found this thread! 
Anyways, I got my explorer when I was 16 as my first vehicle 6.5 years ago with 61k on it from my Grandpa who recently then couldn't drive anymore. Ever since I got it I have made a project out of it. First it started with just fixing some spot rust and waxing and the story just gets longer!!
Since then over the years I have done many mods including:
-Gibson cat-back exhaust
-K&N intake system
-Custom electric fan set up with a painless controller. (I used a dual fan set-up from a 97 ford contour for clearance reasons)
-dimond-cut head lights
-"lego" tail lights, lol (I didn't realize they looked that that until I got them, but I've grown to like them)
-6000K HID's
-Blue LED grill & interrior lights
-LED gauge cluster conversion
-Eagle Alloy 17" rims with 245/70R17 Nitto Terra Grappler tires
-Aftermarket stainless steel running boards to prevent moisture/ salt being trapped against the body
-Pioneer 3100dvd double din radio
-Pioneer 6X8 door speakers and a 10" Audio Bahn sub
-Dynamat in all the doors including the hatch
-Grover 1650 Airhorn with a VIAIR 350C compressor and 2 custom steel air tanks
-Torsion Twist front lift and air shocks in the rear - soon to be custom shackels
-Changed the gear ratio from 3.55 to 3.73LS
Besides all of the mods, I've also replaced the head gaskets at 76k just to have them blow again at 91k so I put a new to me rebuilt engine in. This past summer I had to pull it again to replace the timing chain and tensioner. While it was out I found a bad push rod and rocker.
 Obviously I replaced those too. Note to self, never buy a reman engine from a huge corporation again (it was Proformance Powertrain if you were wondering). Next time I'll do it myself!
 Now all that frustration aside, it is running great again! I have done all of the work myself, except the engine rebuild... never never again.
My grandpa passed away 2.5 years ago so since then I've been trying to keep it as nice as possible. I replaced the rocker panels and dog legs myself 2 summers ago but they weren't welded in correctly ( I used mostly epoxy to prevent rust so the paint cracked at some of the joints but I'll get it fixed up right some day!
To further prevent it from rusting out I bought a 99 2wd ranger to drive as my every day crappy weather vehicle. We have a lot of salt on the roads up here in Northwest Ohio. I miss the 4wd in the snow though!!
In the future I plan to finish/ redo the rust repairs and have all the imperfect areas repainted. I'm a bit of a perfectionist if you couldn't tell
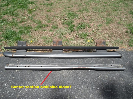
Here are a few pictures of it now with 123k on it. I'll get more but I didn't realize I only had 2 on Photo Bucket..


These pictures are when I got the rims and tires just about a year ago with the rockers and dog legs already replaced.
Since then I drove it to San Antonio, TX and back but not much else so I only put about 5k on it last year and it is currently sitting in the same place in the barn as this picture was taken. lol
EDIT: Since I've created this thread I have now swaped in a supercharged 347 with a TOD4406 transfercase. That progress can be seen here: 5.0 Swap Thread
Anyways, I got my explorer when I was 16 as my first vehicle 6.5 years ago with 61k on it from my Grandpa who recently then couldn't drive anymore. Ever since I got it I have made a project out of it. First it started with just fixing some spot rust and waxing and the story just gets longer!!
Since then over the years I have done many mods including:
-Gibson cat-back exhaust
-K&N intake system
-Custom electric fan set up with a painless controller. (I used a dual fan set-up from a 97 ford contour for clearance reasons)
-dimond-cut head lights
-"lego" tail lights, lol (I didn't realize they looked that that until I got them, but I've grown to like them)
-6000K HID's
-Blue LED grill & interrior lights
-LED gauge cluster conversion
-Eagle Alloy 17" rims with 245/70R17 Nitto Terra Grappler tires
-Aftermarket stainless steel running boards to prevent moisture/ salt being trapped against the body
-Pioneer 3100dvd double din radio
-Pioneer 6X8 door speakers and a 10" Audio Bahn sub
-Dynamat in all the doors including the hatch
-Grover 1650 Airhorn with a VIAIR 350C compressor and 2 custom steel air tanks
-Torsion Twist front lift and air shocks in the rear - soon to be custom shackels
-Changed the gear ratio from 3.55 to 3.73LS
Besides all of the mods, I've also replaced the head gaskets at 76k just to have them blow again at 91k so I put a new to me rebuilt engine in.
This past summer I had to pull it again to replace the timing chain and tensioner. While it was out I found a bad push rod and rocker. Obviously I replaced those too. Note to self, never buy a reman engine from a huge corporation again (it was Proformance Powertrain if you were wondering). Next time I'll do it myself! Now all that frustration aside, it is running great again! I have done all of the work myself, except the engine rebuild... never never again.My grandpa passed away 2.5 years ago so since then I've been trying to keep it as nice as possible. I replaced the rocker panels and dog legs myself 2 summers ago but they weren't welded in correctly ( I used mostly epoxy to prevent rust so the paint cracked at some of the joints
but I'll get it fixed up right some day!To further prevent it from rusting out I bought a 99 2wd ranger to drive as my every day crappy weather vehicle. We have a lot of salt on the roads up here in Northwest Ohio. I miss the 4wd in the snow though!!
In the future I plan to finish/ redo the rust repairs and have all the imperfect areas repainted. I'm a bit of a perfectionist if you couldn't tell
Here are a few pictures of it now with 123k on it. I'll get more but I didn't realize I only had 2 on Photo Bucket..
These pictures are when I got the rims and tires just about a year ago with the rockers and dog legs already replaced.
Since then I drove it to San Antonio, TX and back but not much else so I only put about 5k on it last year and it is currently sitting in the same place in the barn as this picture was taken. lol
EDIT: Since I've created this thread I have now swaped in a supercharged 347 with a TOD4406 transfercase. That progress can be seen here: 5.0 Swap Thread