JasonF
Well-Known Member
- Joined
- May 27, 2002
- Messages
- 390
- Reaction score
- 0
- Year, Model & Trim Level
- 2004 XLT 4x4 4.0
Component Install pics [Updated]
I finally got my new gear installed a couple weeks ago, it went smoothly and the end result turned out as good as I had hoped. I took some pics of the install to hopefully help some of you who might be thinking about a similar project.
What I started with:
-2004 Ex with basic audio system
-Panasonic CQ-9700U head unit
What went in:
-EFX 4 ga amp power kit
-2 sets of TMA twisted pair RCA's
-16 ga speaker wire direct from front speakers to amp
-Infinity 7541a 4 ch amp
-Boston Acoustics SL60 6.5" component speakers
-5x7 to 6.5" speaker adapter plates
-12 ga speaker wire from amp to sub
-Infinity Perfect 12.1 4-ohm sub in an EFX sealed box
First I ran my 4 ga amp wire through the hood release cable grommet under the dash, under the door sills and back to the 3rd row footwell area where my amp is. You can see the wire being fished through the grommet in this pic. I may elect to drill a new hole in the firewall for this wire in the near future as I am afraid the firewall may eventually chafe through the power wire. 8ga would probably be no problem.
[update: I did drill a new hole for the power wire right next to the grommet. Much easier than trying to share the original hole]

Next I pulled the front door panels and took out the stock speakers. I ran 16ga speaker wire from the door through the rubber boots, and back under the door sills to the amp. This avoided the need to splice into any of that thin gauge stock speaker wire.

On the bench I test mounted up the BA SL60 woofers to the adapter plates. I was very excited to get 6.5" front speakers put in, especially with basically no mods. The woofers fit right in to the adapter plate and I used the supplied 1/4" spacer. That assembly then bolted right in to the stock speaker mounting location.

I custom mounted the tweeters up on the top of the door panels using the supplied flush-mount cups. A dremel sanding drum made quick work of the door to provide the clearance hole for the tweeter cups. The quality of the clamping system from Boston was very good and the end result is an almost factory looking tweeter install.


I set the supplied crossovers to the -4dB position for the tweeters which is working out well for my tastes. The supplied crossovers are pretty large but I was able to fit them in the armrest area of the door panel with no problems.
Finally, I ran my RCA's down the passenger side door sills, up under the passenger kick panel, underneath the glove box and up to the back of my head unit. While I had the whole thing out I added an aux input cable to the inputs on the back of the head unit and routed its headphones plug into my glove box for hookup to passenger's mp3 players.
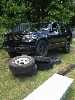
The Infinity Perfect 12.1 went into a sealed Scosche EFX sealed box along with a grill for protection from cargo. I used 12 ga wire both inside and outside the box for maximum current flow. It is hooked to the bridged rear channels of my amp for 278 watts RMS. Each of the front speakers is getting 111 watts RMS.
I left the stock rear speakers hooked up directly to the panasonic receiver (23 watts RMS) for rear fill.
After some tuning I am thrilled with the result. I was able to tune the amp gain for good balance between the fronts and rears, and employed the high and low pass filters on both the amp and receiver in order to route frequencies appropriately.
This one sub really thumps, I can't imagine having more than one of these.
Total install time, about 8 hours.
Any questions just shoot me an email
Jason F
I finally got my new gear installed a couple weeks ago, it went smoothly and the end result turned out as good as I had hoped. I took some pics of the install to hopefully help some of you who might be thinking about a similar project.
What I started with:
-2004 Ex with basic audio system
-Panasonic CQ-9700U head unit
What went in:
-EFX 4 ga amp power kit
-2 sets of TMA twisted pair RCA's
-16 ga speaker wire direct from front speakers to amp
-Infinity 7541a 4 ch amp
-Boston Acoustics SL60 6.5" component speakers
-5x7 to 6.5" speaker adapter plates
-12 ga speaker wire from amp to sub
-Infinity Perfect 12.1 4-ohm sub in an EFX sealed box
First I ran my 4 ga amp wire through the hood release cable grommet under the dash, under the door sills and back to the 3rd row footwell area where my amp is. You can see the wire being fished through the grommet in this pic. I may elect to drill a new hole in the firewall for this wire in the near future as I am afraid the firewall may eventually chafe through the power wire. 8ga would probably be no problem.
[update: I did drill a new hole for the power wire right next to the grommet. Much easier than trying to share the original hole]
Next I pulled the front door panels and took out the stock speakers. I ran 16ga speaker wire from the door through the rubber boots, and back under the door sills to the amp. This avoided the need to splice into any of that thin gauge stock speaker wire.
On the bench I test mounted up the BA SL60 woofers to the adapter plates. I was very excited to get 6.5" front speakers put in, especially with basically no mods. The woofers fit right in to the adapter plate and I used the supplied 1/4" spacer. That assembly then bolted right in to the stock speaker mounting location.
I custom mounted the tweeters up on the top of the door panels using the supplied flush-mount cups. A dremel sanding drum made quick work of the door to provide the clearance hole for the tweeter cups. The quality of the clamping system from Boston was very good and the end result is an almost factory looking tweeter install.
I set the supplied crossovers to the -4dB position for the tweeters which is working out well for my tastes. The supplied crossovers are pretty large but I was able to fit them in the armrest area of the door panel with no problems.
Finally, I ran my RCA's down the passenger side door sills, up under the passenger kick panel, underneath the glove box and up to the back of my head unit. While I had the whole thing out I added an aux input cable to the inputs on the back of the head unit and routed its headphones plug into my glove box for hookup to passenger's mp3 players.
The Infinity Perfect 12.1 went into a sealed Scosche EFX sealed box along with a grill for protection from cargo. I used 12 ga wire both inside and outside the box for maximum current flow. It is hooked to the bridged rear channels of my amp for 278 watts RMS. Each of the front speakers is getting 111 watts RMS.
I left the stock rear speakers hooked up directly to the panasonic receiver (23 watts RMS) for rear fill.
After some tuning I am thrilled with the result. I was able to tune the amp gain for good balance between the fronts and rears, and employed the high and low pass filters on both the amp and receiver in order to route frequencies appropriately.
This one sub really thumps, I can't imagine having more than one of these.
Total install time, about 8 hours.
Any questions just shoot me an email
Jason F