429CJ-3X2
Elite Explorer
- Joined
- November 6, 2009
- Messages
- 1,643
- Reaction score
- 398
- City, State
- Des Moines, Iowa
- Year, Model & Trim Level
- '01,'02, '04 Sport Tracs,
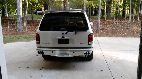
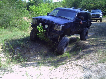
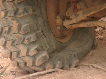
I bought my '02 ST at the end of 2012 with 63,850 miles on it. I've put just short of 70,000 miles on it since. The steering has always been quick and tight despite zero maintenance. I bought new tires a year and a half ago and didn't take care of the obvious camber issue on the right side. As a result of my negligence, the inside of the right front tire wore down to the cords in 15,000 miles. The left front was also worn, but not as bad.
Shout out to Chris Fix who has videos on YouTube where he replaced all these parts and more. His videos are clear and concise, and an added bonus, most (all) are of his Mazda (Ranger), so the info transfers directly to Rangers, Explorers, and Sport Tracs. Don't expect your parts to come apart as easily as they do in the videos. I'm sure he had already replaced the parts, then took it apart and redid them for the videos.
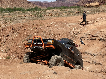
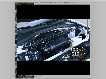
The right upper ball joint was shot - dangerously so. I replaced it, sticking with the 2 piece control arm and only replacing the outer piece. That's a very straightforward repair. The only issue I had was the pinch bolt being rusted in place. It wouldn't budge even with my 3 lb hammer, but I was able to get it out by turning it with a wrench.
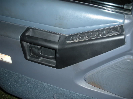
The ball joint/upper arm was a bit of an emergency repair once I found it, so I didn't do the camber bolts at the same time. I used Moog parts from Rock Auto. The camber bolts on the passenger side are not bad to do. You'll need a 21mm deepwell socket for the nut, and a 22mm socket for the bolt head. (Sizes might be reversed, but I think that's correct.) On the driver's side, the fuel line is right in the way of getting the rear bolt in. The new bolt is longer than it needs to be, so I ran the nut on and cut about the width of the bolt head off the end of the bolt. This helped a little in getting the bolt lined up with the hole. The fuel line is still in the way, but not as much as before as the bolt head is now even with the line, not catching on the line as it starts into the hole. The shortened bolt is still plenty long. You could put the bolt in from the rear, but unless you shorten the bolt, you'll need a deepwell socket which there isn't room for. To get the front bolt in, I taped the 2 washers together so I wasn't fighting them to stay on the bolt, then I carefully fed the bolt between the brake lines and the frame from the front, and then fed it into the mounting bracket from the rear. (It'll make sense when you look at the layout.) It takes some dexterity, but I couldn't feed the bolt past the brake lines from the rear.
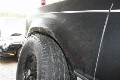
I took it in for new front tires and an alignment last week - one of the tire shop guys had already checked the tread depth on the rear tires and said I'd be ok replacing just the fronts. The rears hadn't worn much in 15,000 miles. They mounted the new tires, but said the inner and outer tie rods needed to be replaced before the alignment could be done. They don't do that, so it wasn't a money grab, and to my surprise, they really did need replacing. I ordered Moog outer and TRW inner from Rock Auto since they only had 1 Moog inner tie rod on hand. After I got the first side apart, I discovered the TRW JAR1139 inner tie rods aren't even close to the right part despite what RA shows. JAR1129, also an option, looks to be the correct part. I didn't have time to wait for parts, so I got the Driveworks parts from Advance/Carquest locally.
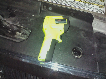
Tools needed - 21mm socket for the castle nut, 21mm open end for the jam nut, and a 7mm to install the grease zerk on the new outer tie rods. The new jam nut on the Driveworks inner tie rod is 22mm. When I replaced the fan blade a couple of years ago, I bought a 36mm combo wrench, which worked perfectly to loosen/tighten the inner tie rod. You'll also need a long screwdriver to break the clamp on the boot and pliers for the outer clamp on the boot.
I only ran into a couple of problems. One was getting the cotter pins out since the assembly line people put them in from the front, and there's no way to get them out 20 years later. I broke the ends off, slid the socket on the nut and had no problem getting the nuts off. The jam nuts were rusted to the tie rods and wouldn't budge at all. Since I was replacing both the inner and outer tie rods, I took them out together, took the outer tie rods off, put the inners in the vise and loosened the jam nuts with a large pipe wrench. Getting the boots on the new tie rods takes some patience, but went better than I expected.
I know I screwed up the camber and caster, but the camber was messed up anyway. The toe should be really close. I'll find out Wednesday when I go back for an alignment.
Shout out to Chris Fix who has videos on YouTube where he replaced all these parts and more. His videos are clear and concise, and an added bonus, most (all) are of his Mazda (Ranger), so the info transfers directly to Rangers, Explorers, and Sport Tracs. Don't expect your parts to come apart as easily as they do in the videos. I'm sure he had already replaced the parts, then took it apart and redid them for the videos.
The right upper ball joint was shot - dangerously so. I replaced it, sticking with the 2 piece control arm and only replacing the outer piece. That's a very straightforward repair. The only issue I had was the pinch bolt being rusted in place. It wouldn't budge even with my 3 lb hammer, but I was able to get it out by turning it with a wrench.
The ball joint/upper arm was a bit of an emergency repair once I found it, so I didn't do the camber bolts at the same time. I used Moog parts from Rock Auto. The camber bolts on the passenger side are not bad to do. You'll need a 21mm deepwell socket for the nut, and a 22mm socket for the bolt head. (Sizes might be reversed, but I think that's correct.) On the driver's side, the fuel line is right in the way of getting the rear bolt in. The new bolt is longer than it needs to be, so I ran the nut on and cut about the width of the bolt head off the end of the bolt. This helped a little in getting the bolt lined up with the hole. The fuel line is still in the way, but not as much as before as the bolt head is now even with the line, not catching on the line as it starts into the hole. The shortened bolt is still plenty long. You could put the bolt in from the rear, but unless you shorten the bolt, you'll need a deepwell socket which there isn't room for. To get the front bolt in, I taped the 2 washers together so I wasn't fighting them to stay on the bolt, then I carefully fed the bolt between the brake lines and the frame from the front, and then fed it into the mounting bracket from the rear. (It'll make sense when you look at the layout.) It takes some dexterity, but I couldn't feed the bolt past the brake lines from the rear.
I took it in for new front tires and an alignment last week - one of the tire shop guys had already checked the tread depth on the rear tires and said I'd be ok replacing just the fronts. The rears hadn't worn much in 15,000 miles. They mounted the new tires, but said the inner and outer tie rods needed to be replaced before the alignment could be done. They don't do that, so it wasn't a money grab, and to my surprise, they really did need replacing. I ordered Moog outer and TRW inner from Rock Auto since they only had 1 Moog inner tie rod on hand. After I got the first side apart, I discovered the TRW JAR1139 inner tie rods aren't even close to the right part despite what RA shows. JAR1129, also an option, looks to be the correct part. I didn't have time to wait for parts, so I got the Driveworks parts from Advance/Carquest locally.
Tools needed - 21mm socket for the castle nut, 21mm open end for the jam nut, and a 7mm to install the grease zerk on the new outer tie rods. The new jam nut on the Driveworks inner tie rod is 22mm. When I replaced the fan blade a couple of years ago, I bought a 36mm combo wrench, which worked perfectly to loosen/tighten the inner tie rod. You'll also need a long screwdriver to break the clamp on the boot and pliers for the outer clamp on the boot.
I only ran into a couple of problems. One was getting the cotter pins out since the assembly line people put them in from the front, and there's no way to get them out 20 years later. I broke the ends off, slid the socket on the nut and had no problem getting the nuts off. The jam nuts were rusted to the tie rods and wouldn't budge at all. Since I was replacing both the inner and outer tie rods, I took them out together, took the outer tie rods off, put the inners in the vise and loosened the jam nuts with a large pipe wrench. Getting the boots on the new tie rods takes some patience, but went better than I expected.
I know I screwed up the camber and caster, but the camber was messed up anyway. The toe should be really close. I'll find out Wednesday when I go back for an alignment.
")