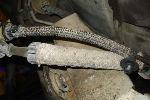
diy radius arm bushings | Page 2 | Ford Explorer Forums - Serious Explorations

  • Register Today It's free!

diy radius arm bushings

If your going to cut off the rivets, the easy way to get them out is to get a cutoff wheel (that's the very thin grinding wheel) and a cheap 4.5" grinder from Harbor Freight. You simply cut an 'X' in the head, and then you then easily pop the head right off with an chisel and punch.


Join the Elite Explorers for $20 each year.
Elite Explorer members see no advertisements, no banner ads, no double underlined links,.
Add an avatar, upload photo attachments, and more!
.


if you have a jacked up bracket you HAVE to cut the rivets, no choice :)
If you have a jacked up radius arm crossmember/bracket its because you drove around metal to metal for quite a while :)

yup, that was mine.. bought it like that. but then, for 250 bucks, you dont expect much.


I recently replaced the RAB's and axle pivot bushings on my mazda b2300 2wd (with 208,000 miles on the stockers) and of course I had to drop both arms out of the front, it wasn't a bad job at all, and I didn't cut rivets either, the axle pivot bushings were a PITA!!!!!!

Last week I replaced the RAB's on my '94 explorer 4wd, the rivets were already gone so I went with the bracket removal method and it was cake too, either method was a good 3 hour job.

I didn't necessarily think either method was difficult, when I did the bushings on my old '92 EX I broke the radius arm getting the nut off :eek: but I didn't cut the rivets on the '92 either...


3 hour job to replace bushings that already had the rivets out? the only thing that held me up at all while doing mine was the fuel filter was right in the way of a nut. other than taht it might have been an hour total.


3 hour job to replace bushings that already had the rivets out? the only thing that held me up at all while doing mine was the fuel filter was right in the way of a nut. other than taht it might have been an hour total.

Well that was with a few other things, I had to weld a shock stud on the radius arm, and it was cold out that day too so frequent breaks were a must. Still even with that it may have been a little less than 3 hours, I reused the 7/16" bolts that were in it and were fairly difficult to remove, but that's an odd size bolt and are unobtanium around here :salute:


hte beam pivot bushings are a PITA to replace because the metal sleeve is pressed into the beam from the factory.

An air chissel will make short work of those suckers, you smash them around the lip until they collapse on themselves, then you can push them out, the new ones go in and IMO need to be tack welded in place (sleeve to beam) to keep the beam from sliding around on them

Merry X mas!

I used a hammer and punch to collapse them, hammered old ones out, then bolts/washers to "press" the new ones in, and a piece of pipe with a bevel ground onto it was sufficient to swell the bushing in a similar fashion to the stock to keep from sliding. I hear ford has a tool that does this but of course the parts stores don't have that in their arsenal.


hi, i was wondering, i saw this post and from what i can tell it looks real good, the only problem is.......the pics dont show up anymore, i have a 91 EB explorer and my right bushing is gone, bad alighment, i was told i needed it replaced in order to get an aliment, and they said the bracket needed to be replaced as well, anyways im just trying to find a real easy way of doing it, i've never done anythng like this befor, they want 300 to do it, i only mainly work on engine stuff, so never done anything else, so any help with pics would be great


If your going to cut off the rivets, the easy way to get them out is to get a cutoff wheel (that's the very thin grinding wheel) and a cheap 4.5" grinder from Harbor Freight. You simply cut an 'X' in the head, and then you then easily pop the head right off with an chisel and punch.

100% agree. I did the exact same thing - I have a DeWalt grinder, but you can get a cheapie from Harbor Freight for $25 that will do the job. I used a cutoff wheel the same as you, cut a single slot in the head of each rivet. Then took an air chisel and took the heads off, which took only a few seconds. I then put a punch in the air chisel and knocked the rest of the rivet out. Each side took no more than five minutes. Much easier than dealing with compressing springs, and trying to do it from the front.


If you take the bracket off the beam (coil spring retainer stud) the bracket requires 250ftlbs of torque. According to Haynes.


I just did this today and I did the no-rivet removal way. It was my first real project on my Explorer and it took me 4 hours, including a trip to get a new wrench cause I broke my 1 1/8" while doing the second side. It wasn't really hard, just a lot of time cranking on the big bolts. You definitely do need to use a propane torch to heat those bolts though, if you don't you will never get anywhere, unless you're a lot stronger than I am. I actually heated them up to put them back in too as they tighten a lot easier that way.


oh please upload the pictures again

what happened!!!!!!!!!!!!!! No pictures... I love this site... I love the pictures


...few other things, I had to weld a shock stud on the radius arm...

So I was wrenching on my '94 Exploder last night till 4:30 AM and while loosening everything up to replace the radius arm bushings, shock absorbers, and ball joints, I managed to snap off the threads on each shock mount. What is the general fix for this. If it wasn't a special stud I'd just weld a bolt in place, so what have you guys done for this?

PM sent to smbracing


That is pretty common.. They make Shock studs that you can bolt onto the Radius arm.. They are different than a "bolt" becuase the shoulder the shock rides on is the right size for the shock bushings and there are no threads under the bushing..

You just drill out the old one.. and bolt the new mount in.

chevy 1/2 ton mounts are what most people use and are easy to find.. Its usually in the "Help" section of the auto parts store (made by Dorman)..

If you can find them, the Chevy 3/4 ton shock mounts have a bigger shaft that goes through the radius arm arm but it isn't "needed"....

We went with the 3/4 ton mount becuase we kept braking our on the road (dirt road)... In our case the shock was a little too long and the shock would bottom out before the bump stop.. Which is bad for multiple reasons..

~Mark


You can buy those replacement studs at NAPA, they're fairly cheap. I actually bought two in advance, just in CASE I managed to snap those things off when I did my radius arms and shocks - and of course, they didn't snap off.


I replaced the RAB's and pivot busihings a couple weekends ago on my '93 4X4 with new poly bushings. My truck had already been converted to the non-rivet system, but I removed the whole front suspension anyway. I was hearing metal to metal noise and I wanted to inspect all the moving parts anyway. So after all the replacements, I still think I need to remove the previously installed bolts and see if there is evidence of movement from bracket to frame. All in all, it was a 5 hour job from start to finish. Granted, I cleaned the front end spic and span, repainted the axle, installed the new pivot bushings, and then reinstalled it all. It's really not that difficult though. Big tools are the secret though.

My next upgrade will be the installation of MM hubs to replace the auto ones, still having problems with them at the moment.

D.


please fix pictures
thread_is_worthless.jpg


For what its worth.... I just this this to the drivers side on my 93 eb explorer. Went the route of NOT cutting out rivets. No torches needed just hand tools. Took me 1.5 hrs tops. This is NOT a hard job to do.


bump for fixing pictures


Join the Elite Explorers for $20 each year.
Elite Explorer members see no advertisements, no banner ads, no double underlined links,.
Add an avatar, upload photo attachments, and more!
.


I replaced mine years ago by just splitting the new poly bushing and just prying it over the shaft. The bushing well had big chunks of metal missing too but that never bothered the new bushing. Years of service with no problem. Just required removing the nut and pulling the axle slightly forward.


Back
Top