Mark Drysdale
Active Member
- Joined
- August 27, 2001
- Messages
- 76
- Reaction score
- 0
- City, State
- Edinburgh, Scotland, United Kingdom
- Year, Model & Trim Level
- 1997 XLT 4.0 SOHC
I thought it would be useful to the other member who haven't yet attempted to lift a 95+ Explorer to list my experiences of doing just this last weekend.
A. Tools Required
1 -2 ton Axle Stand
1 -2 Ton Trolley Jack
1 -4" Angle Grinder (Optional)
1 -Hacksaw (Optional)
1- 1/2" Ratchet
1 -1/2" Torque Wrench
1 -18mm -1/2" socket- Long (3/8 Whitworth)
1 -14mm -1/2" Socket (9/16 A/F)
1 -9/16 Combination Spanner
1 -5/8 Combination Spanner
1 -14" stillsons or self-locking Wrench (Mole Grips)
B. Method Statement
Important Note !!
Switch Off the ARC or Load Levelling
1. Jack up the rear of the car under the rear axle at the spring plate and remove the rear wheel.
2. Place the axle stand under the chassis at the forward spring mount and lower the car ensuring you have sufficient height to gain access under the spring to remove the u-bolts and spring plate.
3. Disconnect the rear shock at the lower mount and swing out of the way. Remove the 4 bolts (18mm) that secure the u-bolts and spring plate (note these are bloody tight)
4. Place the trolley Jack under the axle at the sway bar mounting and lift the axle as high as possible.
5. This will give you access to the centering Bolt and clamp the leafs together with the G- Clamps.
6. Grip the round end of the Centering Bolt with the self-locking wrench or stillsons and loosen the nut (this again was unbelievably tight -I have the bruises to prove it) 7. Loosen the G-Clamps and release the spring.
8. Place the Add a Leaf between the Lowest leaf and the helper Spring
9. Use the G-Clamps again to clamp it all together and fit the 3/8 (largest) centering Bolt and tighten this up to 50 LB/Ft.
10. Release the G-Clamps, and lower the axle back down onto the centering bolt.
11. Refit the u-bolts and the spring Plate and tightening the bolts up sufficiently to clamp every thing together but leave the final torqueing until the car is back on its wheels.
12. Refit the Shock and road wheel and lower the car .
Repeat steps 1 -12 on the other side
13. Once you have completed this and sworn at the car at least a dozen times.
14. You have to torque all the bolts.
A. Shocks -50 Lb./Ft
B. U -Bolts -90 Lb./Ft
15. Cut the excess off the centering bolt and retighten it, the Torqueing up of the U-Bolts will cause the centering bolt to loosen.
Now to the front of the car
16. 13mm Socket and Ratchet, tighten the adjuster bolts until you have gained about 40 -50mm of lift.
16. Switch the A.R.C or Load Levelling back on
17. Now get the alignment checked at the front as lifting the front causes the wheels to toe-out
Note.
The sizes of sockets are approximate and these were the best fits I could find for some odd sized American bolts (I am in the UK)
All together this job took 21/2 hours and was reasonably easy with the right tools.
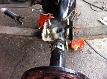
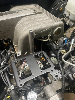
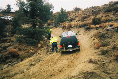
If any one is interested I can posts some before and after photos.
A. Tools Required
1 -2 ton Axle Stand
1 -2 Ton Trolley Jack
1 -4" Angle Grinder (Optional)
1 -Hacksaw (Optional)
1- 1/2" Ratchet
1 -1/2" Torque Wrench
1 -18mm -1/2" socket- Long (3/8 Whitworth)
1 -14mm -1/2" Socket (9/16 A/F)
1 -9/16 Combination Spanner
1 -5/8 Combination Spanner
1 -14" stillsons or self-locking Wrench (Mole Grips)
B. Method Statement
Important Note !!
Switch Off the ARC or Load Levelling
1. Jack up the rear of the car under the rear axle at the spring plate and remove the rear wheel.
2. Place the axle stand under the chassis at the forward spring mount and lower the car ensuring you have sufficient height to gain access under the spring to remove the u-bolts and spring plate.
3. Disconnect the rear shock at the lower mount and swing out of the way. Remove the 4 bolts (18mm) that secure the u-bolts and spring plate (note these are bloody tight)
4. Place the trolley Jack under the axle at the sway bar mounting and lift the axle as high as possible.
5. This will give you access to the centering Bolt and clamp the leafs together with the G- Clamps.
6. Grip the round end of the Centering Bolt with the self-locking wrench or stillsons and loosen the nut (this again was unbelievably tight -I have the bruises to prove it) 7. Loosen the G-Clamps and release the spring.
8. Place the Add a Leaf between the Lowest leaf and the helper Spring
9. Use the G-Clamps again to clamp it all together and fit the 3/8 (largest) centering Bolt and tighten this up to 50 LB/Ft.
10. Release the G-Clamps, and lower the axle back down onto the centering bolt.
11. Refit the u-bolts and the spring Plate and tightening the bolts up sufficiently to clamp every thing together but leave the final torqueing until the car is back on its wheels.
12. Refit the Shock and road wheel and lower the car .
Repeat steps 1 -12 on the other side
13. Once you have completed this and sworn at the car at least a dozen times.
14. You have to torque all the bolts.
A. Shocks -50 Lb./Ft
B. U -Bolts -90 Lb./Ft
15. Cut the excess off the centering bolt and retighten it, the Torqueing up of the U-Bolts will cause the centering bolt to loosen.
Now to the front of the car
16. 13mm Socket and Ratchet, tighten the adjuster bolts until you have gained about 40 -50mm of lift.
16. Switch the A.R.C or Load Levelling back on
17. Now get the alignment checked at the front as lifting the front causes the wheels to toe-out
Note.
The sizes of sockets are approximate and these were the best fits I could find for some odd sized American bolts (I am in the UK)
All together this job took 21/2 hours and was reasonably easy with the right tools.
If any one is interested I can posts some before and after photos.