New guy old builder album | Page 11 | Ford Explorer Forums - Serious Explorations

  • Register Today It's free!

New guy old builder album

Brass critter
Project .223 caliber is 'bout complete...sizes, de-primes & pocket reams progressively. Don't know if any of the majors are building one like this for the little guy but this baby will crank out the brass!! It also has been a real PITA & kept me from working on the Broncobra. lol:D


Join the Elite Explorers for $20 each year.
Elite Explorer members see no advertisements, no banner ads, no double underlined links,.
Add an avatar, upload photo attachments, and more!
.


that model t has a chebby motor in it!!!!!! Blasphemy!!!!!! lol jk it is pretty dang cool.

I used to have an AR-15, kinda wish i still had it, but it does go through the ammo, looks like a pretty handy setup


Bowtie & Ford

Your right on my thoughts that I've shared in this thread about the mix and match concept of mods & at the top is don't mix power plants of one make with the other...not because I like one over the other, but because (you chose the right word Jon) it's blasphemous! That being said my boy's T-model ride is still way cool and his fabrication and finish is way beyond reproach, runs and drives great...yet I still give him grief about the inappropriate combination.


Its funny you posted up, I was just posting to my thread and I was then going to post here and ask where the heck you had gone off to, lol


On leave

Just dropped out for a few days of R&R...found some steel on my doorstep when I returned. 60 foot of DOM tube and 15' of chromolly 4130 solid rod 1&3/4" diameter for my traction bars & 5' of chromolly 4130 2" dia.x 3/8" wall radius arm tubing. So now I have a lot less bank account, minus $700.00, started on the A column hand holds & cowl mount sheet metal & will post some pics of that progress latter.
Also started machining a prototype dimple die setup that I hope will be of use to those who can't afford a set of dies just to do 1 or two projects on their trucks or rods. Let you know how it works out...better yet I'll show you how to do it if I'm successful.


we had thought about doing some dimple dies in a few sizes on my dads lathe until we realized we can't chuck anything in the damn thing straight. id be really interested in seeing how that comes out. ended up just borrowing some from another guy around here but i haven't built my front axle truss yet so I haven't needed them.


Dimple dies

Machined a 1 &1/2" dimple die today....just a rough prototype. Photos attached. Used some heavy wall tube that I machine oilfield equipment with. It is 3" diameter and has 3/4" wall thickness, not nearly the biggest tube I work with, by a long shot, but it is seriously strong tube! I cut a 3" length of it with my chop saw & turned the female die with my lathe.
This is not a punch die...I have to use a hole saw, in this case a 1 & 5/16" diameter saw. The finished dimple is 1&1/2" exactly measured ID with starting radius of the dimple 2" diameter.
The dimples were my first and only attempts and I pressed them in some scrap 14 gauge steel. Turned out really good, considering that my male die was eyeballed and not even secured when I pressed the plate.
I used my small H-frame floor press & used less than 1000 lbs. of pressure. So about any press including arbor bearing presses should be sufficiently powererful enough for sheet up to 8 gauge.
IMAG0014.JPG


IMAG0017.JPG


IMAG0018.JPG


Pressed sheet

Couple more photos of the dimple die work. Course I didn't do any de-burring prior to pressing so the edges are rough...just a rough sample but holes would clean up perfectly.

Cutting tube that tough and that diameter is asking a lot from a chop saw!
 

Attachments

  • IMAG0008.JPG
    IMAG0008.JPG
    70.4 KB · Views: 344
  • IMAG0016.JPG
    IMAG0016.JPG
    83.3 KB · Views: 374
  • IMAG0015.JPG
    IMAG0015.JPG
    59.9 KB · Views: 340


Can't wait to see some projects done with it.
Ever thought of making an English wheel?

Oops posted about the same time. That is cool looking.
It will really strengthen flat pieces of metal. Just like they do in some Monocoque construction race cars.


English wheel

Sure have sold several of the wheels and a few pneumatic planishing hammers too before the China market started giving them away...most of it pure junk. Far as I know the ones I built are all still being used.

Hey thanks Rookie I do have several areas that I want to use dies on for strength and just cause I think it looks cool!


More heavy metal

I posted that the Chromolly came in, so some shots of the high dollar stuff...top photo is 5 foot of 2 inch x 3/8" sidewall thickness....I'm going to build some heavy duty radius arms with this tube.

The second photo is the same tube laying with various cold rolled stock that I keep on hand for building various projects. The smallest is 1 & 7/16" & the largest is just a very short cutoff of 4 &1/2" (didn't want to hurt myself trying to place even 5 foot of this stuff on a work bench)

Third photo is 15 foot of 1& 3/4" solid Chromolly that will be used in my custom traction bars.

You might also be interested in how I hold & secure the round stock for working with various stands, clamps and cradles that I've developed and built...a guys day can be ruined by this heavy stuff rolling and falling while under fabrication
 

Attachments

  • IMAG0001.JPG
    IMAG0001.JPG
    54.6 KB · Views: 333
  • IMAG0007.JPG
    IMAG0007.JPG
    66.1 KB · Views: 333
  • IMAG0002.JPG
    IMAG0002.JPG
    73.2 KB · Views: 338


Odds & ends

Cut & bent grab holds for the A columns and fabbed the brackets...time to weld, clean, paint and install them. Should be of help in mounting up.

Also going to finish the male half of the dimple die. Decided to flip the female half over and use the back side for a 2" die. 1&1/2 Inch on one side 2inch on the other...that way I can stagger the two sizes at the press with just a flip of the die ...course still will require use of two males...hmm quick design change and I can make a doube sided male die also!

Got work to do so latter...
 

Attachments

  • IMAG0020.JPG
    IMAG0020.JPG
    62.9 KB · Views: 340
  • IMAG0019.JPG
    IMAG0019.JPG
    68.9 KB · Views: 343


You might also be interested in how I hold & secure the round stock for working with various stands, clamps and cradles that I've developed and built...a guys day can be ruined by this heavy stuff rolling and falling while under fabrication

DSC08845.jpg


You mean like this when the Atlas fell off the floor jack and smashed my hand while trying to center under truck. Ouch.
This one really got my attention, after going to hospital and finding no broken bones, I immediatly built a custom cradle for the Atlas. Better late then never.


Damages

Dang Rookie that was a HARD lesson for sure, some don't get a second chance to learn the hard way. I lost a young and very talented friend last year when a race car he was working on fell and smothered him...he was working alone in his shop at the time. He left behind a family that will always be "recovering", hope someone will read your post and mine and change "whatever" shortcuts they are getting by with and avert a crippling or fatal injury. Lol, work safe!!!


Ball bearing dimples

In my haste I forgot to explain why I called my die a "rough prototype"...I am a machinist and this is not my first time to turn dimple dies...it has been a long time since I made a "shade tree" dimple die.
An old timer taught me how to poor boy dimple when I was a youngster. All you need is some thick plate 1/2" or thicker, drill bit (or hole saw) of appropriate size and a conical shaped (30 to 45 degree taper is good) grind stone mounted on a drill motor or angle grinder & a ball bearing (larger than the drill bit size by 10 to 20 percent).

Fab process is simple if not quick, poor boy had more time than money, drill hole completely through the heavy plate (same size as you want ID of finished dimple)...then secure plate to a vise or clamp to a work table and start grinding with the tapered grindstone. If you were lucky enough to have a drill press, I wasn't, it's easier. Welders supply companys have these tapered "rocks" for pipe fitters etc. look for the ones that look like lava rock, extremely rough finish, very agressive cut and last a long time...well worth the price. Grind till you have a uniform shoulder that will accomodate the ball bearing at something less than half it's height (this will be your approximate finished outside diameter of the pressed dimple) & your finished with the female die! Drop a ball bearing in the hole and youv'e completed the male die!

This works well for hole sizes of 1 & 1/2" and greater...smaller diameter holes are automatically enlarged by the size of the grindstone tip as it penetrates the plate. On smaller diameter dies (1/2" to 1&1/2" use a tapered reamer to form. If you have a drill press you can mount the reamer in it BUT do not use the motor; turn the chuck by hand & feed the reamer into the work piece slowly. The reamer also works with the lathe but again don't use the motor, use the tail stock to feed into the work.

Pressing sheet metal is simple, place the female die on a press plate in you shop press, lay the sheet metal on top of this (with pre drilled holes) level, centered & supported...drop the ball bearing in the hole and press till it feels & looks right. Practice on scrap till you feel confident and then go make something. One draw back is that you must make sure everything is centered up before pressing or your dimples will not be uniform.

Axle truss, cage gussets, bumpers killer projects & more. Don't need bunch of high dollar gear to do super custom one off fabs that look great!

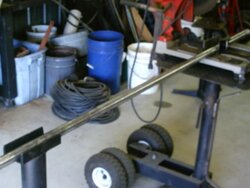
Thats why I used the ball bearing to test press the two holes I posted previously just didn't explain all that. Yeah I turned it in a lathe a lot quicker and I could have just bought one for $150. but wheres the fun in that?
 

Attachments

  • IMAG0018.JPG
    IMAG0018.JPG
    61.9 KB · Views: 339
  • IMAG0019.JPG
    IMAG0019.JPG
    68.9 KB · Views: 352
  • IMAG0015.JPG
    IMAG0015.JPG
    59.9 KB · Views: 341


Grabs

Finished the A column grab bars, get 'em mounted when the paint dries.
 

Attachments

  • IMAG0002.JPG
    IMAG0002.JPG
    70.1 KB · Views: 315
  • IMAG0001.JPG
    IMAG0001.JPG
    59.6 KB · Views: 332


Paint finally dried and I installed the grab handles.
 

Attachments

  • IMAG0001.JPG
    IMAG0001.JPG
    68.7 KB · Views: 297
  • IMAG0004.JPG
    IMAG0004.JPG
    74.6 KB · Views: 334
  • IMAG0005.JPG
    IMAG0005.JPG
    67 KB · Views: 327


As always, informative and incredible. Keep the pics coming! Any special paint you are using. I have been using Duplicolor black epoxy paint and happy with the results.


Patch & paint

Yes I'm a big fan of the duplicolor paints and the epoxy is a great one as are their hi temp coatings. Grnmachine you got some things on your bucket/got to do list? I finally got round to cutting out, treating, patching and painting the only major rust spot on the Broncobra...under the passenger seat, area effected was about 3"x7"

IMAG0006.JPG


Join the Elite Explorers for $20 each year.
Elite Explorer members see no advertisements, no banner ads, no double underlined links,.
Add an avatar, upload photo attachments, and more!
.


Dimples

Machined a 2" female dimple die without using the lathe ...just grinders and a chop saw. About as simple & down & dirty as tool building gets...going to use a scrap 2" trailer hitch ball for the male side...not as pretty as machining on the lathe but just as functional, that makes two die sizes, a 1&1/2" and a 2"...now to build something utilizing the two simple ball bearing dimple dies! Will post pics :D


Back
Top