Pugly | Page 39 | Ford Explorer Forums - Serious Explorations

  • Register Today It's free!

Pugly

The Good, The Bad, & the Pugly :D

1994 Purple Explorer XLT 4wd


I decided to have a registry for my "Other" rig so I can post things done and have a reference for it.

Pretty much stock drive train.

4.0 OHV-A4ld-1354e.
D35 front 4:56 Yukon gears, Aussie Locker.
2nd gen disc 8.8 rear 4:56 gears, Spartan Locker.

Front C-Clip eliminator Mod.

Slight lift with 2" Skyjacker coils & rear F-150 hybrid leaf packs.

3" PA body lift
Helpful thread with pics for the front body mounts
Pics of front body lift mounts

Swapped to manual hubs.
Double U-joint XJ steering shaft.

33" x 12.5" x 15" Cooper Discoverer ATX3, mounted on 15"x10" AR Outlaw1 alum wheels - full size matching spare.

Shocks:
Front Rancho 9000xl
Rear Rancho 9000xl
Duff Stabilizer shock.

Sway bar quick disconnects front & rear.
Custom tube sliders w/kickouts

22" LED light bar.
18w amber fog Led pods.
55w rock lights--2 front--1 rear over diff.
8 LED pods for rocker lights.

Full brush guard.
2.5" Fender Flares.

TTB Diff guard & Skid plate.

Custom roof rack with 48" Extreme Hi-Lift jack.

Flipped Tow hitch & front hooks for tow points.

Cobra19 CB & rear hatch mounted firestick antenna.
Rear view HD camera.
JVC DVD/CD/MP3 Head unit with 7" HD Monitor.
Sony 6.5" front speakers.
Rockford Fosgate 5.25" component rear speakers.
8" JL Audio sub in 2001 enclosure with 500w amp mounted on enclosure.

Custom made center console with CB/Rear view color monitor/2-12v outlets/ in-out temp display. D cell Maglite mounted on cargo panel. Truck bed liner on cargo floor.
Custom Cargo storage box with topside spare tire mount.

'99 Eddie Bauer Front Leather buckets.
'94 Limited Rear leather split bench.


Pugsnewshoes_zpsf609e609.jpg

puglynewbrushguard1.jpg

94frontpassprofile.jpg

puglyrti2.jpg

puglyrearrti1.jpg

puglyrti1.jpg

aftermathmudbath2.jpg

puglysnewseats.jpg

cbantbracket.jpg


Join the Elite Explorers for $20 each year.
Elite Explorer members see no advertisements, no banner ads, no double underlined links,.
Add an avatar, upload photo attachments, and more!
.


I agree put her in time out.

Glad you where able to get home safe though. From the sounds of things I might not want to do this project any time soon at all.


Join the Elite Explorers for $20 each year.
Elite Explorer members see no advertisements, no banner ads, no double underlined links,.
Add an avatar, upload photo attachments, and more!
.


I bet after a day away from the whole thing that line will screw right in with no issues.
Its amazing how that works sometimes.

or.....with it being a new pump, are you sure the thread size and pitch are the same? It could very well be that the two won't mate together for a reason. Anyway....Take that break. I know the feeling well.


I never done this job before, so it was a learning experience for me. The chiltons do not give any good R&R instructions, and neither does the part manufacturer. I just went at it, and hoped for the best. Glad I did, as I can put another notch in my learning belt. :thumbsup:

So.... the reason it wouldn't go in was the pre-bent line that conforms to the gearbox, was bent wrong from the git go, ( it might have been from shipping & handling too). Just bent wrong enough so that the line was hitting the box, and enough to stop me from getting the right angle to get it started. I put it in the vise, and bent it back a few degrees. Went right in after that. Hard to see everything going on with my head in the fender well, and glasses keep falling down my face, and the nasty up to my elbows. lol

So it is all back together now. This took me the better part of the day to do, and I am wiped. Will go back at it tomorrow to bleed it, and to set the toe. It's way off. They did mention that with the new box, but I was like, how can it be off? I'm not touching the TRE's? Sure enough, it is off. That means I need to set an appointment for an alignment. Dang it. :banghead:

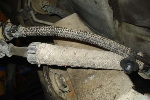
Oh, and the bad news discovered while doing this.... The jeeper steering shaft Mod, is a no go. The outer shaft has wollered out,where the inner meets the outer, and there is a bunch of play now. I need to replace it with something else. :(

heeper shaft.jpg


Between the bad leaking box with worn out bearings, and the intermediate shaft with play, no wonder it was like sawing trees with the steering wheel down the road. :eek:

Always something with these rigs!!!


Glad you finished that project step. Steering is a no joke gotta be right thing, replace anything that gives you crap.

I've never had to wrestle one of these Explorer rack yet, I see a couple needing work soon. I just found out how bad a front carrier can get worn out, my 98 had a spare in it that was rebuilt about 50k ago, and it's really bad(noises it made were scary). I guess I need to learn how to rebuild those D35's next.


I agree 100% Don. It had some play in it in the past, but that was always from the hub nuts coming loose, and slop in the wheel bearing, allowing the camber to go back n forth down the road. I have been tightening them every other month it seems. Dang 35" tires on a D-35 / DD!! (That's a lotta D's man).

Well, Even tho this steering box was a bit of a challenge for me to go in, the next time will be much faster & easier, as I know what to do now. I really hope there isn't a next time, but yeah, you know what I mean.

The 2nd gen R&P rack is by far much much much harder, and painstaking to do the first time. That one is a crap ton of work to change out, and very frustrating. If your on jack stands, your bathing in fluids, dirt, & grease the whole time, your fighting to put a sq peg, in a round hole just right.

Setting the gears Backlash, is still a job I won't do as an amateur / hobbyist wrench turner. I will and have, rebuilt and replaced the differential internals, but only to the point where I mess with the Pinion gears depth setting. For a trail only rig, and never ever sees pavement, I might have a go at it.

Don, which rig are you using for work? If your using the AWD 5.0, I can see the front carrier getting worn out. Carriers vehicles are rode hard, even if your gentle on them. It's a daily grind, and takes a toll.


I have done the backlash a few times, that's to me the easy thing to do. You're only swapping the bearing side spacers, and the kits ran about $30 for the thin shims. My Mercury I put the Torsen differential into, that one didn't need any adjusting, the stock spacers got me the .009 perfect backlash. I should have swapped the old LS back into that, since it's a spare truck now, and use the Torsen in something else. I sold the LS to a friend last year. The D35 I gather is enough smaller that it takes a special bearing separator, the Ford tech who did mine had to find one to borrow then.

I've only got my 98 AWD to drive right now, I've put 40k on it in two years, most on my route. This new route I just took has a lot more full lock tight turning, that's going to eat the front carrier much faster than normal driving. My 99 is the SOHC 4.10 truck, I've wanted to get that D35 built with a Torsen I got last year. Other than the faster wear of the diff, I think the 4.10's will make a nice 302 work truck, 9.5:1 compression and 275hp when I get the 306 built.

The diff building I've never done is the crush sleeve adjusting, pinion depth etc. I've seen a few tools on Summit that look like they are to help with that. I wonder if I can learn how to do it on a bench with the right hand tools and a couple hours of my time at home. I'd love to build a first open diff, for my Mercury that I just swiped the D35 from, and then the two good carriers with the Torsens, then another spare.


I had an 8.8 crush sleeve eliminator kit installed when the gears / locker was installed. It is just a spacer tube and shims. Once set, you can remove and tighten the Pinion nut as often as you like, without worrying about messing up the depth. E-bay for $10 or so. I had to rebuild a center section because a crush sleeve cracked in half on me. That little part cost me a bunch, as it caused total destruction of everything in the center section. I'm talking high dollar 4:56 gearing, locker, carrier, etc... I no likey the sleeves no more.

Bleeding this steering out is going to be a pain, I can already tell. Going to try the old fashioned method first with the tires off the ground, and go lock to lock a bunch. If that fails, then I will try the mighty vac method. if that fails, I will flush and fill, and try again.


Thanks, I'll take the cover off of this trashed D35 very soon. I wonder what did come apart, the bearings most likely I'm guessing, and it ruined everything else no doubt. I got a good deal to have it built by a tech in 2007 or so, and it was flawless until two weeks ago. A slight popping/catching made me think I better do the left axle(knew the dust boot was dry rotted and it was the first axle I ever bought(04 from Autozone)). That ended the symptoms for two days, then after the four CA's, bam it as much worse; got the alignment done by planned appointment that day, drove home and then changed the D35 by midnight. Now it's better, but it does have a little catching/popping still, this is the original D35 from my Mercury, about 150k on it. It might be close to going too, I delivered with it for about 18 months in 2006.


Sounds like the carrier bearings to me. I rebuilt this rear axle complete because carrier bearing fail, destroyed everything. Yours would be easier and cheaper, to just do another swap with another complete used d35 axle.


Sounds like the carrier bearings to me. I rebuilt this rear axle complete because carrier bearing fail, destroyed everything. Yours would be easier and cheaper, to just do another swap with another complete used d35 axle.

Funny. I've already got two bad 3.73 carriers, the original from this 98 that was virtually dry, and this last one. I have a line on a low mileage take out 3.73 from a Ford tech I keep missing. That's the one I'd like to build with a Torsen, it likely has the best ring/pinion condition. It'd be a big job to remove one of these at a JYd, it wasn't fun to do it twice last Wednesday. I should get to doing this soon, I have a radiator leak I want to fix next week.


Well, if your going to add the torsen, I would completely rebuild it with new gears, and a master install kit, and be done with it. No sense to take a chance with used parts in that scenario. Just my O2 .


Yes, ideally all new parts. But Ford gears are high quality and can last decades if taken care of. I feel comfortable with used gears if they are unhurt, and most Ford ring and pinions you can tell if they have had a rough life etc.

Where would you source the parts, a master rebuild kit etc? I think I've seen things on Amazon and eBay for the D35, but maybe Summit has some also.


Poly Performance, Richmond gear, 4wdhardware, my4by, jegs, Randy ring & pinion, east coast supply, are a few others you can check into for pricing.
There are minor & master kits, but the master has the bearings, and more.

If you decide to buy new gears...

Just check and see if they are a 5 cut, as those are better. 3 cut are noisy and don't take the heat as well . Most of the cheaper brands are a 3 cut, and mostly made at the same factory.


Excellent, you know the sources to go to. Would they be able to source the housing bushings also? I noticed some of mine are beginning to have a little wear. I bought a pair from Ford that were available, of the three two match and one is unique(and obsolete). I'd replace everything for sure besides the gears if they looked okay. So a master kit would be great. Would they have any tools at those sources, I'd also want to check on the tool costs to be able to do it all?


Are you referring to the bolt bushings that are used to mount the axle? I have no idea where to get those, other than a salvage yard.

As far as the axle seals go, I got mine direct from a Dana spicer shop that was local to me, and I'm sure you can go to their website and buy some.

For tools, I would source them from tooling shops that specialize in them. I think Grizzly has a good depth gauge for cheaper than most, in the higher end stuff. Over priced units are going to be the Snap on, Matco, etc.. brands, and your not going to be using them enough to make the high cost worthwhile.


Yeah, the mounting bushings I meant, I just saw the invoice from Rock Auto, two of them they carry. I will begin collecting stuff for this first D35 soon, I'll take this one apart and marvel at how bad it was. Thanks for the ideas and sources.


I got the power steering bled as best I could. With the tires off the ground, engine off, and about 20 turns right to left (not lock to lock), it made a mess, and I had rags all around the cap to catch it all, but juice still made it's way to the ground. lol I had to refill a few times as I went.

Started the engine, and turned the wheels. ZERO noise from the pump, and turned like a spoon in a cup of coffee.

Put the wheels back on the ground, and fired it up, turned the wheel, and it has a slight whine to it. I believe that is only because it was not in motion, and the rubber gripping, causing the extra load on it. Should be fine.

Now, to figure out when I can get to the front & rear suspension mods on this thing. I have so many things going on at once, I'm a mess trying to get to it all. Feeling a bit overwhelmed, but it is keeping me busy, and my mind off of life's BS constantly bombarding me. I might sound frustrated at times, but working on these rigs is therapeutic for me. :)


It's good to know someone is making progress, that's you, keep at it. I'm playing fix one Snapper lawn mower with the old one today. The old belt stopped grabbing the drive pulley, my old mower with the original belt looks thicker. I think the new belt that's a year or two old was not the proper size, even though it was a good brand "correct" part etc. *******s mix up parts a lot and sometimes it ends with lesser items. I had to push the mower around my neighbor's yard last week(she's 84 and needs the help, I can't just quit on her). Time to go back out in the 90's heat, Summer is here early.


We skipped spring and went straight to mid summer it seems. Furnace on last week, and the AC on this week. Crazy.

Well, I applaud you for taking care of the ole gal, and not giving up on her. You will get that mower back in order, but it still stinks when stuff like that happens. The heat makes it seem more than it is too. I think it got to me yesterday a little, as I am not used to it yet. But hey, I stopped before a neighbor found my wrench in their yard. :D


Join the Elite Explorers for $20 each year.
Elite Explorer members see no advertisements, no banner ads, no double underlined links,.
Add an avatar, upload photo attachments, and more!
.


Went in for the alignment today, and thought to share this for grins. After they was done, the tech came to give me the receipt. Normally they also give the printout with the before & after specs, but he didn't. I had to ask for it. I instantly knew why once I seen it.

Camber is still in the red at 1.5* & 1* out. I asked why, and was told by the young tech that did the work, the vehicle doesn't have a way to adjust camber on it, and it is what it is. Well, surely you can just imagine how I reacted to that. lol

When I told him, sure you can, he interrupted me, and yelled out, you need special adjustable ball joints, then started to go into his I'm a dumbass old guy speel, and he knows better than I do about my rig.

Yeah, so I let him finish his line of BS, and then I let him know that A) You can adjust the camber by replacing the camber bushings with the degrees needed, and there are bushings for any size he needs. B) If he had just looked, he would have seen the high dollar adjustable Moog +/-4* camber bushings already installed, and looking all shiny still.

I polity asked him to take care of it, and he said too late, another vehicle is on the rack, and we are booked up, make another appointment for another day.
All he had to do is talk to me while it was on the rack, or just look over a few inches to see the adjustable bushings.

After a ride, you can feel the camber being off, as it is wandering a bit, and can feel it under braking. It pulls to the right slightly as it goes. So I have to go thru this all over again, and take it back for fine tuning.

Anyways, hope your all having a great day! :)


Back
Top