JethroBodine
Member
- Joined
- December 9, 2009
- Messages
- 26
- Reaction score
- 2
- Year, Model & Trim Level
- '02 XLS
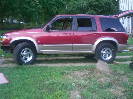
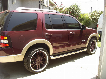
Hi. I have a 2002 XLS with seats without any headrests. I am replacing with junkyard seat backs from a 2004 with identical upholstery but that has the adjustable headrests. If I could find complete seats that were in good shape, I would have done that, but most drivers seat bottoms are cracked, and the seat backs were only $12 while whole seats were $22. Here is a pic showing the original seat on driver's side and the new one already installed on the passenger side:

Here are the tools you will need: Socket wrench with 15mm and 13mm socket, hammer, phillips head screwdriver, flat head screwdriver, pry bar, vice grips, and razor blade or knife.
Optional: upholstry cleaner, magnetic tray.

You need to first remove the old seat. They are bolted to floor with four bolts-- two front, two back. You will have to slide seat up to get to back ones and visa versa. The junkyard seats were bolted in with 13mm bolts. My 2002 used 15mm bolts.
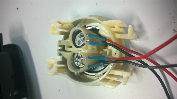
Next, lift up seat and unplug any wired connections under the seat. Mine was manual seat, and it had two connections:

Next take seat out of the car, and remove plastic moldings covering the inside hinge and the outside bottom. The seat adjustment knob pulls off with a little gentle persuasion, and then, both are held in with two phillips head screws:


Forgive the dog hair, dirt and crumbs. Didn't know how good my camera was.") You never know what is under your seat. I found this:
You never know what is under your seat. I found this:

When you get the molding off., you see the seat is held together by a bolt on each side at the hinge, and a roll pin that connects to the spring adjustment. Both the bolts and the roll pins go through a plastic bushing. These must be preserved and reused.
On one side, the black bushing came off with the bolt--this is the best case scenario. The other side, the bolt came out and left the bushing, which had to be finagled out with screw driver and pulled out with help of some vicegrips.


Once the black bushings are out, take a razor and cut the frayed ends off the bushings. I think these were like a wall anchor, they spayed out when the bolt went through. Replacing these with new ones would be best, but Ford didn't seem to have a part number for them, so I had to salvage them as best as I could.


Next, knock the roll pin out using a punch or phillips head screw driver (non-chinese made, or else you'll ruin it) You might have to pound it pretty hard. They should go out either way. Try to preserve the white plastic bushing.


Repeat on the other side. Now the back should separate from the bottom. Comparison of old seat back and new. You can see, the old seat has much beefier metal. Didn't know this until I got to this point, however.


To put it back together, simply reverse process. I put trimmed bushings on the bolts, slipped the bolts in hole and bolted each side together. I then knocked the roll pins in, lining up holes and white bushings. Could have used an extra set of hands for that, but I made do.


Replace moldings on side and on inside hinge.

And the seat is complete:

Now vacuum the 8 months of crapola out of the carpet, reconnect the wiring under the seat, replace bolts and tighten.

Here are the tools you will need: Socket wrench with 15mm and 13mm socket, hammer, phillips head screwdriver, flat head screwdriver, pry bar, vice grips, and razor blade or knife.
Optional: upholstry cleaner, magnetic tray.
You need to first remove the old seat. They are bolted to floor with four bolts-- two front, two back. You will have to slide seat up to get to back ones and visa versa. The junkyard seats were bolted in with 13mm bolts. My 2002 used 15mm bolts.
Next, lift up seat and unplug any wired connections under the seat. Mine was manual seat, and it had two connections:
Next take seat out of the car, and remove plastic moldings covering the inside hinge and the outside bottom. The seat adjustment knob pulls off with a little gentle persuasion, and then, both are held in with two phillips head screws:
Forgive the dog hair, dirt and crumbs. Didn't know how good my camera was.
You never know what is under your seat. I found this:When you get the molding off., you see the seat is held together by a bolt on each side at the hinge, and a roll pin that connects to the spring adjustment. Both the bolts and the roll pins go through a plastic bushing. These must be preserved and reused.
On one side, the black bushing came off with the bolt--this is the best case scenario. The other side, the bolt came out and left the bushing, which had to be finagled out with screw driver and pulled out with help of some vicegrips.
Once the black bushings are out, take a razor and cut the frayed ends off the bushings. I think these were like a wall anchor, they spayed out when the bolt went through. Replacing these with new ones would be best, but Ford didn't seem to have a part number for them, so I had to salvage them as best as I could.
Next, knock the roll pin out using a punch or phillips head screw driver (non-chinese made, or else you'll ruin it) You might have to pound it pretty hard. They should go out either way. Try to preserve the white plastic bushing.
Repeat on the other side. Now the back should separate from the bottom. Comparison of old seat back and new. You can see, the old seat has much beefier metal. Didn't know this until I got to this point, however.
To put it back together, simply reverse process. I put trimmed bushings on the bolts, slipped the bolts in hole and bolted each side together. I then knocked the roll pins in, lining up holes and white bushings. Could have used an extra set of hands for that, but I made do.
Replace moldings on side and on inside hinge.
And the seat is complete:
Now vacuum the 8 months of crapola out of the carpet, reconnect the wiring under the seat, replace bolts and tighten.