Follow along with the video below to see how to install our site as a web app on your home screen.
Note: This feature may not be available in some browsers.
Performance Upgrades - Maintenance - Modifications - Problem Solving - Off-Road - Street Trucks. Covering the Explorer, ST, Sport, Lincoln Aviator, Sport Trac, Mercury Mountaineer, Mazda Navajo, Ford Ranger, Mazda Pickups, and the Aerostar. Featuring H.I. - Human Intelligence.
Couldn't tell you to be honest...think it is 10. It is TINY though and never an issue. I don't think there is much amperage going through that wire at all.
Join the Elite Explorers for $20 each year. Elite Explorer members see no advertisements, no banner ads, no double underlined links,. Add an avatar, upload photo attachments, and more!.
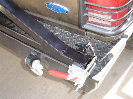
I don't have pics yet, but you shouldn't need them. The pcm goes through the firewall on that side. There are two and its in the top one, the easiest one to reach! The last 4 inches of the harness where it plugs in is not taped, but has something similar to a velcro wrap, you pull it apart like a ziploc, but is sticky not velcro. The brown wire is the only solid brown in it. I tested with a test light with car running and to groud and positive battery, got weak light and then removed the 20 fuse from #18 , got no light so its the right wire. Then poked a hole in the vacuum line grommet right next to it and ran my wire into the cab from there and up to the dummy switches on passenger side of the radio, takes about 30 minutes all together. Not sure if its like that on the Aussie explorer's, could be just opposite.
that's under the bonnet (Hood) you mean don't you on the Australian version that's right behind the fuse box very hard to get to but I'll have a go anyway
Yes, in the engine compartment. On the passenger's side for left hand drive vehicles. The PCM goes through the firewall. It has two wire harnesses plugged into it, one on top the other below it. Its in the one on top, and you just remove the last 4 inches or so of the harness by pulling it apart like a ziploc bag. Then the last part of the harness exposes all the wires and its the brown one, solid brown and a tiny bit bigger than the rest. If you hook a test light to it while running the vehicle and remove the 20 amp 4x4 fuse, #18 , in my fuse panel, then the test light should go off, if so its the right one.
I haven't done this mod but I have disconnected the 4x4 module as it has gone bad. I can tell the difference that it is in 2WD because the rear wheels slip alot(mostly in rain) than before I disconnected. I also heard somewhere that 4x4 auto is essentially 75% power to the rears and 25% to the front. With disconnected the tc can't engage the front shaft. I remember that when I had the module in I never had wheel slippage even in rain because power was going to fronts as wheel. But with this mod will I lose my 4x4 all together? Because Canadian winters can be brutal and I would love 4x4 for winter and 2wd in summer. BTW with this module disconnected I have seen increases in MPG. Currently my truck has CAI and I only go to 2K RPM between shifts. Before module disconnect: 13.5/19.8 city/hwy after module disconnect 14.7/21.3. Also to note these are for summer weather AT AROUND 25-35C temperatures. The hotter the weather and the lower the rpms the better economy you get.
I hope after a couple other mods that I will achieve 20 mpg city. Even 16 city I would be fine with.
If you have advance trac, you have to push the button once and THEN push and hold it until the "OFF" light blinks. If no advance trac then just pushing the button should disable it
The button should be between the two cup holders up front. Advance trac is just ford's name for their stability control
Join the Elite Explorers for $20 each year. Elite Explorer members see no advertisements, no banner ads, no double underlined links,. Add an avatar, upload photo attachments, and more!.