Spdrcer34
Explorer Addict
- Joined
- March 14, 2002
- Messages
- 3,873
- Reaction score
- 13
- City, State
- Bremerton, WA
- Year, Model & Trim Level
- 1992 Explorer XL
I needed some money, so I sold the BBK Throttle Body off of my Daily Driver...not REALLY wanting to go back to a stock TB...I was reminded of the ThrottleBody mod that 'aldive' had done to the Ford Motorsports TB on his SOHC ( http://www.explorerforum.com/forums/showthread.php?t=172480&highlight=throttle+body+mod )...I wanted to do the same thing...well 1/2 of what he had done at the least...
So this is how I did it:
Start with a TOTALLY STOCK Throttle body (note: this mod has to be done with the TB off the vehicle) Like this one:

When you open the throttle/butterfly, you'll see the issues with this particular design:

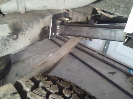
The VERY FIRST thing you need to do, in order to disassemble the TB, is to grind off these little screw ends. The best tool here to use, as shown, is a rotary tool. Often called a Dremel. I have a flex shaft installed on the end of mine, making it easier to get into small spaces. The factory used a hollowed out screw tip so it could be crushed during final assembly. They did this to prevent a screw from coming loose and entering the motor.


After you get those pieces cut off, you can start taking it all apart.
Start with the Butterfly Screws

And slide the Butterfly out of the throttle shaft


Remove the plastic link from the 2 cams on the side of the TB, and remove the 8mm bolt.


Now everything just slides out easily. DO NOT let the springs gets bent, lost, or otherwise damaged!

Okay...once you cross this line, you are at the point of no return. Let's start cutting! Take a look at the throttle shaft that holds the butterfly. You are going to cut part of it off the shaft. You are going to cut the side that DOES NOT.....I repeat...you are going to cut the side that DOES NOT have the threads tapped in it.


This is exactly what you have come this far to remove

Now comes the tricky part. If you'll notice in the pic of the section removed from the shaft, I didn't make the cut flush with the slot in the shaft. I left a LITTLE meat in there. I started to dry fit everything together....and trimmed a little more from the meat I left of the shaft.
Once you get the shaft trimmed to match the bore of the TB, it's time to trime the screws again to make up for the length lost in this modification.

Get it the shaft and butterfly all cleaned up again, and start the assembly.
Start with your now clean Throttle Body

Put the Larger of the 2 springs in place, the way the 'hook' is oriented in the pictures is correct


Insert the Throttle Shaft in the Throttle Body. Wind the spring around 1x. Do not load the spring any more than that.


Now attach the Butterfly on the Throttle Shaft, in the Throttle Body.


Only a couple more things to do, and you're done. Attach the other Throttle Linkage Cam with the 8mm bolt. Make sure you wind the spring only 1x. And after the shaft is bolted down, attach the plastic link to both Linkage Parts


And that's it...You're DONE!
Ryan
So this is how I did it:
Start with a TOTALLY STOCK Throttle body (note: this mod has to be done with the TB off the vehicle) Like this one:

When you open the throttle/butterfly, you'll see the issues with this particular design:

The VERY FIRST thing you need to do, in order to disassemble the TB, is to grind off these little screw ends. The best tool here to use, as shown, is a rotary tool. Often called a Dremel. I have a flex shaft installed on the end of mine, making it easier to get into small spaces. The factory used a hollowed out screw tip so it could be crushed during final assembly. They did this to prevent a screw from coming loose and entering the motor.


After you get those pieces cut off, you can start taking it all apart.
Start with the Butterfly Screws

And slide the Butterfly out of the throttle shaft


Remove the plastic link from the 2 cams on the side of the TB, and remove the 8mm bolt.


Now everything just slides out easily. DO NOT let the springs gets bent, lost, or otherwise damaged!

Okay...once you cross this line, you are at the point of no return. Let's start cutting! Take a look at the throttle shaft that holds the butterfly. You are going to cut part of it off the shaft. You are going to cut the side that DOES NOT.....I repeat...you are going to cut the side that DOES NOT have the threads tapped in it.


This is exactly what you have come this far to remove

Now comes the tricky part. If you'll notice in the pic of the section removed from the shaft, I didn't make the cut flush with the slot in the shaft. I left a LITTLE meat in there. I started to dry fit everything together....and trimmed a little more from the meat I left of the shaft.
Once you get the shaft trimmed to match the bore of the TB, it's time to trime the screws again to make up for the length lost in this modification.

Get it the shaft and butterfly all cleaned up again, and start the assembly.
Start with your now clean Throttle Body

Put the Larger of the 2 springs in place, the way the 'hook' is oriented in the pictures is correct


Insert the Throttle Shaft in the Throttle Body. Wind the spring around 1x. Do not load the spring any more than that.


Now attach the Butterfly on the Throttle Shaft, in the Throttle Body.


Only a couple more things to do, and you're done. Attach the other Throttle Linkage Cam with the 8mm bolt. Make sure you wind the spring only 1x. And after the shaft is bolted down, attach the plastic link to both Linkage Parts


And that's it...You're DONE!
Ryan