My Install:
Finally got about 90% complete on my install.
First, want to thank all that have contributed thus far to this and other related threads.
danxmanly in particular, thanks for the idea on the location to drill for firewall access. Drilling wasn’t all that difficult at all, getting the damn grommet in there situated properly took me forever...mainly because of my crap drill job
")
.
Wiring diagrams for the Sony amp have been posted a few times after I really dug into searching but the first one I found to be legit was posted by Rudsther2435 – thanks – from what I can tell, that document you scanned/took pix of is legit! (
http://www.explorerforum.com/forums/showthread.php?t=388000 )
Onto the gear:
JL Premium Amp install kit (4g power/ground line)
Polk Audio db6501 Components for Front
Stock rear speakers (for now)
JL 12W6v2 in sealed box ¾” MDF all around except 1” front
JL 300/4 amp (driving fronts only for now)
JL 500/a amp (driving sub)
Audio Control EQX (REALLY OLD model – picked up off Ebay for $30 probably 8+ years ago)
JL Cleansweep CL441DSP & CL-SSI
A few spare pieces of 4G cabling for ground and power runs I had from previous installs.
Signal Flow – Cut Sony amp speaker level output wires feeding front mids and tweets as well as the sub channels. All of those signals feed into the JL CL-SSI signal summer unit, which then feeds into the main CL441dsp. From there, the signal runs into the EQX and splits off full range to the 300/4 for the front mids/highs and out of the mono low output to my 500/1 for the sub.
* Problem – I couldn’t for the life of me figure out the “preamp outputs from the deck”. The 4 signals I found coming from the deck all had zero volume control, meaning I had high volume coming out of them whether or not the deck music volume was up or down. I couldn’t figure this out for the life of me given that so many people have said they have taken “rear” line level outs from the amp location. After many hours of trying to figure that out, I gave up and went with the Sony amp spkr level outputs which I REALLY did not want to do. Would love to see some input on this from others.
Gear Location – I thought this was pretty cool myself but I located my mid/high amp in the factory location of the 8” sub. It fits pretty well in there, although currently I have it secured with simple zip ties. The main issue is if I have to adjust it at all I need to rip apart the rear cabin but in the many years I had that amp in my previous vehicle I never touched it after it was installed so I am hoping to have the same luck here, save for a planned future upgrade of the rear spkrs possibly… I located the sub amp in the spare tire rim – removing the jack and tool accessories. I have relocated those to under the front seats so as to still have the tools in the vehicle in the event I need ot change the spare. The spare still resides in the vehicle as well, just need to lift the amp out of the way to remove the tire…fair trade I suppose. Since ther was so much room in the passenger side rear ¼ panel I may 1 day look into the driver side panel to see if that amp can be installed there.
That leaves the 2 JL cleansweep units and the EQX. I decided to mount all of those on a thin particle wood board I covered in black fabric in the rear cargo area atop the spare tire cover. The size of the wood panel is roughly 32” x 12”. I could have went smaller but I figured I would save space in case I added a future component and I went ahead and mounted my power distro block and rear fuse holder there as well so those things weren't flopping around in the back. I don’t have a pic of this yet as I am not done cleaning it up. The cool thing here is that all of the pieces are low profile enough to have a bit of space in the event that the rear seats fold completely down for storage. I believe this whole thing could have been set under the 2nd row seats if I wanted, though I think I would have had to break up the wood into two pieces, and then run the risk of something stepping on it when entering/exiting from the 3rd row – no thanks!
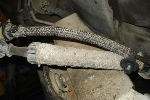
Amp power – I used an old JL ANL fuse block from a previous install and mounted that on the driver side ledge in the engine bay near the top of the strutt in such a way that there is easy access to the strut bolts if needed. Routed the cable down and through the whole and I drilled in pretty much the same location as danx. One thing to note, I suspect this is the same on all our late model Explorers but I believe dan mentioned there was a double firewall in this area. From what I can tell, that is incorrect as I easily went through that metal and determined that there was no empty space in between. I could be wrong and could be getting my firewall posts mixed up (too lazy to check right now) but just wanted to throw that out there. Side note, I couldn’t find that groment behind the glovebox that so many people have mentioned in other post. I’m either an idiot or blind, or both but I must have wasted another 3 hours looking for that freagin thing. Besides, running power from driver side made the cable run shorter anyway so I am glad I didn’t find a way to do it over there.. I have ordered some temp shield wire tubing to cover the amp cable to help protect it from the heat of the engine bay – just in case! Getting the cable back to the rear of the car wasn’t much of a hassle at all, most of the side panels snap out pretty easily. The only pain was getting it under the rear ¼ panel piece, it took quite a bit of work to wedge the bottom out enough to fit the cable in. couldn’t imagine doing that with 0g cable…oh boy. Ran the spkr line the same way, along with the cleansweep volume control cable as well.
Front door speaker install:
I must have spent 3 hours trying to figure out how to run new spkr cable into the door. I thought of fishing new cable in using the old cable as a pull…thought better of that given the size of the openings I could find and the compactness of the cables – also it appears they are all taped together within the bundle…so yea, I don’t think that would have worked. Then I had what at least I feel is a genius thought. Not sure if anyone else has done this but I said “Self – The freagin stock cabling running to the spkr isn’t that much thinner than what I was planning to run into the doors myself (16g) and its actually thicker than what came with the damn speakers out of the box (what appears to be 20g) so I am assuming the factory wiring is 18g. More than sufficient to run the final 2-3’ from the foot well into the door. So I cut the cables running from the amp to the speakers, spliced in my crossed over cables from the passive box I mounted in the footwells behinds cables and was off to the races. Once I had that done I wanted the 3 hours back I spent trying to figure out how to run new cables into the doors…absolutely no reason to in my application – only pushing ~75w to those spkrs ea….~18g is more than adequate! The Polk tweeters are a bit larger than stock so they don’t fit exactly into the area the stocks do. As such, I had to hot glue them in. figured that was best bet for easy removal later if necessary. Set the tweeter gain to -3 (hate harsh highs) and off to the races. Need to tune high-end just a bi with EQX but for out of the box setup with zero eq tuning, I think it sounds really good. Install note – there are 3 bolts (10MM – 1 behind the door release handle and two behind the a panel behind the door “grab” bar/arm rest) holding the door on and a bunch of plastic clips – two other screws that are 6mm if I remember correctly, on the bottom edge of the door.
Initial impressions:
Love, Love LOVE the Polk speakers. For the money, hands down the best component set out there that I have personally tried in the 100w power range. I have owned MB Quart, Diamond Audio Hex and IDQ and DEI components, tried Focal, RF, JL etc…. all of those costs hundreds and hundreds more (well, all accept the DEI stuff) and initial impressions are these stand up really well. I give it to Polk on this one, they knocked it of the park for what could be considered a budget component set @ $199 MSRP. Not sure I see a reason to spend $400 more on a top tier JL or focal or Dyanaudio etc set and get 10—15% “better” sound…maybe. I’m also not going to push a ton of power to the spkrs as I don’t want to change amps so it works out well for me. Bass from sub sounds clean. Sitting in middle seats, sound is good as well, the rear doors and tweets fill in nicely back there. Again, impressed they don't really distort like the stock fronts did at high volume.
A few notes for anyone looking to do any of this stuff:
If you are removing the rear interior ¼ panels – do yourself a favor and tape up (wide painters tape or masking tape etc) the area just under the rear tweeter in the pillar down to the intersection of plastic pieces. This will prevent the scratches you will get if you do not do this. Thankfully, plastic scratches on that material buff out pretty well but not completely – so far as I can tell. I have a few battle scares on the plastic to show for it.
All told, I spent about 40-50 hours by myself working on this project over the last 2 weeks. I’d say in total, about 15 hours were wasted chasing dumb problems, making many trips to stores, searing online for help etc. I think if I had it all over to do again knowing what I know now, I could probably knock it out in 12hrs with 1 store run counted in there. Happy to say that I did all of this and didn’t break any clips or lose any pieces or stock screws – pretty sure a first for me in any automotive project ever!
Initial impressions of the cleansweep deal is it works as advertised. I did some quick looks at signal pre and post EQ on it and it definitely flattens out the signal curve. There are a few dips and peaks in the curve naturally from Sony for whatever reason but all told, the Sony signal didn’t seem all that bad. Bass isn’t where I would like it to be at low volume, I need to experiment with ways to fix that. I think the stock head unit or amp may apply volume dependent equalization, but typically stock stereos up the bass at lower volumes. More testing will tell the story.
Oh, finally, I mounted (semi) the volume control knob under the center arm rest. I think I’ll typically leave that thing cranked to 75% and control system volume from the Sony knob. The problem is I have to remember that the rears and ctr channel are still completely controlled by the Sony system, until that changes, I’ll always have to balance out what knob ot use and when. It’s no biggy really, I use the Sony knob 97% of the time and I don’t crank it passed a set point.
I guess that’s it for now. For the future, I need to redesign my sub box so that it fits while allowing the rear seats to fold up for seating. I have decided to accept that one seat will always have to be at least partially setup for seating which is fine, but right now, the back cannot come up which means I have a 6 seater…
Hope this is helpful to at least 1 person out there… I certainly thank everyone who contributed to this and other posts on the topic.
A few pix of the location I put the amp - I had every intention of taking more throughout the process but I am just terrible at that!