Hello fellow Explorer enthusiasts.
If you want to jump to my solid axle swap thread click link below: http://www.explorerforum.com/forums/showthread.php?t=163210
If you start here you will see the mods to my Ex in cronological order as they happened, and as my own ideas and expectations were being formed. Some of my early mods led me into my SAS, and were essential to the process. There is a link to my solid axle swap at the end.
This started out as a re-do of my modification thread I started before I finally became elite. I couldn`t go back to it and post pictures so I wanted to redo it in style.
~~~~~~ TABLE OF CONTENTS ~~~~~~
This is a rough guide that may depend on your resolution!
PAGE 1:
-Intro
-Front license plate raised
-driving lights
-Stock picture
-Cone air filter
-CB and cheap glass mount antenna
-Wire mesh grille
-Front tow hooks install
-2"suspension lift + shocks
PAGE 2
-2"suspension lift + shocks cont`d
-Broken front lower shock mount remedy
-Addition of 31x10.5 tires
-Alignment woes
-Fire extinguisher added (with warning pics)
-Rear locker added (my initial thoughts)
-How I beat the "left side lean"
-My first real trip report with thoughts on truck perf.
PAGE 3:
-Body lift kit parts problems
-Canadian flag 3rd brake light
-2" Body lift install
-2" Body lift install cont`d
-Short lived front bumper gap filler (LOL)
-Rear bumper remount (2" higher)
PAGE 4:
-Rear bumper remount (2" higher) cont`d
-Front bumper remount (2" higher) (Tow hooks raised inside frame)
-Warrior shackles and rear shock mount skidplates
-Skid plate problems
-My first time towing a Jeep outta the mud
-Rear sway bar removal and upper shock mount mod
-Emergency brake cable mod #1
PAGE 5:
-More Warrior skidplate/shockmount problems noted
-Front splashguard (bumper to swaybar)
-Trip report; Vancouver Island
-Post trip thoughts
-Warrior skidplate shock mount breakage
-The amazing throttle cable mod!
-Hieght measurements to bottom of bumpers
PAGE 6:
-Info on wheel spacers
-Warrior comes through with proper plates
-Rear shock mounted to axle with old sway bar brackets
-Raised upper rear shock mounts
-I get the dumb idea to buy a bra
-The "Zimmerman" rear spring mod (I later regret)
-Front swaybar disconnects (cheap, didn`t work well)
PAGE 7:
-Emergency brake cable extension!
-1 & 1/2 inch wheel spacers
-1 & 1/2 inch wheel spacers cont`d
-Custom exhaust (brand?)
-My first stuck!
-Wheeling thoughts and misdiagnosed problem
-Hippoliner on rockers (like herculiner)
-Replacing a rear shackle bushing with poly
-Starter problem troubleshooting, repair
-Note on premature corroding of battery cables for 91-94 Explorers
PAGE 8:
-Better front swaybar disconnects
-Dual battery setup!
-Dual battery setup! cont`d
-Fender trimming to fit 33s
PAGE 9
-Fender trimming to fit 33s (cont`d)
-I put my front driving lights in the back for reverse lights
-The 33s are on!
-Warrior shock relocation bracket mounts for rear lowers
PAGE 10
-Four foot antenna mount at rear corner
-Another trip report
-1 year anniversary
-I prove that I could possibly be crazy
PAGE 11
-Cheap fender flares
-Old Man Emu rear springs (OME-36)
PAGE 12
-I assume that I have reached a plateau!
PAGE 13
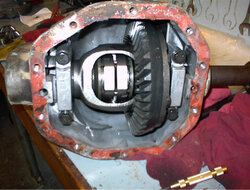
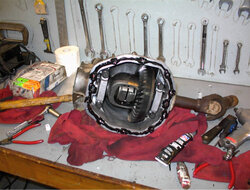
-Detroit EZ locker install into my open front diff.
PAGE 14
-Detroit EZ locker install into my open front diff. (cont`d)
-Rear towhook install
PAGE 15
-J-Clips to keep front coils from popping out at the top
LAST PAGE
-Link to rusty rocker panel repair
-Link to Solid Axle Swap


