How to: - Receiver Hitch storage basket (Welding project) | Ford Explorer Forums - Serious Explorations

  • Register Today It's free!

How to: Receiver Hitch storage basket (Welding project)

Prefix for threads which are instructional.

DeRocha

NEX Vice President
Moderator Emeritus
Joined
July 5, 2003
Messages
6,669
Reaction score
63
City, State
Brockton, MA
Year, Model & Trim Level
'93 XLT 4x4
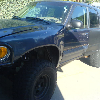
Hauling my snow blower around in the Explorer's trunk area was a pita. In order to shut the hatch I had to leave the rear glass open and tilt the snow blower back so the handles could stick out. Even with a rubber trunk protector the melting snow still made a mess of the trunk. A receiver hitch basket would allow me to carry it and keep the mess outside.

18205Receiver_hitch_basket_4_WEB-med.jpg


I picked up the angle brackets at Home Depot (cheaper than Lowes or local steel supply). The steel comes with a protective coating so I used the angle grinder to remove it at all my welding joints. A sander could also have been used, but at a mush slower rate.

Dimensions 30" x 48" x 1 1/5 high. Approx Cost: $86

Note: I had to buy a full 4' x 8' sheet of Expanded metal $51, but only used 10 sq ft for the project.

I picked up the 2" Square tube and expanded metal at Turner Steel. I picked up the angle stock at home depot (Cheaper than Lowes or Turner Steel)

An Angle grinder with cut off wheels quickly cuts all the steel.

To ensure good support for the snow blower I placed the stringers about on-center with it's wheel track width.
18205Receiver_basket-med.jpg


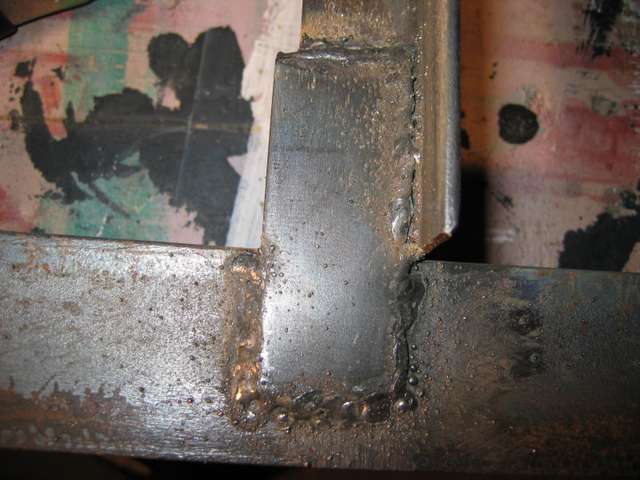
Since the stringers were at the same height as the frame I attached Stringer supports (Underside of basket):
18205Receiver_hitch_basket_support_WEB-med.jpg


Here is the basket frame ready for the expanded metal floor. Notice the left side is open as it is where the ramps attach:
18205Receiver_hitch_basket_2_WEB-med.jpg


The expanded metal floor has been installed with a tack weld at each contact point (108 in all). This greatly aides to the structural integrity and rigidity of the unit.
18205Receiver_hitch_basket_3_WEB-med.jpg


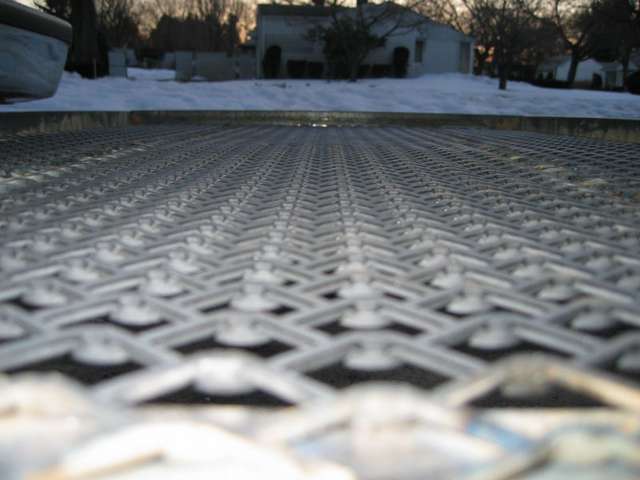
Expanded metal Close up:
18205Receiver_hitch_basket_expanded_metal_1_WEB-med.jpg


I made 5' ramps out of 2x8 lumber and some aluminum ramp ends.
182055_ramps_WEB-med.jpg


Just about all Fab'd up. I just need to drill some holes for tie down hooks. For rust prevention I am going to sandblast it and give it a few coats of Por-15

18205Basket_with_snow_blower_WEB-med.jpg


Notes: The 2" Square tube fits perfectly within the receiver, but I noticed a tiny amount of slop (1/16") at the receiver. This translates into a 1/16" movement on the centerline that grows to about 1" as you reach the extreme left or right sides of the basket. I searched the Webb and found this wobble is completely normal and can be minimized by using various anti-rattle devices.


Join the Elite Explorers for $20 each year.
Elite Explorer members see no advertisements, no banner ads, no double underlined links,.
Add an avatar, upload photo attachments, and more!
.


Nice job; I was wondering where you are going to store the ramps and I thought you could weld up some tabs and drill holes in the ramps and attach with bolts and wingnuts.
 

Attachments

  • SNOWBLOWER1.jpg
    SNOWBLOWER1.jpg
    62.1 KB · Views: 1,426


i wonder how big and how heavy of something you could make one of those before it started to be too much for the hitch....


it all depends on the tounge weight rating of the hitch, usually about 500lbs. If ya got somethin' heavier than that ya need a trailer :D


Looks really good. Nice job man! :thumbsup:


Looks great. Nice work!


Thanks guys...

I just got a welder at the end of Dec, and haven't gotten around to building it until now (too many family functions and holidays). I had kind of assumed I would be getting all my steel at a local steel mill the next town over. I was surprised :confused: to learn Home Depot had cheaper prices. So I need to find a reasonable steel supplier.

Broccoli1: I am trying to design something similar to your suggestion to carry the ramps. The wing nuts would work, but (IMO) they'd be too cumbersome to align and thread on each time. I'm thinking to fab up some 5" deep "U" shaped brackets the ramps can just sit into. I would then use a few bungie cords to keep them from moving around.

The platform is rock solid, and most of the cheapo ones you can buy ready made have max capacity of 500 lbs or your hitch's tongue rating. Check out this ATV Hitch Carrier. Its massive...


I agree on nixing the wing nuts: they're a good idea until you have to use them all the time :D


Yea man, looks good..I was debating on making or buying one. Buy one--$60..less labor..built flimsy....Spend a few extra bucks and make one solid as a tank and to my dimensions and needs!!!


Don't you want some triangular braces going from the 2x2 to the basket? I would think that a big enough bounce would be able to break the welds b/c the weight is cantilevered out from the center.

BigDakota said:
Yea man, looks good..I was debating on making or buying one. Buy one--$60..less labor..built flimsy....Spend a few extra bucks and make one solid as a tank and to my dimensions and needs!!!

The cheapest I found them was $90 at Cabela's near Pottsville, PA

I ended up making my own. I used an old bed frame for the channel steel that I picked up at goodwill for next to nothing


I have been seeing similar setups to carry motorbikes, and I considered it for me. Just a little worried that it wouldn't hold up to a 350lb bike back there.


Hokie said:
Don't you want some triangular braces going from the 2x2 to the basket? I would think that a big enough bounce would be able to break the welds b/c the weight is cantilevered out from the center.

Not the best pic but here's what I did with mine

attachment.php


This thing is crazy strong!


Hokie said:
Don't you want some triangular braces going from the 2x2 to the basket? I would think that a big enough bounce would be able to break the welds b/c the weight is cantilevered out from the center.

Thanks for the info and will seriously take that into consideration. To make it is as stable as posible I tacked all 108 contact point of the expanded metal to make the whole unit one solid piece. I will also keep the load centered directly over the 2x2 support tube to help minimize any additional torque loads (which use the 2x2 as a folcrum).


I have followed Hokie's advice and added 4 additional support brackets. These brackets are made of 1" angle sistered at each end for 8" and attach to the center tube in a triangular configuration.
18205Basket_with_supports_WEB-med.jpg


Hokie,
Not that the braces are a bad idea but if the joints are welded correctly the welds should not fail- the metal itself would/should bend/break first. A good weld will always be stronger than the base metal. If your welds are breaking then you are not getting good penetration. A good cheap test is the ol' sledge hammer test: weld two flat pieces together and put it in a vise and give it a few wacks- the metal should bend but the welded joint should stay together. If you can break the joint apart with the sledge then there wasn't enough penetration during the welding.

Ed


I think the supports on the commercial ones are to keep it from bending the carrier frame OR breaking a weld.. every aftermarket carrier that I've seen rated for 500 lbs has a those type of supports, though these are usually 20"x60" which means the weight can be pretty far from the center pivot, allowing for a higher stress on the frame and the weld, IMHO.. but I'm not an engineer.

more support never hurts, his particular application is pretty much centered, so it shouldn't be an issue. Hokie thinks like I do.. yeah maybe it would be fine... but its one more possibility of making it home even if it does break, without loosing the cargo, for maybe $8 in metal and $1.00 in weld wire, it cheap compared to a new snow blower to replace the one that went sliding across the freeway...


Broccoli1 said:
Hokie,
Not that the braces are a bad idea but if the joints are welded correctly the welds should not fail- the metal itself would/should bend/break first. A good weld will always be stronger than the base metal. If your welds are breaking then you are not getting good penetration. A good cheap test is the ol' sledge hammer test: weld two flat pieces together and put it in a vise and give it a few wacks- the metal should bend but the welded joint should stay together. If you can break the joint apart with the sledge then there wasn't enough penetration during the welding.

Ed

Good to know... we welded the crap outta it when making it, I just put the triangular braces b/c I had seen every other one out there like that, it seemed like a good idea, and i had the extra metal laying around :)

DeRocha said:
I have followed Hokie's advice and added 4 additional support brackets. These brackets are made of 1" angle sistered at each end for 8" and attach to the center tube in a triangular configuration.

Lookin' good! :thumbsup:


Join the Elite Explorers for $20 each year.
Elite Explorer members see no advertisements, no banner ads, no double underlined links,.
Add an avatar, upload photo attachments, and more!
.


More support can never hurt but with Derocha's design he had already incorporated as much structual integrity as Hokie's because he ran angle iron/braces out from his center post where as Hokie did not and the braces that Hokie used allows him not to need the angel iron in the middle of his basket. As Hokie said " this thing is crazy strong" and I believe him, he followed the commercial ones he had seen and building your own sh*t is always rewarding.
and if Derocha's basket falls apart then he probably didn't let the weld dry long enough in that cold weather he's got up there :D


Back
Top