Everybody has encountered a situation where they needed a certain kind of tool which wasn't available (or too expensive). This is when you have to improvise, and get creative. I had this happen a few times. To start off this thread, I was replacing my front suspension components (shocks, springs, upper control arm bushings, ball joints, etc), and encountered a situation where I needed a way to compress the lower control arm, and support it. Here are some pictures to further explain what I did:


-
Performance Upgrades - Maintenance - Modifications - Problem Solving - Off-Road - Street Trucks.
Covering the Explorer, ST, Sport, Lincoln Aviator, Sport Trac,
Mercury Mountaineer, Mazda Navajo, Ford Ranger, Mazda Pickups, and the Aerostar.
Featuring H.I. - Human Intelligence.
Register Today It's free!
You are using an out of date browser. It may not display this or other websites correctly.
You should upgrade or use an alternative browser.
You should upgrade or use an alternative browser.
Show off your home made tools!
- Thread starter BrooklynBay
- Start date
Elite Explorer members see no advertisements, no banner ads, no double underlined links,.
Add an avatar, upload photo attachments, and more!.
BobWiersema
Explorer Addict
- Joined
- November 5, 2008
- Messages
- 1,307
- Reaction score
- 17
- City, State
- Chicago Burbs, Illinois
- Year, Model & Trim Level
- 98 xlt 4.0L SOHC 4x4
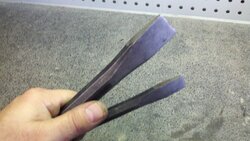
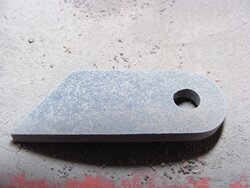
Just finished these fan clutch wrenches today. A few weeks ago I had to rent the set from Autozone to change the waterpump on a powerstroke. While I had them I took dimensions, drew them in CAD and then cut them out of 1/4" steel on my cnc plasma. (I know that is kind of cheating)
Nice, now I know who to call when I have to change the pump.
Elite Explorer members see no advertisements, no banner ads, no double underlined links,.
Add an avatar, upload photo attachments, and more!.
- Joined
- March 13, 2005
- Messages
- 7,283
- Reaction score
- 21
- City, State
- Martinsburg WV
- Year, Model & Trim Level
- 84 BII "Li'l Samson"
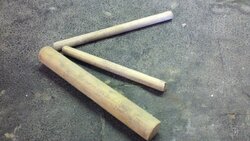
Got tired of using those buckets to stand to lean over fender. Had various size tubing laying around so I thought I'd put them to good use, plus a little safer.
- Joined
- April 16, 2002
- Messages
- 9,263
- Reaction score
- 89
- City, State
- Millersville , Maryland
- Year, Model & Trim Level
- 2000 Explorer Sport
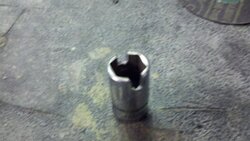
Extra deep sockets.
8mm for Acura drip rail moldings
10mm for Lexus drip rail moldings
and 11mm for Ford (?) rear bumper cover.

8mm for Acura drip rail moldings
10mm for Lexus drip rail moldings
and 11mm for Ford (?) rear bumper cover.
- Joined
- April 16, 2002
- Messages
- 9,263
- Reaction score
- 89
- City, State
- Millersville , Maryland
- Year, Model & Trim Level
- 2000 Explorer Sport
- Joined
- April 16, 2002
- Messages
- 9,263
- Reaction score
- 89
- City, State
- Millersville , Maryland
- Year, Model & Trim Level
- 2000 Explorer Sport
- Joined
- April 16, 2002
- Messages
- 9,263
- Reaction score
- 89
- City, State
- Millersville , Maryland
- Year, Model & Trim Level
- 2000 Explorer Sport
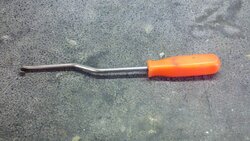
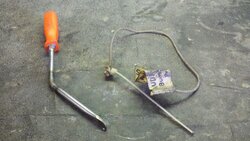
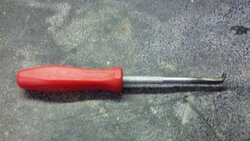
The orange one on the left is for Lexus windshield squinter removal.
The one on the right 90's Audi wagons had this hokey puck looking thing that went under the rear cover and held the center of it up.
It was spring wound. You would twist it all the way down and stick the zip tie into a slot on the spring loaded hokey puck looking thing. Snap it onto the rear bumper and drape the string behind the bumper beam. Then slide the cover in place and attach appropriately. Then grab the string and yank. The zip tie would come out and the spring loaded hokey puck thing would spin up into place.
Attachments
- Joined
- April 16, 2002
- Messages
- 9,263
- Reaction score
- 89
- City, State
- Millersville , Maryland
- Year, Model & Trim Level
- 2000 Explorer Sport
- Joined
- November 11, 2005
- Messages
- 56,717
- Reaction score
- 1,195
- City, State
- Brooklyn, NY
- Year, Model & Trim Level
- 88 89 93 95 96 Aerostars
mrbubblessk845
New Member
- Joined
- August 17, 2011
- Messages
- 3
- Reaction score
- 0
- City, State
- agra oklahoma
- Year, Model & Trim Level
- 2000 explorer xls 4.0 4*4
I recently made a impact tool for my stock Ford Jack. Using a socket and a piece of coal finish round solid bar. Just found a solid rod and cut and shaped the end to fit in the Jack and welded it into a socket. Now I just get the impact out and Jack up my truck. Works pretty good.
- Joined
- November 11, 2005
- Messages
- 56,717
- Reaction score
- 1,195
- City, State
- Brooklyn, NY
- Year, Model & Trim Level
- 88 89 93 95 96 Aerostars
Could you post a picture of it?
Brian1
Elite Explorer
- Joined
- February 2, 2000
- Messages
- 5,389
- Reaction score
- 649
- City, State
- Albuquerque, NM
- Year, Model & Trim Level
- 1991 XLT
- Callsign
- KG5BAQ
willindsay
Explorer Addict
- Joined
- May 22, 2010
- Messages
- 1,044
- Reaction score
- 8
- Location
- Sevierville
- City, State
- Sevierville,TN
- Year, Model & Trim Level
- 94 Limited
Here's my 2$ Kydex press made with scrap wood, a clearance 2x4 and a scissor jack from a junked car.
It just needs some foam and it'll be done.

It just needs some foam and it'll be done.
- Joined
- November 11, 2005
- Messages
- 56,717
- Reaction score
- 1,195
- City, State
- Brooklyn, NY
- Year, Model & Trim Level
- 88 89 93 95 96 Aerostars
Brian1
Elite Explorer
- Joined
- February 2, 2000
- Messages
- 5,389
- Reaction score
- 649
- City, State
- Albuquerque, NM
- Year, Model & Trim Level
- 1991 XLT
- Callsign
- KG5BAQ
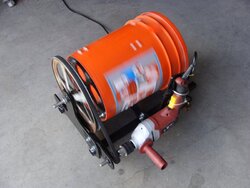
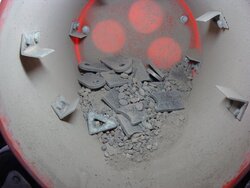
Made a parts tumbler out of a $3 Home Depot Bucket and a $25 Harbor Freight drill. The big wheel is from an A/C unit I scrapped. I take my small plasma cut parts right off my CNC table and throw them in there and then turn it on for an hour or 2. The parts come out slag free and with a nice sand blasted like finish.
Attachments
Elite Explorer members see no advertisements, no banner ads, no double underlined links,.
Add an avatar, upload photo attachments, and more!.
- Joined
- June 16, 2003
- Messages
- 31,619
- Reaction score
- 3,287
- City, State
- Humboldt, KS
- Year, Model & Trim Level
- 2000 Mounty
Brian,is that just gravel out of the yard? 
Wonder if a big 55gallon plastic barrel would hold up to larger parts? That is pure genius though, I like it.
Wonder if a big 55gallon plastic barrel would hold up to larger parts? That is pure genius though, I like it.

Similar Threads
- Replies
- 3
- Views
- 3,848
- Replies
- 0
- Views
- 525
- Replies
- 15
- Views
- 7,736
- Replies
- 10
- Views
- 21,838

