RockRangerII Refresh | Page 10 | Ford Explorer Forums - Serious Explorations

  • Register Today It's free!

RockRangerII Refresh

I am going to be going through my 93 ranger and giving it a refresh. I bought the truck in late 2004. Other then a rancho lift kt it was an all stock stripped truck with a 4.0 manual trans and tcase. No AC cruise or power windows. The perfect basic wheeling rig.

Here are the specs of how the truck currently sat before this refresh.

4.0V6 all stock
Stock 5 speed
d.d. machine duel case setup with manual 1350 front and 1354 rear.
Front axle is a 1984 Jeep wagonner dana 44 converted to 5 on 5.5 bolt pattern 4.88 gears and an Aussie locker
Three link front suspension using 8" skyjacker TJ springs.
Rear axle is a 1992 explorer 8.8 4.88 gears and welded spider gears.
63" Chevy springs with a bellteck shackle.
BroncoII tank behind the rear axle
Warn 9.5 XP winch behind the front grill.
Interior roll cage
37" MTR on 17" steel rims

11806351705_12f3ea8e7c_c.jpg

Untitled by dresselhausfc, on Flickr

I took the truck down to King of The Hammers and few years ago and did some wheeling and managed to crush the bed good. Broke both front hubs and all 4 front axles, bent the rear driveshaft and ripped a shock mount off. Due to life getting in the way it sat on the trailer for 18 months before I even touched it again. Now I plan to give the truck some love and get it back on the trials again.


Join the Elite Explorers for $20 each year.
Elite Explorer members see no advertisements, no banner ads, no double underlined links,.
Add an avatar, upload photo attachments, and more!
.


You don't need stiffer springs for that, you probably just need some shocks with stiffer compression valving.


Join the Elite Explorers for $20 each year.
Elite Explorer members see no advertisements, no banner ads, no double underlined links,.
Add an avatar, upload photo attachments, and more!
.


Would the more compression valving also help the body lean around corners? Taking a turn at any type of speed and the truck is leaning hard. I do like how the front currently works in the rocks. If I could make it so I could get rid of sway on the road (add a front swaybar) and then make it so I could get some more speed in the open desert I would be happy. My 10 year old white rocket shocks could be a problem.


I'm no shock tuning guru, I only understand a little more than the basics, but I think slow shock shaft speed like leaning in turns could be attributed to both soft compression and the rebound being too fast. But I'd also think you want fairly quick rebound so the tires easily drop into holes when rockcrawling. Either way, I hear pretty often that a good rule of thumb regarding spring rate is to use the lightest rate possible that still gives the ride height you want. I would definitely start with replacing those shocks.


Yeah firmer compression would definitely help the on road feel and bottoming. Rebound won't have much effect in the rocks because of slow speed. I agree that slower rebound would help on the road too. I bet your current shocks are just beat and not dampening. You could add a antirock too. Soft springs are where it's at in the rocks IMO.


If shocks and coils are the same as coil over shocks, then you should set up the shocks for highway and go fast dirt driving. That's what I ended up doing and it works great. There was no difference in slow, rock crawling type driving, except the truck feels a little more stable.

I learned mostly all I know about shocks from Khris (sirhk100). There is a bunch of information about shock dampening in my SAS thread. Starts on page 30. I originally went with a light compression and lighter rebound. Did not work at all as I was constantly bottoming out. Re-valved shocks with a medium to hard compression and medium rebound. Works great. I am sure a shock tuner could do a much better job, but I am happy with how it functions.


A rare 2 ranger sighting at koh. Tbars needs to chime in with his even rarer 3 ranger pic:D
 

Attachments

  • 20150203_094449.jpg
    20150203_094449.jpg
    91.8 KB · Views: 425


What no umbrella? :dunno:


Could've used it out there...got a little toasty during the day then you freeze your ass off at night. I have a couple broken (thanks to the wind) patio umbrellas that I was going to make one good one from but they are too far gone. Might buy a new one and make a holder that mounts to the hitch or make some kind of canopy...we'll see.


Could've used it out there...got a little toasty during the day then you freeze your ass off at night. I have a couple broken (thanks to the wind) patio umbrellas that I was going to make one good one from but they are too far gone. Might buy a new one and make a holder that mounts to the hitch or make some kind of canopy...we'll see.

You need the auto mo brealla:D


Sorry Matt for the Hi Jack:(


That's pretty much what I was going to make and/or a mounting point in the bed somewhere.

Here's another pic I got of you Matt coming up whatever trail that was we were on.
 

Attachments

  • 20150204_100851.jpg
    20150204_100851.jpg
    92.9 KB · Views: 404


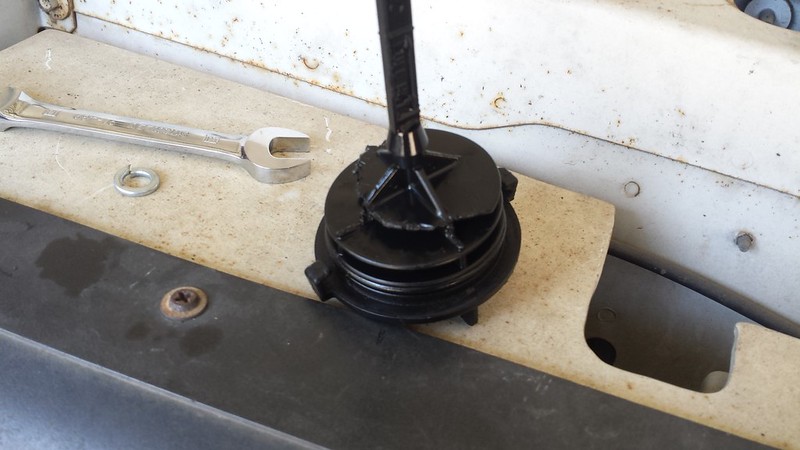
Been doing a few things to the truck. The York mount I built previously allowed the pulley to make contact with the hood when flexed up. I built a new bracket lowering the pulley another quarter inch. Hope that is enough cause that is as low as I can go. It is so tight I had to modify the PS cap so I could get it off with compressor mounted. I also had to counter sink one of the bolts grind a bit on the bracket to get the PS open.

20150313_121841 by dresselhausfc, on Flickr

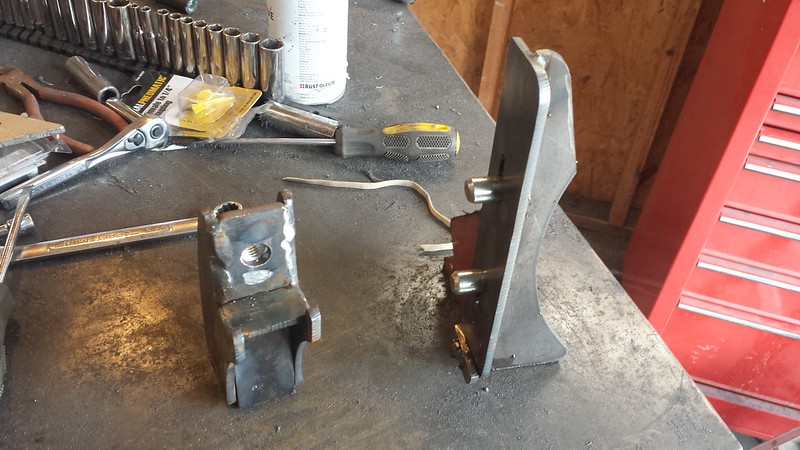
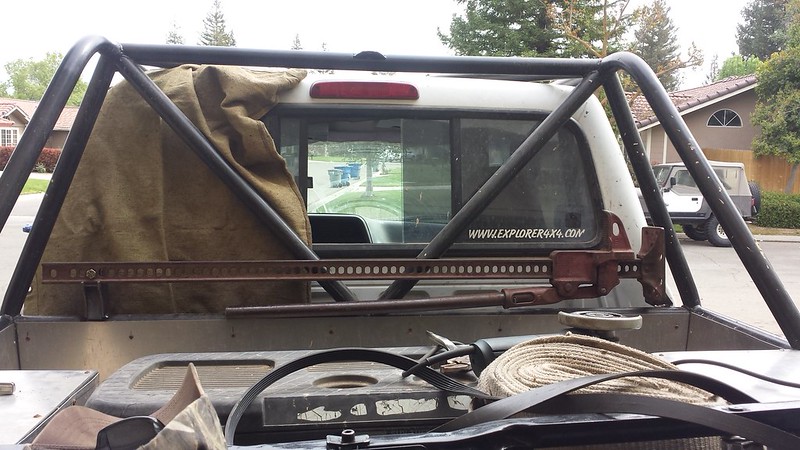
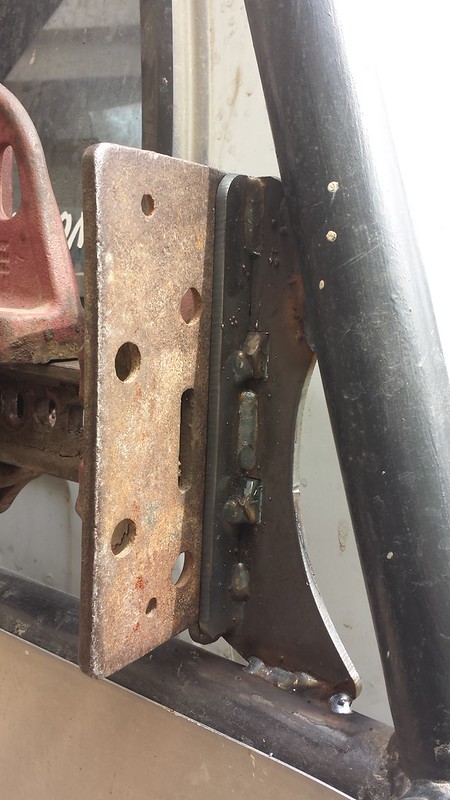
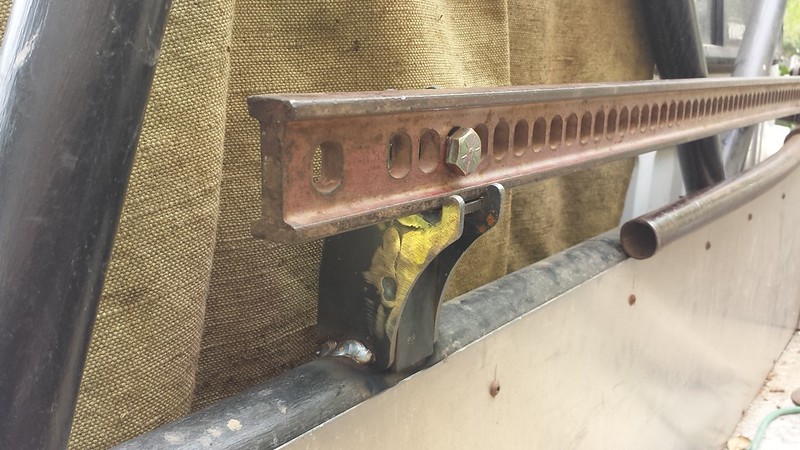
I also made a mount for my hi lift jack. A 60" jack is hard to make fit but was able to mount it across the bed under the back window. I did not want huge brackets that might be in the way if I ever need to take it off and haul other items. I ended up capturing the base plate with two cut off bolts through existing holes. The other end drops onto a bracket and then a bolt holds it. I plan on changing the bolt eventually to make for toolless removal.

20150317_113753 by dresselhausfc, on Flickr

20150317_120709 by dresselhausfc, on Flickr

20150317_120725 by dresselhausfc, on Flickr

20150317_120756 by dresselhausfc, on Flickr


Smart and simple, I like it.


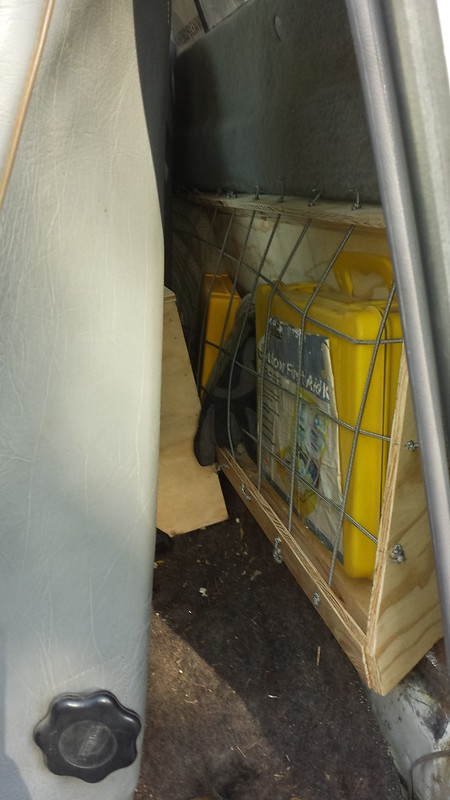
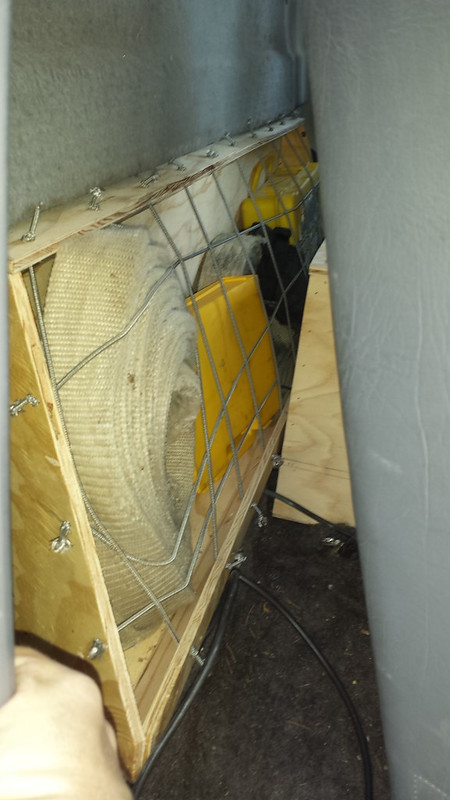
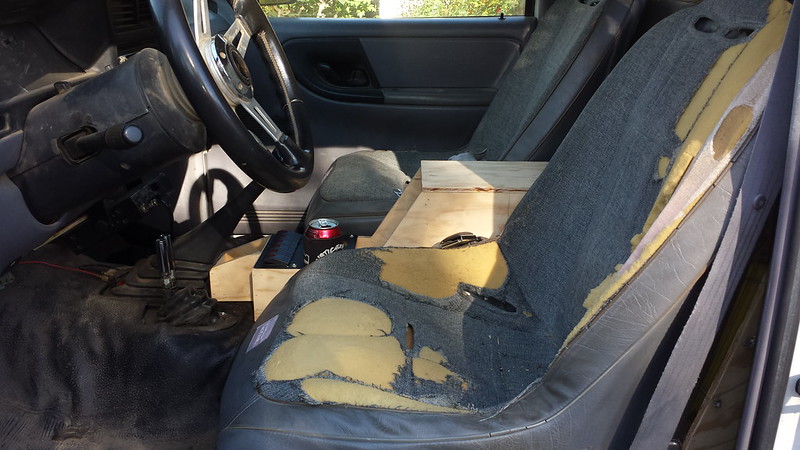
The interior of the truck has been sparse. I added some aftermarket seats and hate them. The fabric on them began failing quickly after they were installed. They are on the list to be replaced but haven't yet. Having a standard cab and stuffing things behind the seats has always been a challenge. Anytime I need something I slide the seat forward and then everything falls down and has be reorganized before the seat can go back. So I built a box out of some ply with a grid of bungee cord to hold everything in place. I used wood this round as a proof of concept to see how I like it and what changes I will make after using it a while. I used wood as it is cheaper and faster for me to work with. The next one will be made of steel and painted.

20150330_165646 by dresselhausfc, on Flickr

20150330_170543 by dresselhausfc, on Flickr


Brilliant. I have an extended cab and it drives me nuts keeping stuff back there. I want a tool box but I don't want to give up bed space. This is a good solution. Especially if the jump seats would still work.

Are you selling the tranny mounts?


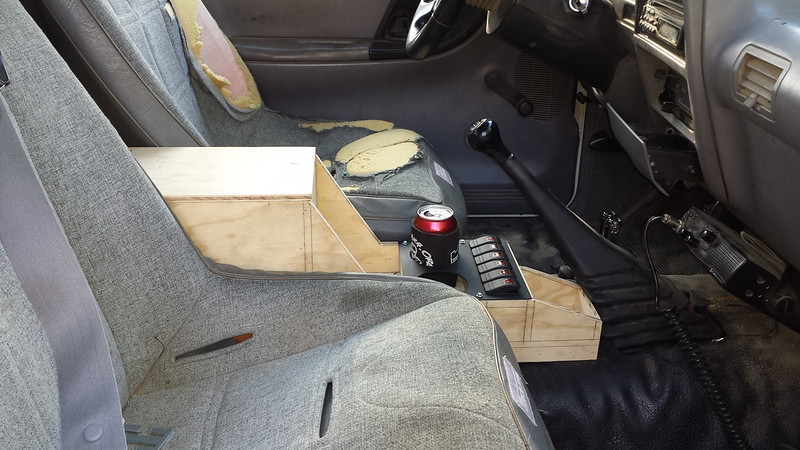
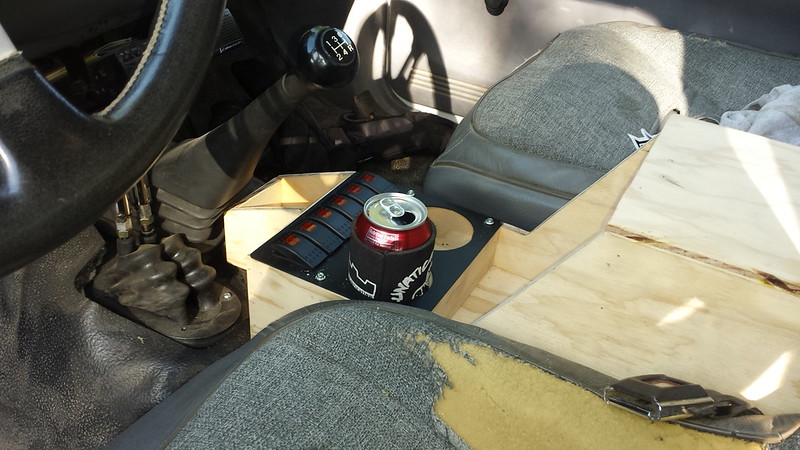
I never had a center consul once I swapped to bucket seats. I had some cheap pepboys cup holders but that was it. I again made it out of wood so I could see what I liked and didn't for the next steel version. I needed a spot to add some switches as well. These switches are in easy reach. Time will tell if they get hit to much on accident to stay there in the final version.

20150330_171930 by dresselhausfc, on Flickr

20150330_165602 by dresselhausfc, on Flickr

20150330_165617 by dresselhausfc, on Flickr


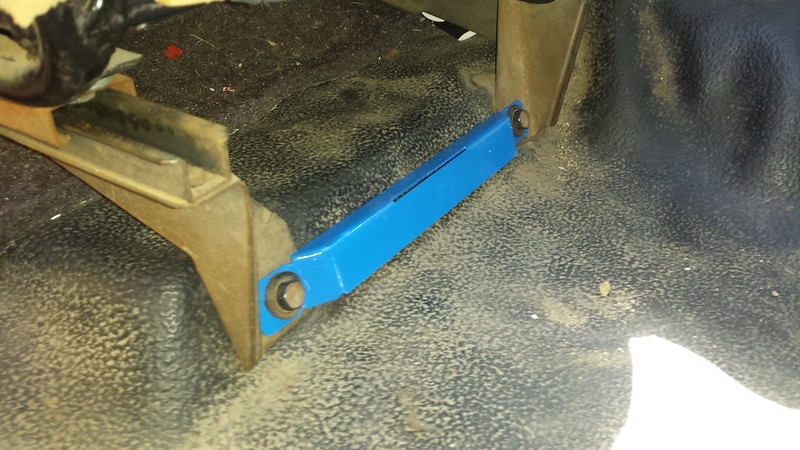
Needing a place for a flashlight I was talking with a friend and he said some land cruiser guys make a mount that goes to the front seat mounting bolts. So I drew up a bracket but a bend in it to give it some strength and now have a mount I can get some maglight mounts and a maglight and it will always be in easy reach. One for each the passenger and driver sides. Also might mount a fire extinguisher to one of them.

20150330_120225 by dresselhausfc, on Flickr

20150330_151034 by dresselhausfc, on Flickr

Driver
20150330_151550 by dresselhausfc, on Flickr

Passenger
20150330_160100 by dresselhausfc, on Flickr


Brilliant. I have an extended cab and it drives me nuts keeping stuff back there. I want a tool box but I don't want to give up bed space. This is a good solution. Especially if the jump seats would still work.

Are you selling the tranny mounts?

Yeah I can do a transmount. I have to see how much metal I have left. If I don't have enough it will be a bit till I get more as I am heading out of town and won't have time to get anymore till I get back in town.


Rad. I would like to get one from you in cSe I need to redo my tranny crossmember when I sas.


Join the Elite Explorers for $20 each year.
Elite Explorer members see no advertisements, no banner ads, no double underlined links,.
Add an avatar, upload photo attachments, and more!
.


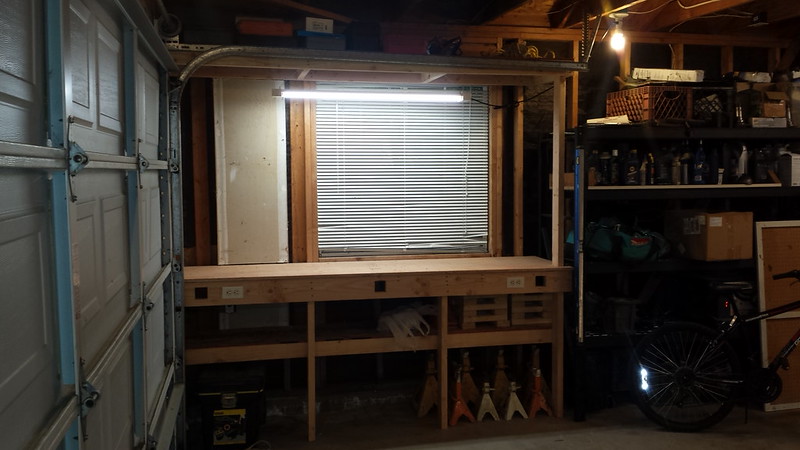
Got a little time to work on the ranger and the garage. First I am always wanting more workbench space so I built one. I added plugs to the front to make plugging in tools easy. In addition I cutout holes that will be for three receiver hitches. Plan is to mount a vice and other accessories on 2" tube that can slide in and mount to the workbench but be easily removed when not needed. I also added a shelf even with garage door track for storage up high of seldom needed items. Also made a good place to hang a light from.

20150507_180848 by Matthew Dresselhaus, on Flickr

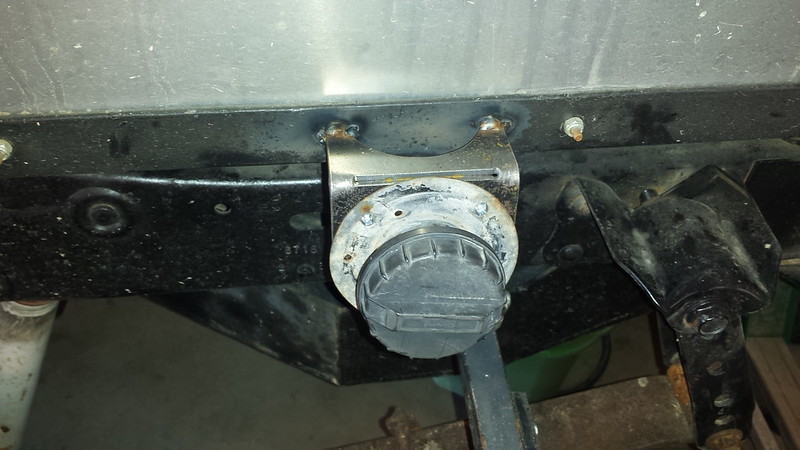
Next I made a mount to hold the gas filler and cap. They have been flopping around sense I built the bed.

20150509_135540 by Matthew Dresselhaus, on Flickr

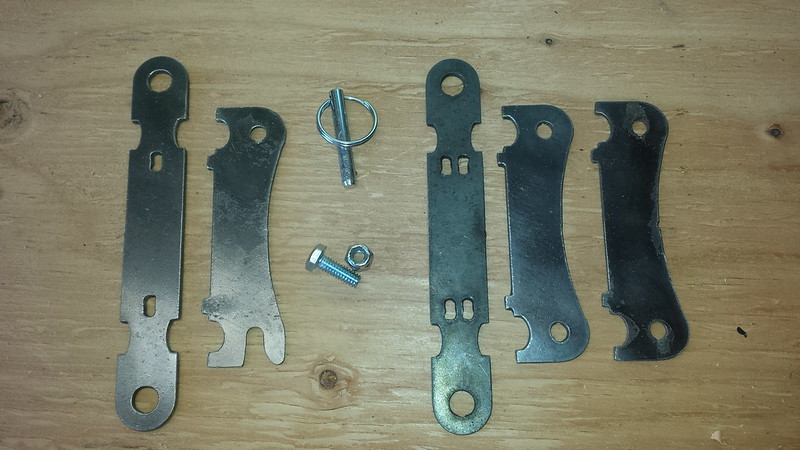
I haven't had a fire extinguisher in my truck for a while. It needed to be easy to access and not buried behind the seat so I drew and cut these brackets.

20150509_133008 by Matthew Dresselhaus, on Flickr

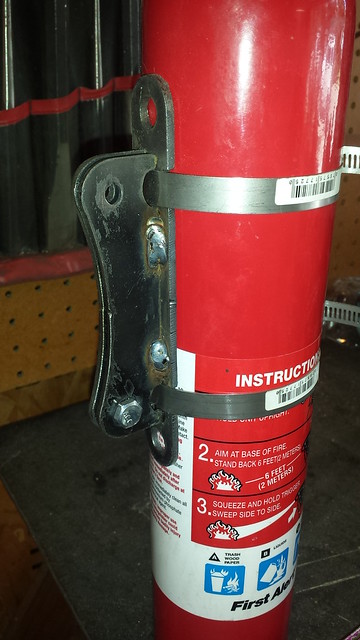
It is designed so either side can be bolted or hose clamped on. It could be used for more then just fire extinguishers. I used hose clamps to mount a fire extinguisher to one side.

20150509_135443 by Matthew Dresselhaus, on Flickr

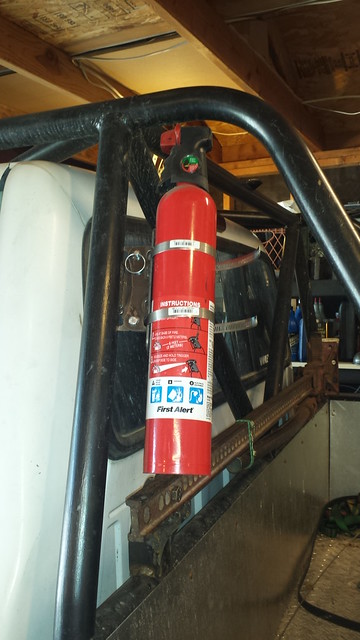
The other side I left the plate off and welded it directly to cage. Pull the upper pin out and it drops out and is ready for use. No tools needed to remove it.

20150509_135339 by Matthew Dresselhaus, on Flickr


Back
Top