P. doggy
Well-Known Member
- Joined
- April 24, 2006
- Messages
- 109
- Reaction score
- 3
- City, State
- Gillette, Wy
- Year, Model & Trim Level
- 2002 UW Ed.
I know this has been posted before, but here is the post with pics and a better title for those searching.
This is the procedure I used on a 2002. It should work on up to a 2005. These are the steps I followed. I am not saying this is the best and this is just a guide. Give your self about 2-3 hours to be safe.
1.Remove Dash. Start by removing the dash piece around the radio, center vents and air control. I applied a flathead screwdriver to the bottom of the plastic dash piece and pried up. This might leave a small mark in the dash piece below it, where the shaft of the screwdriver rests. Be careful. The dash should pop out. It should gradually start popping off. There are about six pops (clips) that should happen.
2. Mount the switch. I wanted mine in a easy-to-reach spot and visible. Since I have an XLS, the spot in the pics works great.
It is also easy to replace the small dash piece if needed. I also used a lighted switch, so I needed power for the light. I used the second wire from the right on the wiring harness to the 4x4 option buttons.
4. Run the wiring. I grounded my switch out to the radio (yellow wire). The red wire is the power wire spliced into the wiring harness mentioned above. I ran it to the power input on the switch.
The acc. or load wire on the switch, I ran behind the glove compartment. You can make the glove comp. swing all the way down by squeezing the catches inward.
After it is all wired, check the switch. Turn the key to the on position and check the switch. Should light up. Carefully replace the dash piece. Make sure not to pinch any wires. Close the glove compartment.
5. Find the Wire. If you remove the step plate on the passenger side, there is a wire channel underneath. You will also want to pull off the lower plastic trim piece, on the far right-hand side, under the glove comp. Remove the top cover of the wire channel; it is black and made of plastic. This will now show 2 bundles of wires; one large and one small. You want the small bundle.
The plain brown wire is the one of interest.
6. Install relay and wires. Cut the brown wire. Strip the ends and crimp or solder on a wire to both sides of the brown wire. There should be three bolts where you pulled off the plastic under the glove comp. One should be bare. This is where I mounted my relay and grounded out my relay.
If you do not have a mount, you can it tuck back in the body. I used a 12V/30A relay. In this photo,
Yellow = Ground
Green = Switch
Black = Input from brown wire (runs toward rear of vehicle)
White = Output to brown wire (runs to front of vehicle)
7. Check. After it is all hooked up, check it out. Start the vehicle. If the light is on, on the switch, all 4x4 options should work. If the light is off, it should be 2x4.
8. Put the plastic back on. Take for a test drive. Should work.
Notes. You now have new feature. You can still get the transfer case to shift into low. 2x4 Low! With the tranny in Neutral and with your 4x4 switch turned off, press the 4x4 low button. You should have low range but no 4x4. I have ran this mode several times and have no adverse effects. Feel free to ask questions. I am always glad to help.
Have Fun, Jared G.
This is the procedure I used on a 2002. It should work on up to a 2005. These are the steps I followed. I am not saying this is the best and this is just a guide. Give your self about 2-3 hours to be safe.
1.Remove Dash. Start by removing the dash piece around the radio, center vents and air control. I applied a flathead screwdriver to the bottom of the plastic dash piece and pried up. This might leave a small mark in the dash piece below it, where the shaft of the screwdriver rests. Be careful. The dash should pop out. It should gradually start popping off. There are about six pops (clips) that should happen.
2. Mount the switch. I wanted mine in a easy-to-reach spot and visible. Since I have an XLS, the spot in the pics works great.
It is also easy to replace the small dash piece if needed. I also used a lighted switch, so I needed power for the light. I used the second wire from the right on the wiring harness to the 4x4 option buttons.
4. Run the wiring. I grounded my switch out to the radio (yellow wire). The red wire is the power wire spliced into the wiring harness mentioned above. I ran it to the power input on the switch.
The acc. or load wire on the switch, I ran behind the glove compartment. You can make the glove comp. swing all the way down by squeezing the catches inward.
After it is all wired, check the switch. Turn the key to the on position and check the switch. Should light up. Carefully replace the dash piece. Make sure not to pinch any wires. Close the glove compartment.
5. Find the Wire. If you remove the step plate on the passenger side, there is a wire channel underneath. You will also want to pull off the lower plastic trim piece, on the far right-hand side, under the glove comp. Remove the top cover of the wire channel; it is black and made of plastic. This will now show 2 bundles of wires; one large and one small. You want the small bundle.
The plain brown wire is the one of interest.
6. Install relay and wires. Cut the brown wire. Strip the ends and crimp or solder on a wire to both sides of the brown wire. There should be three bolts where you pulled off the plastic under the glove comp. One should be bare. This is where I mounted my relay and grounded out my relay.
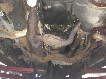
If you do not have a mount, you can it tuck back in the body. I used a 12V/30A relay. In this photo,
Yellow = Ground
Green = Switch
Black = Input from brown wire (runs toward rear of vehicle)
White = Output to brown wire (runs to front of vehicle)
7. Check. After it is all hooked up, check it out. Start the vehicle. If the light is on, on the switch, all 4x4 options should work. If the light is off, it should be 2x4.
8. Put the plastic back on. Take for a test drive. Should work.
Notes. You now have new feature. You can still get the transfer case to shift into low. 2x4 Low! With the tranny in Neutral and with your 4x4 switch turned off, press the 4x4 low button. You should have low range but no 4x4. I have ran this mode several times and have no adverse effects. Feel free to ask questions. I am always glad to help.
Have Fun, Jared G.


")