I’ve read through the entire thread a couple of times. I’ve seen some folks indicate that this project went smoothly and without a hitch. Others have had a hard time. Having just finished this project I have several comments. Perhaps more of a long rant...sorry.
First, I would say that to take on this project you need to be brave and be lucky. I say “brave” because until you complete the project you will not know what you are getting yourself into. I say “lucky” because it is very clear that depending on your vehicle you could be have it easy or this could be the project from hell. I’ve pretty much come to this conclusion after having spoken with have a dozen mechanics who have perform rear wheel bearing replacement on 3rd generation Explorers. In fact, I have been told that the Expeditions that followed the Explorer with independent rear suspension have the same exact problem.
This was my experience.
The pinch bolts were not an issue at all with me. Probably thanks to this thread showing how to deal with the pinch bolts.
Disconnecting the parking brake cable wasn’t too difficult as I used the suggestion to pull down on the cable just under the vehicle below the driver’s seat then inserting a pin into the appropriate hole in the parking brake mechanism in the cab. This is actually the procedure that Ford provides. The pin will remove tension on the parking brake cable giving you enough slack to disconnect the cable ends from the “pinchers” on the brake assembly of the spindle/knuckle.
I have a 4 wheel drive vehicle. There is a slight difference from the 2 wheel drive models. On my vehicle there are wheel slippage sensors on the rear wheels. Basically, there is wiring with a magnetic pickup sensor that must be unscrewed from the spindle/knuckle assembly. As I recall, it is a simple 10mm bolt that is removed then the magnetic sensor just comes right off. Very easy. As far as I can tell, this is the only difference between the 2 and 4 wheel drive vehicles for this project.
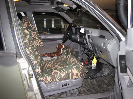
Using a hub puller to remove the spindle/knuckle assembly off of the axle spline was VERY, VERY, VERY difficult. Did I say VERY VERY VERY difficult? From this thread you’ll note that for many it wasn’t a big deal to get the assembly off. Whereas for others, it was a problem. A big problem. In fact, I sensed disbelief by a few who probably found this part of the process very easy. That is, they asked to make sure the axle nut was removed. I assure you, the folks who were having a problems really were struggling. This is part one of why I say you need to be brave and lucky. With a rented hub puller set up on the right wheel assembly and ready to pull I cranked on the hub puller bolt. I could NOT turn it at all. I then replace my wrench with a breaker bar to get more leverage. I had to have someone use a long screw driver to hold the hub puller to keep it from turning as I tried to turn the hub puller bolt with a breaker bar. The bolt just would not turn. It felt like I was about to strip the threads out of the hub puller bolt. Trust me. I do have experience using a hub puller. I know what easy feels like and what VERY, VERY, VERY difficult feels like. You can read about that in
this thread.
I was getting ready to give up. However, I decided I would do a couple of things. First, I tried to spray PB Blaster on the axle spline. I let it soak. I tried to turn the hub puller bolt again. Again, no dice. I’m positive that hub puller was getting ready to fail. Next, I used a heat gun and tried to heat up the hub and axle spline. The heat gun got the temperature up to around 400 degrees. Not really hot but perhaps enough to work on the microscopic gunk holding that hub on. I sprayed it down again with PB Blaster and let it soak. Then one last try before giving up. I really pushed hard on the breaker bar and my helper really struggled to keep that hub puller from rotating on the hub/spindle/knuckle assembly. Dang, that thing turned just the slightest amount almost to the point where you wondered if it really turned or if you started to strip the threads on the hub puller bolt. Slowly but surely it became evident that the hub puller was working. Let me tell you….that SOB was hell to turn each and every turn to the last bitter thread. The hub puller bolt was within 1/8” of running out thread before that sucker finally separated from the axle spline. With one assembly off the car I was confident that this project might have a good conclusion after all. I was looking forward to the left assembly being easier than the right side. Guess what? No luck either. The left SOB also fought me to the bitter last thread. These hub/spindle/knuckle assemblies should have come off with 5 minutes work each. I spent two hours getting those suckers off. I tell you my story to give hope to those who also were not lucky and found their assemblies pretty much impossible to come off. What was disappointing was that the front knuckle assemblies came off with very little effort whereas the rears were the SOBs from hell. Keep in mind that my vehicle is a garage kept Florida vehicle that has never seen snow/ice/salt nor lake water, etc. Remember, you have to be brave and lucky. But wait, that isn’t the end of my saga. Part II of why you have to be brave and lucky…
With the hub/spindle/knuckle assemblies off the vehicle I thought the hard part was over. That is, just drop them off with a shop and have them press out the old bearings then and press in the new ones. Drop them off at the shop and $30 - $40 per side and done. WRONG! Prior to removing the assemblies I called half a dozen shops to get pricing as well as to insure the shop was competent. Well, I thought I found the perfect place. A small private shop where the owner ran the shop and only wanted $25 per side. What I liked about this guy was that he was so well thought of in the area that he had his own weekend “mechanic show” on the radio (Atlanta area not “po-dunkville”).
So I drop them off and decide to wait for them. The first thing the “radio expert” does is try to whack out the hubs with a socket and baby sledge hammer a couple of times. When that doesn’t work he tells me that I’ll need to remove the brake pads so that he can press the hubs out. Press out the hubs…what a novel idea. At this point I’m thinking this guy doesn’t have a clue. Banging them out with a sledge hammer???? Ugh! Disappointed I decide to go home and research again a shop to do the work and at least look into this “sledge hammer” business. After re-reading this thread I note that there were some who did beat them out with a hammer. Hmm, maybe the “expert” really did know what he was talking about. From phone calls to other shops I get one of several responses (1) bring them in so we can look at your assemblies – meaning they don’t have a clue, (2) the backplate needs to be cut off and the hubs will get destroyed so bring new hubs with you, (3) we only do that work with the assemblies on the vehicle using our parts, (4) we can’t promise when we could get to it, (2) It will cost $120+ per side.
It was all very discouraging. I decided to give the “expert” another chance. I took off the brakes and unscrewed the backplate so that he had room to work and dropped them off. Half a day later, I called and was told that he could do them but only if I brought in new hubs because the old hubs will get destroyed since he didn’t have the right adapters for his press. At this point, I had enough of the “expert”. What really ticked me off about this guy was the conversation I had with him when I dropped the assemblies off to him the second time. I tried to give him some information I garnished from this thread. The idea was that since he didn’t have specific experience with 3rd generation Explorers I would help him understand the potential problems and the way to get around them. He cut me off mid-sentence and told me: “I don’t like to be told how to do my job. I’ve pressed thousands of wheel bearings and I can do this with my eyes closed. Don’t worry. I know what I’m doing”. Arrogant and unwilling to learn something new make for a poor choice of mechanics.
I decided I needed to find someone who specifically did this job on 3rd generation Explorers. The first place I found wanted $120 per side. This after all the work I did to get the assemblies to him. He wanted to cut the back plate and he said he would destroy the hubs in the process. Next!
The next place was promising. He said it would cost $50 per side. I dropped them off and kept my fingers crossed. As soon as I got home I received a phone call from him telling me that he needs to use a torch to get the hubs out and it would take one hour per assembly. Also, he indicated that I would need to supply new hubs. Next!
Very frustrated, I decided to go to the local Ford stealership. Of course the stealership wanted $150 dollars per side. Honestly, if felt as though they didn’t want my business and gave me the typical story about how the rear wheel bearings on a 3rd generation Explorers are a nightmare. Also, they indicated that they just couldn’t get to it any time soon. It was clear to the stealership that I wasn’t going to bite. He suggested I go down to the local NAPA store as they sometimes sent work to them. I previously called this NAPA store but was told they didn’t have a press nor shop. Confused, I drove down there anyway as Ford insisted there was a small shop behind the store.
Of course, when I got to NAPA I was told they did not have a shop. I explained to them that Ford told me they sent work to them. The NAPA guy says “That’s right. They do. We send the work to another NAPA store 20 miles away where they have a machine shop”. I decide this remote NAPA store with machine shop HAS TO BE the solution. That is, real experience with these assemblies and perhaps at a reasonable price. I take the 20 mile drive to this “po-dunkville” town with the NAPA machine shop. When there I get told $50 per side but the machinist just left for lunch for an hour. I wait an hour then the machinist shows up. He takes one look at my assemblies and says “those are from an Explorer, aren’t they?”. Clearly, this guy knows exactly what he is looking at and what it takes to do the job. Of course, he tells me it will cost $65 per side not $50. This is $15 to $30 more per side than I expected. However, it is clear this guy knows exactly what he is doing.
At this point, I REALLY, REALLY, REALLY need to get my car back together so I used this guy. There were no better alternatives. The best part of using this guy was he was willing to work with me. That is, press out the hub and bearing. Install the new bearing but DO NOT install the hub until I install the parking brake pads. Installing the brakes only takes 10 minutes if the hub is not in your way.
I waited while he got to work right away. It took him 1 hour 40 minutes to get the hubs out and install the new bearings. He gave me the hub-less assemblies for me to take home to install the brakes. He wasn’t done with the hubs though. Apparently, he had to cut the hubs out of the spindle/knuckle. He cut out the side of the bearing then removed the bearings and separated the hub from the spindle/knuckle. Then he had to cut the outter race to get it out of the spindle/knuckle. After installing the bearings and giving them to me he had to cut off the inner race from the hub. He did this whilst I went home to install the brakes. When I came back he simply pressed in my old hubs. It took him 5 minutes. I asked him if this is typical for the Explorer. He indicated that you have to be lucky. Half the time he has to cut them out as described above. He wasn’t lucky with mine and it probably spent 2+ hours for both assemblies. Apparently, the hubs can get “welded/bonded” to the bearing. There is no way you could have pressed the hubs out in this case. Certainly, banging them out with a hammer would have been impossible. This guy proved to me that a skilled person who knows what they are doing with the right tools can do the job without cutting the backplate or destroying the hub. I learned that it can be very difficult to find someone who really knows how to do these assemblies when you are not lucky.
My long winded rant is not meant to discourage anyone from attempting this job. I just wanted to share my experience with you and explain what I meant when I said you have to be brave and lucky to pull this off. While pulling the assemblies off of the axle spline was difficult the second part in finding a service to press the bearings was a nightmare and the hardest part of the job. This, even though I paid someone to do the work.
Reassembling the vehicle was a piece of cake. I torque everything to spec. I used Locktite blue on all nuts/bolts EXCEPT for the hub nut (35mm). Also, I put lithium grease on the control arm stubs that go into the pinchers. I put anti seize grease on the axle spline.
Total cost was $240 for both sides. That breaks down to $55 for Timken bearings and $65 labor for bearing removal/install job per side. I rented for free a 250 ft-lb torque wrench and the hub puller from Advanced Auto.
p.s. Thanks to Pontisteve for answering some of my questions in private messaging.