Safety
Take the time to wash under your truck. You'll be under there alot and it will be time well spent. Gloves and eye protection are a must. Don't want to end up having to get your eye's drilled. Disconnect the battery just in case and removing the gas tank is a MUST! Don't skip around this at all.
Tools needed
various drillbits(at least a 3/8")
a good drill
1 1/2" hole saw
jack stands
various sockets and wrenches
zip ties
C-Clamps
FlatHead Screwdriver
Grinder
Right Angle Drill Kit
REAR Drivers Side Mounts
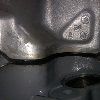
The first thing you MUST do is drop the gas tank and remove the Ebrake cable. There is no room to fit the socket and bolt into them not to mention the fact that you've have to drill holes right next to the tank. Follow the instructions in the manual to do this. Since you've removed the tank this is also a great time to replace the fuel pump. Just a suggestion. Next you'll want to remove the bolt for the spring hanger. You'll only need to remove the front one. Keep this bolts as they will be reused. Put the mount up to the frame and put the bolt back in. Put a clamp onto the mount to hold it into place, and make sure it's on straight as this will decide how your bars are mounted. After double checking that everything is flush against the frame transfer the holes from your mounts onto the frame. Remove the mount and drill the frame. Take your time and before you start make sure all the fuel lines are out of the way. This is also where the Right Angle drill kit comes into play. There is not enough room between the frame and the body to fit a drill and the bit. Use a very small bit and the drill kit to drill the two holes in the top of the mount, then from the inside of the frame drill out the holes till the bolts fit. After these are done you'll be able to do the one on the bottom no problem.
Dead Link Removed
Front Drivers Side Mount
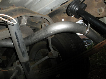
Start off by removing the bolt on the Transmission Crossmember(Save this bolt) and on the Fuel Filter bracket. While the bracket is off this is also a great time to replace the fuel filter. You'll have to take the fuel filter bracket and grind off the rear bolt. Next drill out the hole so a 3/8" bolt will fit. Do the same with the hole in the frame. Take the time here to zip tie all the fuel lines as well as any other wires out of the way. Put the mount onto the frame holding it on with the transmission cross member bolt and a C-Clamp. Once again make sure everything is flush and mark your holes. Remove your mount again and drill your holes. After you drilled you can put the mount back up, making sure you use the 3/8" bolt supplied rather than the stock bolt for the fuel filter mount.
Dead Link Removed
Dead Link Removed
Finishing Drivers Side
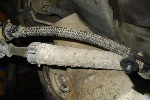
Now that all your holes are drilled put the mounts into place and put in the bolts. DO NOT TIGHTEN THEM! Leave them lose as this will help with the install of the slider. With help from a friend put the slider into the mount till the holes line up. It may take some taping on the mounts and the sliders, but if all the holes are drilled correctly they will fit. After the sliders are in double check the mounts are flush to the frame. If they are go ahead and tighten down all the bolts, reconnect your Ebrake and gas tank.
Dead Link Removed
Passenger Rear
Most of this mount is done like the drivers side. You'll need to remove the spring hanger bolt and put the mount up. Put the bolt back into place and make sure all is flush. If so mark your holes and remove the mount. Here is where you can make life easy on yourself. There is room to drill with the muffler in place, however if you take the time to drop the muffler you'll open up a ton of room that will save you time. It's not a must, but it's what we did to save us time. Drill the holes on the top of the mount first with the right angle kit and a small bit. If you dropped the muffler you're now able to remove the right angle kit and drill from the inside of the frame out slowly increasing the size of the bit as you go. If you left the muffler in place you'll need to continue to use the right angle kit, and do your best to keep the bit from moving. It will want to drill at an angle due to the bit not fitting and the frame being double reinforced where the bolts for the mount are. Take your time none the less. Once the top holes are drilled do the same for the bottom one.
Passenger Front
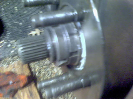
This one by far is the tuffest to do. Take your time and double check everything so you don't have to do it twice. It is also suggested that you remove the cat back, but is not required. We did not, but just keep in mind that it's very close as your drilling. Start off by removing the upper bolt on the transmission crossmember(save this bolt) and then putting the L-shaped bracket on, making sure the hole that is in the center is on the cross member and the one that is off center is going to the mount. You'll next drill a 1 1/2" hole into the cross member allowing you to get a socket onto the bolt that will go in this area. Next twist and turn the slider so the bracket will fit through the cross member and flush against the frame. Tighten down the mount and transfer the holes onto the frame. Next remove the mount and drill your holes. Take your time and make sure you do not drill into the cat back.
Dead Link Removed
Dead Link Removed
Finish the Passengers Side
Go ahead and put both mounts into place and put the bolts into place. DO NOT TIGHTEN THEM DOWN! As the same for the drivers side they may need to move some to allow the slider to fit into the mount. Do the same as the drivers side and slide the slider into place. Once it's in put the bolts into place and tighten. If you dropped the cat back and/or muffler put these back into place.
To finish you'll want to double check you didn't drill into anything that you shouldn't of and that the sliders don't interfere with anything. If not reconnect the battery and you're done. The steel on the mounts will bend somewhat to conform to the frame, however this is only making them stronger. The frame is helping strengthen the mounts. These were the instructions for a stock 1994 Explorer Sport, however they will change somewhat depending on your make/model and the mods you've done. Take your time and make sure your drilling into the correct spots. Don't rush as if you're off on the measurements the sliders may not fit into the mount. If you have any questions please email at
Leebo@explorerforum.com
Dead Link Removed
Dead Link Removed
This post will change as we find mistakes in me typing these instructions and changes in the product itself. I'm doing this after working from 9am on Monday till about 1am Tuesday morning. Add a three hour drive home and I've got a total of 4 hours sleep the past two day.
I'd like to thank Rick and Gloria for all you're help. I wish you two the best on the business and more so with the bundle on the way.
Take the time to wash under your truck. You'll be under there alot and it will be time well spent. Gloves and eye protection are a must. Don't want to end up having to get your eye's drilled. Disconnect the battery just in case and removing the gas tank is a MUST! Don't skip around this at all.
Tools needed
various drillbits(at least a 3/8")
a good drill
1 1/2" hole saw
jack stands
various sockets and wrenches
zip ties
C-Clamps
FlatHead Screwdriver
Grinder
Right Angle Drill Kit
REAR Drivers Side Mounts
The first thing you MUST do is drop the gas tank and remove the Ebrake cable. There is no room to fit the socket and bolt into them not to mention the fact that you've have to drill holes right next to the tank. Follow the instructions in the manual to do this. Since you've removed the tank this is also a great time to replace the fuel pump. Just a suggestion. Next you'll want to remove the bolt for the spring hanger. You'll only need to remove the front one. Keep this bolts as they will be reused. Put the mount up to the frame and put the bolt back in. Put a clamp onto the mount to hold it into place, and make sure it's on straight as this will decide how your bars are mounted. After double checking that everything is flush against the frame transfer the holes from your mounts onto the frame. Remove the mount and drill the frame. Take your time and before you start make sure all the fuel lines are out of the way. This is also where the Right Angle drill kit comes into play. There is not enough room between the frame and the body to fit a drill and the bit. Use a very small bit and the drill kit to drill the two holes in the top of the mount, then from the inside of the frame drill out the holes till the bolts fit. After these are done you'll be able to do the one on the bottom no problem.
Dead Link Removed
Front Drivers Side Mount
Start off by removing the bolt on the Transmission Crossmember(Save this bolt) and on the Fuel Filter bracket. While the bracket is off this is also a great time to replace the fuel filter. You'll have to take the fuel filter bracket and grind off the rear bolt. Next drill out the hole so a 3/8" bolt will fit. Do the same with the hole in the frame. Take the time here to zip tie all the fuel lines as well as any other wires out of the way. Put the mount onto the frame holding it on with the transmission cross member bolt and a C-Clamp. Once again make sure everything is flush and mark your holes. Remove your mount again and drill your holes. After you drilled you can put the mount back up, making sure you use the 3/8" bolt supplied rather than the stock bolt for the fuel filter mount.
Dead Link Removed
Dead Link Removed
Finishing Drivers Side
Now that all your holes are drilled put the mounts into place and put in the bolts. DO NOT TIGHTEN THEM! Leave them lose as this will help with the install of the slider. With help from a friend put the slider into the mount till the holes line up. It may take some taping on the mounts and the sliders, but if all the holes are drilled correctly they will fit. After the sliders are in double check the mounts are flush to the frame. If they are go ahead and tighten down all the bolts, reconnect your Ebrake and gas tank.
Dead Link Removed
Passenger Rear
Most of this mount is done like the drivers side. You'll need to remove the spring hanger bolt and put the mount up. Put the bolt back into place and make sure all is flush. If so mark your holes and remove the mount. Here is where you can make life easy on yourself. There is room to drill with the muffler in place, however if you take the time to drop the muffler you'll open up a ton of room that will save you time. It's not a must, but it's what we did to save us time. Drill the holes on the top of the mount first with the right angle kit and a small bit. If you dropped the muffler you're now able to remove the right angle kit and drill from the inside of the frame out slowly increasing the size of the bit as you go. If you left the muffler in place you'll need to continue to use the right angle kit, and do your best to keep the bit from moving. It will want to drill at an angle due to the bit not fitting and the frame being double reinforced where the bolts for the mount are. Take your time none the less. Once the top holes are drilled do the same for the bottom one.
Passenger Front
This one by far is the tuffest to do. Take your time and double check everything so you don't have to do it twice. It is also suggested that you remove the cat back, but is not required. We did not, but just keep in mind that it's very close as your drilling. Start off by removing the upper bolt on the transmission crossmember(save this bolt) and then putting the L-shaped bracket on, making sure the hole that is in the center is on the cross member and the one that is off center is going to the mount. You'll next drill a 1 1/2" hole into the cross member allowing you to get a socket onto the bolt that will go in this area. Next twist and turn the slider so the bracket will fit through the cross member and flush against the frame. Tighten down the mount and transfer the holes onto the frame. Next remove the mount and drill your holes. Take your time and make sure you do not drill into the cat back.
Dead Link Removed
Dead Link Removed
Finish the Passengers Side
Go ahead and put both mounts into place and put the bolts into place. DO NOT TIGHTEN THEM DOWN! As the same for the drivers side they may need to move some to allow the slider to fit into the mount. Do the same as the drivers side and slide the slider into place. Once it's in put the bolts into place and tighten. If you dropped the cat back and/or muffler put these back into place.
To finish you'll want to double check you didn't drill into anything that you shouldn't of and that the sliders don't interfere with anything. If not reconnect the battery and you're done. The steel on the mounts will bend somewhat to conform to the frame, however this is only making them stronger. The frame is helping strengthen the mounts. These were the instructions for a stock 1994 Explorer Sport, however they will change somewhat depending on your make/model and the mods you've done. Take your time and make sure your drilling into the correct spots. Don't rush as if you're off on the measurements the sliders may not fit into the mount. If you have any questions please email at
Leebo@explorerforum.com
Dead Link Removed
Dead Link Removed
This post will change as we find mistakes in me typing these instructions and changes in the product itself. I'm doing this after working from 9am on Monday till about 1am Tuesday morning. Add a three hour drive home and I've got a total of 4 hours sleep the past two day.
I'd like to thank Rick and Gloria for all you're help. I wish you two the best on the business and more so with the bundle on the way.
 ) If possible on my order please move it closer to the frame and closer to the body.