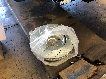
Thank you McSlug for taking the time to explain the reasons for using the soda bottle material as a spacer. I was probably more concerned about the curvature of the spacer than the thickness. This was a mistake because the plastic will easily conform to the diameter of the camshaft bearing. We don't drink sodas at our house so I don't know their thickness. I measured the thickness of the pill bottle with a micrometer to be 0.030 inches before use and 0.028 inches after. As you point out that is considerably thicker than needed but I don't think it's the reason that Cliff's cap broke. I think it was due to the cam being out of position and the cap bound when tightened. A much safer process is to only remove one cap at a time, insert the plastic and then loosely tighten preventing the camshaft from achieving an angle to the journals. However, in the future I will use thinner and more pliable plastic.