- Joined
- March 4, 2007
- Messages
- 26,320
- Reaction score
- 122
- City, State
- anaheim hills,california
- Year, Model & Trim Level
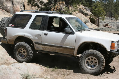
- 95 ranger 4x4/ 91 X 4x4
..This job was done on my 95 Ford Ranger 4x4 with no body lift and it has relocated spring hangers in the rear with Chevy springs on it so some stuff may be, or appear to be different than on your vehicle..
Disclaimer:
..This is just how I do it..Do so at your own Risk..
..This is not the safest way to do this so again, this is only what I did and you need to do what you can to protect yourself and be as safe as humanly possible...
___________________________________________________
The Cause
..It was that time of the season again and Smog was due on my Ranger..Although it is ODBII compliant, California sees it as ODB1 since Federal law did not require ODBII until the vehicle model years of 1996 cars and trucks..
..This is important Because 95 and older vehicles in Calif. are required to also take an "Evap" test (along with their Smog Test)..This is where they pump about 3# of nitrogen into your fuel tank in order to test your "Evap" system for leaks..(More info on Calif Smog Test can be found here .. )
..Although my Ranger had failed 3 years ago when the test started and I had replaced the Fuel Filler hose then, my Ranger failed the Evap test again this year...
..I've been asked how I replaced the Fuel Filler hose without removing the bed when I previously did the repair so this year I decided to show a couple ways of doing this all by yourself...
..It is much easier if you have someone help you remove the bed but I'll give you a couple options on how I do this and you can improve on how it is to be done safely..")
..This is a very dangerous and flammable area to be working in so take precautions and having plenty of fire extinguishers and whatever safety equipment you feel comfortable with having under these conditions....
___________________________________________________
The Fuel Filler Hose
..Since the "Evap" test has resulted in finding the Fuel filler hose is a common failure part, Ford raised the price of these to almost $500 and aftermarket out here is about $212 plus tax..
.This is a special hose as it is 2" on one end and 2-1/4" on the other..
...The last time I replaced this I found a deal at $150 but it only last 3 years while the OEM lasted many more than that but I surely was not going to pay $500...
..Another way to fix this in the past was to but a fuel rated 2-1/4" Gates 90* degree elbow (about $40 by itself) and then have a muffler shop make a coupler to go inside of the elbow and reduce down to go inside of the remaining 2" hose...
..I was all set to do that and thought that would be a nifty fix for around $80-$100 if you didn't have friends with a muffler shop...Hey, $50-$75 dollar savings isn't half bad...
..Well I did a little more researching and I found on one of the racing forums guys had recently found a deal on Ebay..I looked it up and found out who the supplier was and contacted them personally just to make sure this was right..
..This was $40.20, free shipping and arrived Tuesday when I ordered it Saturday afternoon..The only difference I could see between this one and the one I previously paid $150 for was it did not have a retainer on the bottom hose clamp to keep it from spinning while you were trying to tighten it..A valuable item yes but not over $100 worth..
..What the heck, I'll give her a try and if it last till my next "Evap" test in two years I'm money ahead....:biggthump
http://www.am-autoparts.com/Ford/Ra...opping&utm_source=google_base&utm_content=FMX
..This is their website and filler hose page..
http://www.am-autoparts.com/search.html?words=fuel+filler+hose&x=0&y=0

___________________________________________________
..How to remove just the filler hose without removing the bed..
..First you need to block the vehicle as needed, jack up the rear axle, and remove the drivers side rear wheel in order to better see and to gain some working room..
..After removing the tire, this view is easily seen from the wheel well looking at the Fuel Filler hose where it goes over the frame rail onto the neck of the fuel tank..This is where the damaged hose problem is almost always found, at the 90 going onto the neck of the fuel tank..

...This 90* area is a flex area which is like wringing out a wash cloth as there is flex in the hose between where it is attached at the bed to where it is attached at the tank..This 90 also sits right above the fill opening to the tank and is always subject to the fuel vapors in this spot...
...After taking all the safety precautions and also brushing the dirt away from the top of the tank with my hands I proceed to cut the hose as close to the neck on the tank as possible...This gives me more hand room to locate and un-tighten the hose clamp that is holding it on..

..After removing the remnant of hose that was left on the tank, you can see where it dry rotted at the elbow..

...Unlike the OEM hose I originally pulled 3 years ago, this one also cracked at the filler neck..

...I remove this part last as it helps keep the hose from flopping around when I'm cutting it in two at the tank...
..Simply remove the 3 Phillips screws and remember or mark the location of the clip for the fuel cap before removal..

..With the screws and cap removed..

..Let the remaining hose now drop to the ground and removal is complete..
___________________________________________________
..Install the new hose
..This is what the fuel filler hose looks like from behind the fuel door/gas cap area..Insert the end up to the fuel door opening as this will give you a hand on this end and I also start the 3 screws first to keep it from twisting while trying to work with the other end of this hose..

..Now carefully put the other end over the frame rail and attach it to the neck of the tank..Note the location of the nut on the hose clamp so you can tighten it from this side..

..Tightening this clamp can be tiresome but attention needs to be taken to do this properly...Take the time and make sure to do it right..
...Last time I had access to a couple long extensions and I actually ran those over the fuel tank to tighten it up...It was easier to do then but since I moved the hangers forward I lost access to easily tighten them up..
...Now go back to the fuel door and replace the hanger for the gas cap and tighten those 3 Phillips screws back up..
...That's all it takes to do this hose swap this way..
Disclaimer:
..This is just how I do it..Do so at your own Risk..
..This is not the safest way to do this so again, this is only what I did and you need to do what you can to protect yourself and be as safe as humanly possible...
___________________________________________________
The Cause
..It was that time of the season again and Smog was due on my Ranger..Although it is ODBII compliant, California sees it as ODB1 since Federal law did not require ODBII until the vehicle model years of 1996 cars and trucks..
..This is important Because 95 and older vehicles in Calif. are required to also take an "Evap" test (along with their Smog Test)..This is where they pump about 3# of nitrogen into your fuel tank in order to test your "Evap" system for leaks..(More info on Calif Smog Test can be found here .. )
..Although my Ranger had failed 3 years ago when the test started and I had replaced the Fuel Filler hose then, my Ranger failed the Evap test again this year...
..I've been asked how I replaced the Fuel Filler hose without removing the bed when I previously did the repair so this year I decided to show a couple ways of doing this all by yourself...
..It is much easier if you have someone help you remove the bed but I'll give you a couple options on how I do this and you can improve on how it is to be done safely..
..This is a very dangerous and flammable area to be working in so take precautions and having plenty of fire extinguishers and whatever safety equipment you feel comfortable with having under these conditions....
___________________________________________________
The Fuel Filler Hose
..Since the "Evap" test has resulted in finding the Fuel filler hose is a common failure part, Ford raised the price of these to almost $500 and aftermarket out here is about $212 plus tax..
.This is a special hose as it is 2" on one end and 2-1/4" on the other..
...The last time I replaced this I found a deal at $150 but it only last 3 years while the OEM lasted many more than that but I surely was not going to pay $500...
..Another way to fix this in the past was to but a fuel rated 2-1/4" Gates 90* degree elbow (about $40 by itself) and then have a muffler shop make a coupler to go inside of the elbow and reduce down to go inside of the remaining 2" hose...
..I was all set to do that and thought that would be a nifty fix for around $80-$100 if you didn't have friends with a muffler shop...Hey, $50-$75 dollar savings isn't half bad...
..Well I did a little more researching and I found on one of the racing forums guys had recently found a deal on Ebay..I looked it up and found out who the supplier was and contacted them personally just to make sure this was right..
..This was $40.20, free shipping and arrived Tuesday when I ordered it Saturday afternoon..The only difference I could see between this one and the one I previously paid $150 for was it did not have a retainer on the bottom hose clamp to keep it from spinning while you were trying to tighten it..A valuable item yes but not over $100 worth..
1989 - 1997 Ford Ranger Fuel Filler Neck with 6 Foot Bed
AM Price:
$40.20
This part replaces:
OE #: F47Z 9034 P, F47Z9034P, E97Z 9034 B, E97Z9034B,ZZM0-42-210B, ZZM042210B
DORMAN #: 577-902
SPECTRA PREMIUM #: TNKFN518
..What the heck, I'll give her a try and if it last till my next "Evap" test in two years I'm money ahead....:biggthump
http://www.am-autoparts.com/Ford/Ra...opping&utm_source=google_base&utm_content=FMX
..This is their website and filler hose page..
http://www.am-autoparts.com/search.html?words=fuel+filler+hose&x=0&y=0
___________________________________________________
..How to remove just the filler hose without removing the bed..
..First you need to block the vehicle as needed, jack up the rear axle, and remove the drivers side rear wheel in order to better see and to gain some working room..
..After removing the tire, this view is easily seen from the wheel well looking at the Fuel Filler hose where it goes over the frame rail onto the neck of the fuel tank..This is where the damaged hose problem is almost always found, at the 90 going onto the neck of the fuel tank..
...This 90* area is a flex area which is like wringing out a wash cloth as there is flex in the hose between where it is attached at the bed to where it is attached at the tank..This 90 also sits right above the fill opening to the tank and is always subject to the fuel vapors in this spot...
...After taking all the safety precautions and also brushing the dirt away from the top of the tank with my hands I proceed to cut the hose as close to the neck on the tank as possible...This gives me more hand room to locate and un-tighten the hose clamp that is holding it on..
..After removing the remnant of hose that was left on the tank, you can see where it dry rotted at the elbow..
...Unlike the OEM hose I originally pulled 3 years ago, this one also cracked at the filler neck..
...I remove this part last as it helps keep the hose from flopping around when I'm cutting it in two at the tank...
..Simply remove the 3 Phillips screws and remember or mark the location of the clip for the fuel cap before removal..
..With the screws and cap removed..
..Let the remaining hose now drop to the ground and removal is complete..
___________________________________________________
..Install the new hose
..This is what the fuel filler hose looks like from behind the fuel door/gas cap area..Insert the end up to the fuel door opening as this will give you a hand on this end and I also start the 3 screws first to keep it from twisting while trying to work with the other end of this hose..
..Now carefully put the other end over the frame rail and attach it to the neck of the tank..Note the location of the nut on the hose clamp so you can tighten it from this side..
..Tightening this clamp can be tiresome but attention needs to be taken to do this properly...Take the time and make sure to do it right..
...Last time I had access to a couple long extensions and I actually ran those over the fuel tank to tighten it up...It was easier to do then but since I moved the hangers forward I lost access to easily tighten them up..
...Now go back to the fuel door and replace the hanger for the gas cap and tighten those 3 Phillips screws back up..
...That's all it takes to do this hose swap this way..