-
Ford Explorer Community - Maintenance - Modifications - Performance Upgrades - Problem Solving - Off-Road - Street
Explorer Forum Covers the Explorer ST, Explorer Sport, Explorer Sport Trac, Lincoln Aviator,
Mercury Mountaineer, Mazda Navajo, Ford Ranger, Mazda Pickups, and the Ford Aerostar
Register Today It's free!
screws
-
2
Replacing A TPS With Damaged Screws, How To
A couple of years ago I got the idea of replacing my throttle position sensor since it was the stock part. I gave up after rounding the philips screws. I then tired to use a dremel to cut a slot into the screw heads but that didn’t work out too well. Recently, my absolute throttle position...- 239
- Thread
- 2000 bolts explorer ohv position screws sensor throttle tps
- Replies: 8
- Forum: Stock 1995 - 2001 Explorers
-
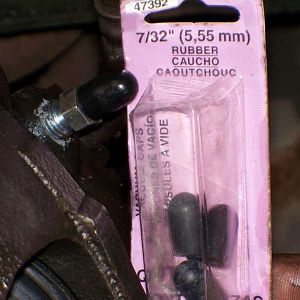
Vacuum caps for the bleeder screws.
The part number from Motormite/Dorman/Help is 47392. The size is 7/32".- BrooklynBay
- Media item
- bleeder caps for screws the vacuum
- Comments: 0
- Category: General Photo Album
-
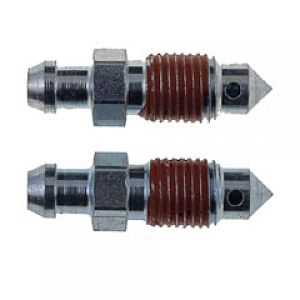
Bleeder screws with a built in check valve.
Motormite/Dorman/Help sell bleeder screws with a built in check valve to make bleeding the brake system a one person job.- BrooklynBay
- Media item
- a bleeder built check in screws valve with
- Comments: 0
- Category: General Photo Album
-

12707 front bleeder screws.
Thread size is 7/16" X 20 X 1 1/4". Overall lenght is 1.27". This bleeder screw has a built in check valve, and fits on the front caliper of a 1995 Aerostar. It's made by Motormite/Dorman/Help.- BrooklynBay
- Media item
- 12707 bleeder front screws
- Comments: 0
- Category: General Photo Album
-

12701 rear bleeder screws.
Thread size is 3/8" X 24 X 1 3/16". Overall length is 1.19". This bleeder screw has a built in check valve, and fits on the rear wheel cylinder of a 1995 Aerostar. It's made by Motormite/Dorman/Help.- BrooklynBay
- Media item
- 12701 bleeder rear screws
- Comments: 0
- Category: General Photo Album
-

Tighten the set screws with an Allen wrench.
- BrooklynBay
- Media item
- allen an screws set the tighten with wrench
- Comments: 0
- Category: General Photo Album
-

Tighten both inside screws.
- BrooklynBay
- Media item
- both inside screws tighten
- Comments: 0
- Category: General Photo Album
-
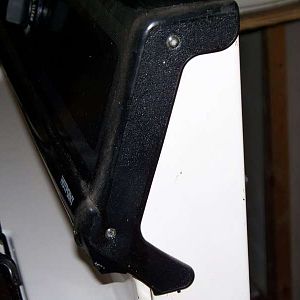
Two Torx head screws on the side.
- BrooklynBay
- Media item
- head on screws side the torx two
- Comments: 0
- Category: General Photo Album
-
Two screws on the back.
- BrooklynBay
- Media item
- back on screws the two
- Comments: 0
- Category: General Photo Album
-
L
Swapping visors.
We have a 99 Eddie Bauer that has Homelink on the Driver's Visor. We just bought an 02 Explorer that doesn't. We pulled the visors out of both, but when we went to install, we found the screws don't match up!!! The 99 is a triangle with 3 screws, the 02 a rectangle with 2 screws. Anybody...- LisaBelle
- Thread
- homelink screws visor
- Replies: 2
- Forum: Stock 1995 - 2001 Explorers
-
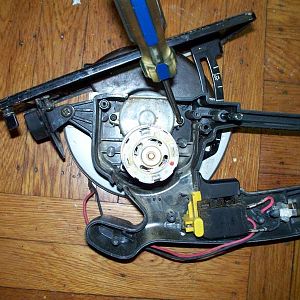
The motor is connected with 4 screws.
- BrooklynBay
- Media item
- 4 connected is motor screws the with
- Comments: 0
- Category: General Photo Album
-
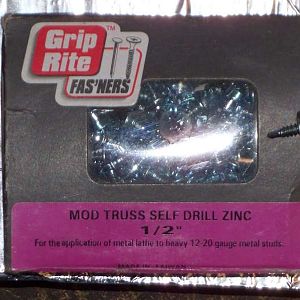
Truss head self drilling screws.
- BrooklynBay
- Media item
- drilling head screws self truss
- Comments: 0
- Category: General Photo Album
-
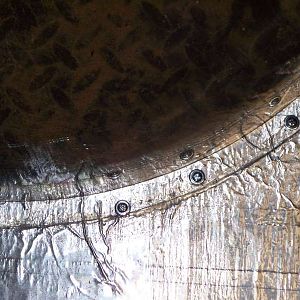
The screws are getting mounted to the rim.
- BrooklynBay
- Media item
- are getting mounted rim screws the to
- Comments: 0
- Category: General Photo Album
-
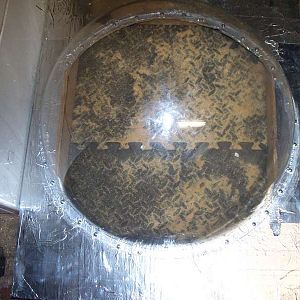
The screws are all around the rim.
- BrooklynBay
- Media item
- all are around rim screws the
- Comments: 2
- Category: General Photo Album
-
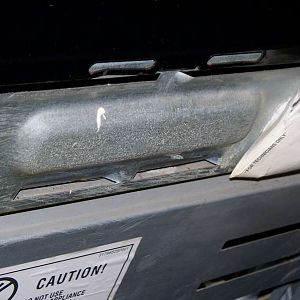
Remove 2 corner screws to get access to the igniter.
- BrooklynBay
- Media item
- 2 access corner get igniter remove screws the to
- Comments: 0
- Category: General Photo Album