Decreasing IAT on my Supercharged SOHC V6 | Page 2 | Ford Explorer Forums - Serious Explorations

  • Register Today It's free!

Decreasing IAT on my Supercharged SOHC V6

I installed a Banshee M90 supercharger kit on my 2000 Explorer Sport with the 4.0L SOHC V6 engine.
EngineBay.jpg

The intake air temperature (IAT) climbed to 174 degrees during my last set of of pulls on the dyno.
IATTqLock13.jpg

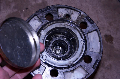
As the IAT increases the PCM reduces spark advance to avoid detonation. Max power is reduced when the spark advance is less than optimum. The IAT is OK during normal driving and is excessive only during boost. There is an intercooler in the intake manifold between the output of the M90 blower and the head intake ports.
CoreInstall6.jpg

I installed a stock external ATF cooler on the driver side to act as a heat exchanger for the intercooler. Some airflow is blocked by hoses associated with my remote full flow and bypass oil filters, the passenger side external ATF cooler, and the thermostatically controlled engine oil cooler. Also, the lower part of the grille support blocks the lower two rows of the stacked plate cooler.
BlockedAirflow.jpg

At first I thought the high IAT was due to the vehicle being stationary during dyno testing but during a short street pull a high IAT (164 deg F.) was also datalogged on a warm day driving at 50 mph.
IATDrive50mph.jpg

There is about 1.5 inches between the back of the cooler and the front of the A/C condenser.
Space1.5.jpg

There is also room in front of the cooler if some of the hoses are relocated. I'm thinking about moving the cooler up and forward enough to place a puller fan between the cooler and the A/C condenser to increase airflow thru the cooler. My goal is to reduce the maximum IAT to about 150 degrees.


Join the Elite Explorers for $20 each year.
Elite Explorer members see no advertisements, no banner ads, no double underlined links,.
Add an avatar, upload photo attachments, and more!
.


good fit for stock

I agree Don. I like the 1/2 inch female NPT ports that can accept 90 or 45 degree elbows. It might even fit (with some minor cutting) in the recessed area directly in front of the A/C condenser. However, I hope to install a puller fan there.


Join the Elite Explorers for $20 each year.
Elite Explorer members see no advertisements, no banner ads, no double underlined links,.
Add an avatar, upload photo attachments, and more!
.


I keep thinking about the fan. Do you really need one?
I mean, unless your on a dyno, when you are at wot, there should be lots of air passing thru the rad anyway. Is my thinking way off?


not just on the dyno

The second graph in the first post is not on the dyno. I have another log pulling from stop in 3rd speed on a local boulevard and the IAT increases from 124 to 164 degrees at 69 mph in 12 seconds. If I ever get around to stroking this engine I'll need all the cooling I can fit.


It would have been interesting to do the same pull, with the same everything except a fan.
Its impossible to test everything though.

A fan definitely cant hurt.


fitting the fan

I finally finished replacing the back door, frame and molding - the frame had rotted and damaged the subfloor which was discovered when our hardwood floor was replaced after the dishwasher overflowed. So I've resumed work on the custom air filter enclosure and the forced air heat exchanger for the intercooler. I've removed the grille, grille trim, parking lights, hoses and mounts connected to the second stock ATF cooler I was using as a heat exchanger. I was able to remove the stock ATF cooler without removing the engine oil cooler thermostat.
FanMount1.jpg

However, to install the large fan and larger ATF cooler I will have to remove the grille reinforcement.

I installed the Amsoil high flow drop in air filter and began cutting the top of the air filter enclosure.
FilterTop1.jpg

The plan is to leave enough space between the top enclosure and the MAF sensor to allow the adapter tube to slide away from the sensor and into the enclosure. That should provide enough slack to slide apart the intake hoses/couplers.


fan almost fits

I removed the bolts/nuts that mount the grille reinforcement then slid it forward enough to disconnect the headlight connectors and set the assembly aside. The fan housing is only about 1/4 inch wider than the opening.
FanMount2.jpg

There's a plastic clip on the driver side of the opening that holds some weather stripping to prevent air being sucked in from the side between the A/C condenser and the radiator support. On the passenger side I would have to cut a notch in the bracket and the lip behind it because the fan housing front to the rear of the motor is about 3/8 inch greater than the rear of the bracket. That would weaken the bracket which is the only center support/mount for the grille reinforcement. I think I'll remove the stock weather stripping/clip since it does not provide a good seal. Then Ill cut a notch on the driver side and use adhesive to attach a longer section of weather stripping.

I'll have to mount the new heat exchanger as low as possible in the opening to allow room for the passenger side port fitting. I'll probably have to lower the engine oil cooler thermostat and reroute all four port hoses associated with it. The top fitting and hose is removed in the photo.


Thats the same B&M trans cooler I use. It rated at something like 24,500 BTU by there procedure. Whatever that may be. The NPT fittings indicate its for racing and has no temp bypass as you said. Noticed you were mounting it correctly, nipples up. Plate coolers trap air bad if upside down. Otherwise very efficient and robust.


My input would be...front heat exchanger is to small and using a heater core as a IC does not work well at absorbing heat..honestly I never liked how he sets up the ic at all, just doesnt look very efficient. .

Also I know you are using shared container from engine radiator, is hot water from the radiator mixing with that?? Is it a sealed container or vented?

But do know 160* was the MAX my dyno guy wanted to ever see for IAT, he honestly didnt want to see over 140* as I dont have a knock sensor and am obd1 :(


160 degrees max

Thanks for the info about 160 degrees max. I agree that my heat exchanger will be smaller than the normal size that stretches across the lower front between the wheels. But I hope with the forced cooling it will be adequate for street use with low boost pressures. As I previously posted my goal is a max IAT of 150 degrees.

Even though I'm using the coolant overflow reservoir there is very little flow between the radiator and the reservoir. Normally, the only flow is after starting the engine as the coolant warms (expands) and shutting the engine off when coolant cools (contracts). According to my remote reading thermometer the radiator temperature on a warm day with the engine idling is 150 degrees. The reservoir is not pressurized. The only advantage to pressurization is to prevent vaporization of the coolant. Water vaporizes at 212 degrees at standard atmospheric pressure. Adding antifreeze/coolant and pressurization increases that temperature. When I finish the system I may experiment with some special additives to increase heat transfer of the coolant.


Im interested in the results with the fan.


WOT only fan

I suspect the fan will be noisy - I haven't tested it yet. I'll probably only have it activate at WOT since that's the only time I have an IAT issue. I'll datalog IATs with and without the fan running to see how much affect it has.


Fitting the heat exchanger

The heat exchanger looks like it will fit pretty well in the opening and probably would be a good choice for an auxiliary ATF cooler.
CoolerMount1.jpg

I'll have to cut a hole for the 1/2 inch dia. 90 degree NPT male to hose barb elbow.
CoolerMount2.jpg


sooo close to making it fit with zero cutting. Too bad.

What I would like to see is the coolant pump and fan turn on at a couple pounds boost (hobbs switch) and stay on for a couple of minutes after your out of boost.

To me, this makes the most sense as the intercooler does not need to have coolant running thru it unless there is boosted air, then after your out of boost the system should continue to run for a couple of minutes to bring the intercooler and coolant back to ambient temps.

This would keep noise down, and extend life of components.


excellent idea!

Don, that's an excellent idea! My intercooler pump always stays primed because it is lower than the reservoir and the heat exchanger ports. So there is coolant flow almost immediately when the pump is energized. It's a waste of electricity and pump service life for the intercooler pump to run whenever the fuel pump is activated. A normally open, adjustable Hobbs switch is exactly what I need to activate the intercooler pump, heat exchanger fan, and possibly a vacuum motor for the brake booster. I'll have to start searching for an appropriate part.


Ive been looking around for an appropriate delay timer. My issue is that most delay timers seem to start as soon as power is applied. We want the delay to start timing after the power is switched off (out of boost).

I think once an appropriate, affordable delay timer and a 1 psi hobbs switch are sourced, the rest is easy.

Forgive me for interrupting.

Perhaps this would work?

http://www.alliedelec.com/images/products/datasheets/bm/NCC/70059682.pdf

AmTek T3 Series


AmTek T3 Series

That has the correct logic. The output relay closes on control input positive transition, the timer activates on the negative transition, and the relay remains closed until the settable timer expires. However, the operating temperature range would prevent it from being mounted under the hood. I don't particularly care for the 11 pin circular connector that also serves as a mount. Also, relay contacts are rated at 10 amps. I'll be looking for a separate timer/relay controller and relay instead of an integrated unit.

By the way, you're not interrupting. Your comments are encouraged.


Hobbs switch

So far the most suitable switch I've found is the Hobbs HPS-2. It comes with a factory setting of 2 psi but is field adjustable from 1 psi to 3 psi. It comes with a Metri-Pack connector and the sensor port is male 1/8 - 27 NPT. The temperature rating is -40 to 259 deg F but unfortunately for me the switch contact rating is only 8 amps at 12 VDC and decreases as the voltage increases. It would be adequate to turn on and off (with no delay) my intercooler pump which only draws 2.2 amps but my fan is rated at 7 amps and probably draws more than that at activation. So I'll probably select a 20 amp relay to have a safety margin. The other issue is the physical size of the switch and access to a boost port. It's almost 3 inches long (includes the pipe threads) and 1.5 inches in dia.
Hobbs_cutaway.jpg

I have an unused port on the passenger side of the intake manifold.
Install10.jpg

But there's inadequate room there for the switch because on the plenum.
LoomFit2.jpg

The easiest method would be to just insert a T fitting in the hose that goes to the vacuum/boost gauge and then install a female NPT to hose fitting on the switch. Maybe I could mount the switch on the firewall between the EGR valve and the windshield wiper motor.
EGRPipe2.jpg


Here's a link to the switch best price source I've found: Pressure Switch, 2PSI, SPST M/P280S
You can also get the weather tight mating connector at the same source: Connector Set, Hobbs Switch


Join the Elite Explorers for $20 each year.
Elite Explorer members see no advertisements, no banner ads, no double underlined links,.
Add an avatar, upload photo attachments, and more!
.


Dremel success

I tested the fan today and it pulls about 9 amps at start up and quickly drops to 6 amps at full speed. I decided to cut the passenger side using my Dremel with a cut off wheel. The vertical cutout between the green arrows is 2.5 inches from the A/C condenser which leaves a 1/8 inch gap for the fan motor.
FanMount3.jpg

I also removed the front lip marked by the blue arrows.
The rear of the fan shroud sits in front of the rear lip.
FanMount4.jpg

The fan came with mounting tabs. Now I have to figure out what to attach them to.


Back
Top