Ryan's F250/Explorer hybrid | Page 7 | Ford Explorer Forums - Serious Explorations

  • Register Today It's free!

Ryan's F250/Explorer hybrid

I guess this is what happens when you take someone like me, add someone like Kevin (DWD), and throw in some beer!
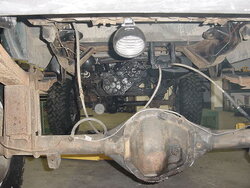
Here's the plan. This weekend I'm looking at buying a '79 F250 longbed. It has a 300 straight 6, leaf sprung dana44 front, dana 60 rear. Basically, I'm going to put my Explorer body on the F250 frame.
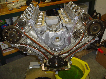
First things first. I need to rebuild the 6banger, trans and axles. Then, I cut some of the frame out of the F250, bring the dana60 forward a bit. Fab up some body mounts, get creative with the engine compartment and steering linkage coming out of the Explorer firewall. Then I spend 200 or so manhours rewiring, fabbing fuel and brake lines. Then I slap on some new tires (38s?) with 8lug rims and bingo....I go 4wheelin'.
This project doesnt have a 100% green light yet. I have a lot of messurments to take on the F250. If I'm satisfied with my tape messure, then its a go.
This project will obviously take time. My inital calculations for money are around $5000, although thats surely going to climb 20-30% (much like building a house). That cost includes the cost of the vehicle, but does not include tires/rims.


Join the Elite Explorers for $20 each year.
Elite Explorer members see no advertisements, no banner ads, no double underlined links,.
Add an avatar, upload photo attachments, and more!
.


The master cylinder. Kevin posted a pic of the slave and the bracket we fabbed to hold it. We used a combo from a 84 BroncoII. The master had to be shimmed against the firewall so that the rod could meet with an Explorer clutch petal.
 

Attachments

  • master.jpg
    master.jpg
    39.1 KB · Views: 951


Join the Elite Explorers for $20 each year.
Elite Explorer members see no advertisements, no banner ads, no double underlined links,.
Add an avatar, upload photo attachments, and more!
.


This pic shows the mild firewall modifications we had to make. In order to make clearance for the valve cover, we had to push the firewall back about 2 inches. I glued it all back together with JB Weld (about 40 dollars worth!). We also had to push the firewall back about an inch to make clearence for the exhaust manifold.
I knew from the beginning that there would be no A/C, but I didnt know I would have to tear out the A/C condensor to fit the engine. As it turns out, when the heater is on, the hot air passes by the condensor into the dash. I wanted to keep heat, so I had to fab that blue triangle you see to get the hot air into the dash.
 

Attachments

  • firewall.jpg
    firewall.jpg
    39.7 KB · Views: 975


Here's the steering shaft we made. I ripped a steering shaft from a mid 90s Windstar. I wanted its ujoints. I then mixed those with the end from the explorers origonal steering shaft and from the other end from the F-250s steering shaft. Those are some narly angles, but they are not as bad as the ones in the Windstar. We'll wait and see how the ujoints hold up.
 

Attachments

  • steering.jpg
    steering.jpg
    37.9 KB · Views: 936


Here's a shot from the rear of the Dana60. Thats the rear rock light (there are a total of 3, you can see the back of the middle light pointing down towards the t-case). I used simple tractor lights for those.
Thats the Hooker muffler, I love the sound of it. Also, we just finished the ebrake. The paint wasnt even dry when I took the picture. We had to fab that wierd looking bracket for the cables. I tell you, it was a pain splicing the cable from the Explorer to the cable of the F-250.
 

Attachments

  • rearlook.jpg
    rearlook.jpg
    38.9 KB · Views: 929


The rear bumper isnt installed yet. I'm putting up this pic to show the rear cargo container I fabbed up. Access will be from under the bumper, I'll make a little door for it later. I figure I can put a tow strap and winch gear in there. The box is tucked up between the rails of the tow hitch. If it gets eaten by a rock I'll then make the bottem of the box out of 1/4inch plate.
 

Attachments

  • rear.jpg
    rear.jpg
    39.1 KB · Views: 923


Here's something I had not anticipated. It called for an extra trip to the hardware store. Matching up the gas filler tubes was done by using exhaust pipe reducers. The explorers tube is somewhere around 3 inches, and the F-250s tube is 2.25 inches. By the way, the F-250 fuel tank is 24 gallons. That should be enough with the 1barrel carb.
 

Attachments

  • gas.jpg
    gas.jpg
    38.5 KB · Views: 1,172


Here's a pic of the front axle, from the front. You can see the front rock light tucked up there in the frame rail.
 

Attachments

  • frontlook.jpg
    frontlook.jpg
    39.4 KB · Views: 1,184


A couple other notes:
I'm going to build a front skid plate out of 1/4inch plate to protect the radiator.
After getting the bumper and winch on, the front end sagged down a 1/2inch. I dont see how I can lower the front suspension anymore. There is only 6 inches between the frame and the top of the leaf pack. I guess this is how tall its going to be. After I get the rear bumper with the tire carrier on, and I let it settle, I'll reduce the rear blocks to level the truck out.
If I have trouble on the trails being tippy, I'll just have to build myself an exo-cage :)

Thanks for the use of your camera Kevin. Much better than the one I have available to me.


I'm glad I ledt the camera as I am sure the rest of the followers of this thread are. I am impressed with how fast that thing is coming together.


That's one sweet looking....uhhh.......eX-250. Get a comparision pic next to a stock F-250 and an explorer.

Let's see that thing in action!


I need a rear driveshaft first....should have it in the next couple of days.


Are you just going to have the original f250 driveshaft shortened?


Yup. needs new yokes, but its otherwise good. upgrading to 1350 ujoints, making 48 inches long.


that is one bad TRUCK , can't wait to see that thing in a layer of mud.


Kevin came over today just after I got my new driveshaft installed. We flexed the beast out a little. Keep in mind, I havent done any work to increase flex as of yet.
I guess the rock lights work pretty well.
 

Attachments

  • flex1.jpg
    flex1.jpg
    39.8 KB · Views: 1,575


From the front, unfortunatly kevins camera took a crap.
 

Attachments

  • flex2.jpg
    flex2.jpg
    36.5 KB · Views: 1,071


Is it me or is this project progressing at an incredible rate?? :-D


!!!!WEAK!!!!:)


i wasnt payin attention to this thread. That beast is incredibly awesome. Its huge!! congrats!


Join the Elite Explorers for $20 each year.
Elite Explorer members see no advertisements, no banner ads, no double underlined links,.
Add an avatar, upload photo attachments, and more!
.


I thought you said you had 37s under there:eek:
attachment.php


Back
Top