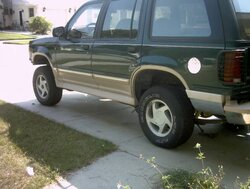
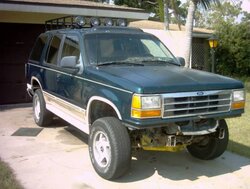
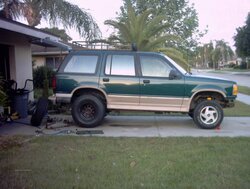
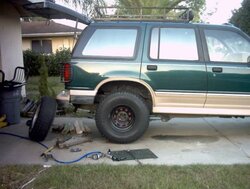
Well i started 2 years ago. I bought a 3" Body Lift from 4 wheel Parts for $100 shipped.
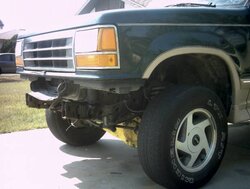
And one thing after another got in the way. Well until last night I have been trying to get the front core support bolts off, so on Easter Sunday i had to work Ya. Then i get sent home early to spend time with my family. But it was too late at night. So pissed i start wrenching on the explorer. First i took off the manik brush guard, followed by the front bumper. Now i can see my rival, my nemeses the front mount Derocha said to try to a pipe wrench so a few weeks ago i got an 18" cheapo wrench from the Home Depot. after a few trys it finally grabbed and the bold came out and must have 5 degrees of angle in it. Then taking what i learned and applying it to the other front bolt took less then 10 minuets. Then i attacked the other eight bolts which took fifteen more minuets. So today my dad came over, he has only one leg, so all he was good for was to yelling at he and say i was going to kill myself when he looked up from the newspaper. His favorite phase was you need more damn wood!!!!
But any way the lift was very easy but it just needed prep work. But that is not to say i did not f-up some. But i disconnected the tranny lines, shifter/4x4 cables, all the wire harnesses, and e brake. Then with all four wheels blocked I lifted the drivers side and put in all the blocks, but the front i took out and burned up a 1/2 drill bit so we cut the treads off the metal golf tee looking thing replaced the metal cup and blocked it. I put in bolt finger tight as i went. Then i saw that i jacked the fan shroud into the fan i cut the bottom clips off and aligned the shroud then I did the same on the pass side. Going back to the shroud i bolted it in with a copper colored bracket from the kit PA 793. But Now the fan looked cracked in between two of the blades.
IS it f-up? and should be replaced? Or is it norm i and i did not see it till now?
I put in the steering connecter with red lock tight.
Then I walked around with red lock tight and pounded then home.
Hooked everything back up and started up fine and ran fine, the steering was better then i thought thou I could feel not sticking but not smooth as butter in some spots. If i was going around a corner and let go of the wheel mid turn it used to go strait, but now it does not always, i have to think to turn the wheel back to the 12 o'clock position. I only drove a mile So it might loosen up.
but i can not figure out the e bake, i took it off the driver side body mount, and disconnected the part in the back with the spring where it turns into two wires. HELP!!!!!!!!!!!!
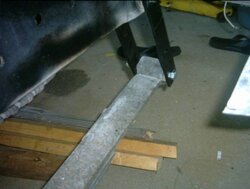
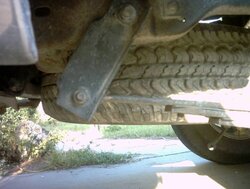
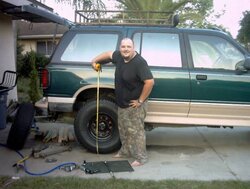
That is where i am. I wanted to see the rear bumper without moving it i hate it, it will be moved up and a class 3 hitch will be put on. I need to a bracket the look like a side was "Z"
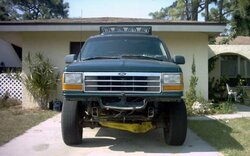
to move the brush guard up and move the front bumper up. So i am 95% done.
In the next week or so i will put on the f-150 spacers, and shackles and the 33's.
I will take pic tomorrow and past them at midnight after work.
But damn i feel good.
ps i had plumber crack showing and my butt is sun burned.
And one thing after another got in the way. Well until last night I have been trying to get the front core support bolts off, so on Easter Sunday i had to work Ya. Then i get sent home early to spend time with my family. But it was too late at night. So pissed i start wrenching on the explorer. First i took off the manik brush guard, followed by the front bumper. Now i can see my rival, my nemeses the front mount Derocha said to try to a pipe wrench so a few weeks ago i got an 18" cheapo wrench from the Home Depot. after a few trys it finally grabbed and the bold came out and must have 5 degrees of angle in it. Then taking what i learned and applying it to the other front bolt took less then 10 minuets. Then i attacked the other eight bolts which took fifteen more minuets. So today my dad came over, he has only one leg, so all he was good for was to yelling at he and say i was going to kill myself when he looked up from the newspaper. His favorite phase was you need more damn wood!!!!
But any way the lift was very easy but it just needed prep work. But that is not to say i did not f-up some. But i disconnected the tranny lines, shifter/4x4 cables, all the wire harnesses, and e brake. Then with all four wheels blocked I lifted the drivers side and put in all the blocks, but the front i took out and burned up a 1/2 drill bit so we cut the treads off the metal golf tee looking thing replaced the metal cup and blocked it. I put in bolt finger tight as i went. Then i saw that i jacked the fan shroud into the fan i cut the bottom clips off and aligned the shroud then I did the same on the pass side. Going back to the shroud i bolted it in with a copper colored bracket from the kit PA 793. But Now the fan looked cracked in between two of the blades.
IS it f-up? and should be replaced? Or is it norm i and i did not see it till now?
I put in the steering connecter with red lock tight.
Then I walked around with red lock tight and pounded then home.
Hooked everything back up and started up fine and ran fine, the steering was better then i thought thou I could feel not sticking but not smooth as butter in some spots. If i was going around a corner and let go of the wheel mid turn it used to go strait, but now it does not always, i have to think to turn the wheel back to the 12 o'clock position. I only drove a mile So it might loosen up.
but i can not figure out the e bake, i took it off the driver side body mount, and disconnected the part in the back with the spring where it turns into two wires. HELP!!!!!!!!!!!!
That is where i am. I wanted to see the rear bumper without moving it i hate it, it will be moved up and a class 3 hitch will be put on. I need to a bracket the look like a side was "Z"
to move the brush guard up and move the front bumper up. So i am 95% done.
In the next week or so i will put on the f-150 spacers, and shackles and the 33's.
I will take pic tomorrow and past them at midnight after work.
But damn i feel good.
ps i had plumber crack showing and my butt is sun burned.