hello all! well, turdle's mounty has come to maryland. i had been tossing around the idea of a really well built suv that didn't cost a fortune. i have a 97 mounty to tow my racecar and it has been a trusty companion for the last 4 years, but the drivetrain, although very reliable, hasn't been very inspiring. so, i had been looking around for options. i settled on the thought of a 347, but the cost was out of my range...until i read about turdle's mounty up for sale. done deal!
now i need to get going on it. work has been crazy for the past month, so i havent been able to get very far and august isn't looking much better, but i am going to try to squeeze in some time.
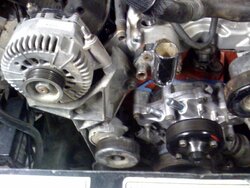
i thought about fixing up the new mounty and just selling mine, but with all the body work, reassembly of the drivetrain and electrical issues, it would be far less time to swap in the drivetrain. so, i pulled the engine and trans.
let me tell you, that 4406 is a monster! i dont think its going into mine. the shifter location intruded upon my leg space and i like a stock appearance better, so i'm either going to stick with the AWD or swap in a 4405 control trac and use the v-6 radio bezel with the TC control knobs. need to find out if the control trac can hold up to the power of the mighty 347 tho.
i originally thought that the drivetrain was perfect as is, but after looking into it further, the 3k stall torque converter changes the entire ballgame. i found out that a stall converter isnt good for towing and a lumpy cam is no good for a stock stall. so, they both have to go. i picked out a smaller comp cams stick and a hughs towing converter. the trans is good for over 600tq from stock and the art carr shift kit is a great plus, so that will remain as is. again, the 4406 is NOT going into my truck. the next thing i have been considering is a change in the engine lineup. my mustang is built for american iron, except 1 thing. the 408 lump in the engine bay makes waaay too much power. a 347 would be a perfect size. theres more work involved, but a 408 in the mounty would certainly haul my now lighter mustang! yeah, i know. ive been told a hundred times that the 351 will not fit, but im not convinced. with some block huggers instead of the really wild and tangled mess of torque monster headers, it might be easier to get past the steering column and a/c box. i think the box may need to be modified for the valve cover, but it wouldn't be hard to do. good news is i now have lots of spare parts to test with! the oil pan and CPS arent going to be too much of a problem. i could easily modify the pan i have to fit and the CPS doesn't look that hard. i have access to a lathe. its more work, but it solves 2 problems. 1) i want to have a legal american iron car. 2)i love torque and excellent street manners. i can de-cam the **** out of the 408 to idle smooth as glass while never sweating the hills of PA while towing.
if that doesn't work out, so be it, but it would be a cool project! anywho, thats my story. i hope to share the build with you all! thanks to turdle for helping get this thing shipped to me.
now i need to get going on it. work has been crazy for the past month, so i havent been able to get very far and august isn't looking much better, but i am going to try to squeeze in some time.
i thought about fixing up the new mounty and just selling mine, but with all the body work, reassembly of the drivetrain and electrical issues, it would be far less time to swap in the drivetrain. so, i pulled the engine and trans.
let me tell you, that 4406 is a monster! i dont think its going into mine. the shifter location intruded upon my leg space and i like a stock appearance better, so i'm either going to stick with the AWD or swap in a 4405 control trac and use the v-6 radio bezel with the TC control knobs. need to find out if the control trac can hold up to the power of the mighty 347 tho.
i originally thought that the drivetrain was perfect as is, but after looking into it further, the 3k stall torque converter changes the entire ballgame. i found out that a stall converter isnt good for towing and a lumpy cam is no good for a stock stall. so, they both have to go. i picked out a smaller comp cams stick and a hughs towing converter. the trans is good for over 600tq from stock and the art carr shift kit is a great plus, so that will remain as is. again, the 4406 is NOT going into my truck. the next thing i have been considering is a change in the engine lineup. my mustang is built for american iron, except 1 thing. the 408 lump in the engine bay makes waaay too much power. a 347 would be a perfect size. theres more work involved, but a 408 in the mounty would certainly haul my now lighter mustang! yeah, i know. ive been told a hundred times that the 351 will not fit, but im not convinced. with some block huggers instead of the really wild and tangled mess of torque monster headers, it might be easier to get past the steering column and a/c box. i think the box may need to be modified for the valve cover, but it wouldn't be hard to do. good news is i now have lots of spare parts to test with! the oil pan and CPS arent going to be too much of a problem. i could easily modify the pan i have to fit and the CPS doesn't look that hard. i have access to a lathe. its more work, but it solves 2 problems. 1) i want to have a legal american iron car. 2)i love torque and excellent street manners. i can de-cam the **** out of the 408 to idle smooth as glass while never sweating the hills of PA while towing.
if that doesn't work out, so be it, but it would be a cool project! anywho, thats my story. i hope to share the build with you all! thanks to turdle for helping get this thing shipped to me.
") the sharp bend on #7 looks worse from the outside than looking at the inside of the tube, although, i do have a couple lips to grind out on the inside. it really sucked to use all those little 15-30 degree bends to make the header. but its done and i am satisfied with it.
the sharp bend on #7 looks worse from the outside than looking at the inside of the tube, although, i do have a couple lips to grind out on the inside. it really sucked to use all those little 15-30 degree bends to make the header. but its done and i am satisfied with it.