Messed up front bumper - replacement tips? | Ford Explorer Forums - Serious Explorations

  • Register Today It's free!

Messed up front bumper - replacement tips?

glo81

Member
Joined
November 8, 2002
Messages
44
Reaction score
8
City, State
Southern California
Year, Model & Trim Level
2002 Explorer XLT 4.0L
Long story short, I damaged my front bumper (was not thinking when it happened and am kicking myself about it). Not horribly, but I'm definitely going to need to replace the front bumper and the passenger fog light cover. No amount of bondo will fix the plastic. I'm planning to DIY and was reading some old threads regarding bumper repair/replacement. The fog light cover seems easy enough to replace. After removing the old bumper, the hardest task will probably be to paint the top portion of the bumper. A replacement bumper costs $105 on ebay and it says it's primered. Any thoughts on what I should believe with that? Or will I really just be able to spray paint, clear coat, buff/polish without any bumper prep?

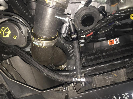
Pic of damaged bumper:
IMAG0385.jpg


Join the Elite Explorers for $20 each year.
Elite Explorer members see no advertisements, no banner ads, no double underlined links,.
Add an avatar, upload photo attachments, and more!
.


I'd go to your local wrecking yard. Though most Ex's seem to be involved in front end collisions. Wrecking yard bumpers are $35 in my area.

You may even get lucky on the color. Also, don't forget to look for Ex's on CL that are being parted out.

Based on the damage I see, you could apply heat to it and mold it back into place. It's called Plastic Welding. There are tools for it, but a $14 heat gun from harbor freight would do it. Key is shaping the plastic with an object once it's good and hot. Just don't melt it too much.


I paid almost $200 to a guy that painted my rear bumper cover on my camry. Search on craigslist on your area, there are guys who worked in the body shop and moonlights on their own homes. The result is really professional can't detect that it was replaced. I also bought the bumper in LKQ (it's OEM primered used for $180)

You might get lucky to find some decent and matching colors on the local junkyard too.


One comment about new & refurbished Ebay bumpers.... Often when they say they are primered, they are -- 100%. Meaning no dark argent lower cladding. Great if you have an Eddie Bauer or Limited with full paint, top & bottom.

With that, I'd look for a used one, preferably one with similarly faded lower cladding to match the rest of your truck. Unless you plan to refurbish all the lower cladding.

Good luck.


Thanks for all the feedback everyone. I checked on craigslist yesterday hoping to find a car being parted out and I didn't see anything. So far a couple local junk yard searches have come up empty. The replacement bumper on ebay I'm looking at comes with the upper portion primered for paint and the lower portion is in the grey textured finish like that of the original. If I end up getting that one, the lower part will look newer and shinier than the rest of the grey trim around the SUV that's faded with time, but I think I'll be okay with that. I'll post pics of progress once the ball gets rolling with replacement parts. This will be the biggest DIY I'll have taken on with my Ex.


I've got one, though I've sanded the texture part. Otherwise it's an OE bumper. Let you have it for $40, I picked it up for $80 then found one my color for $100.

http://atlanta.craigslist.org/nat/pts/5214036040.html


Edit:
Well, pay the freight, lol, I thought you were from South Carolina for some reason.


Haha I would've said that's a good deal. Southern California does look very similar to South Carolina at first glance. ;)

I ended up purchasing the bumper I saw on ebay. It arrives next week, so I'll probably get around to doing the painting the weekend after this. I searched old threads for removal and one person said about 20 minutes to get the old bumper off. Does that sound about right?


It's a 20 minute job once you've done it all ready.


It's a 20 minute job once you've done it all ready.
Which probably means it'll take me at least double that time removing it for the first time. Hopefully putting the new one back in place is easier than removing it.


I've done it four or five times. Remove the front wheel well screws, this will release the bumper from the wheel well and also give you access to the mounting blocks. Being able to move the tires in and out will help.

There are two bolts that go through a block at the very end of the bumper on both sides, at the wheel well. Extension and swivel will help. Peel back the wheel well to see them.
There's two bolts under the front of the bumper I believe as well.

Once in bolted, the top of the bumper has little tabs that go through slots in the header panel (the piece the grill and headlights mount to.). Lifting up on the bumper while pulling the bottom out (45° angle) will allow you to pull the tabbed top portion out easier.

I think that's is.


Thanks for the tips! I hope it's not too difficult when I do this for the first time. I don't have car jacks/lift for being able to move the tires in and out. Will that make the job harder if I am unable to do that?


My replacement bumper was delivered today and after opening the box, I was happy to see that the bottom half was already taped off. This saves me a lot of time; I wasn't looking forward to taping off the grey textured part and now I don't have to. I'll probably paint this Friday. Will post pics of my progress.

IMAG0405.jpg


I completed my biggest DIY to date on my Ex. I'm very satisfied with the end result. The hardest part as I had expected was painting the new bumper, because it required the most time, detail, and care. Prior to this, the most I'd done as far as painting was small scratch repairs. Removing the bumper went pretty smoothly thanks to tips here on Explorer forums. Obviously the best and easiest scenario would be finding your exact bumper match at a junkyard, but if I can do this from scratch, anyone can. I used Duplicolor's perfect match for YZ and their clear coat to follow. I'd like a glossier finish for the clear coat, so I may have to add another layer in the future. Or if anyone has suggestions for a good clear, let me know.

Also, the grey trim/molding that came on the replacement bumper highlights the faded grey molding on my passenger side. The driver side molding matches well because when my truck was side swiped two years ago, the body repair included replacing the molding on that side. Any advice for getting the faded molding to match the one on the new bumper?

After removing the bumper:
IMAG0416a.jpg


After spraying basecoat (I used three cans altogether):
IMAG0421a.jpg


After clear coat and drilling holes for the license plate holder:
IMAG0437a.jpg


Final product:
IMAG0447a.jpg


Molding on driver side is all uniform:
IMAG0463a.jpg


Old and new molding side by side:
IMAG0465a_1.jpg


Looks great. Very nice work!


Back
Top