5spdman's slow and cheap XLT build | Page 23 | Ford Explorer Forums - Serious Explorations

  • Register Today It's free!

5spdman's slow and cheap XLT build

Several updates...due to pictures this also may be multiple posts and a long story...

It all began with a trip to KY....

I decided that I wanted a bit of protection as it was suggested I beef up a bit before the Black Mountain trip. Rock sliders and beefing up the skid plate were priority, so I got some steel and got to work. I first came up with an idea on the sliders and made a cardboard mock-up...

IMG_20170407_191130518_HDR.jpg


I really liked it, but those missing rocker sections were bothering me, so I got a hood from a ranger (free from a friend), separated the skin and got busy cutting, hammering, bending, wire wheeling, hammering, trimming and welding...

IMG_20170509_135351509_HDR.jpg


IMG_20170429_133410477.jpg


IMG_20170509_152111372_HDR.jpg


IMG_20170509_182958419_HDR.jpg


IMG_20170509_194016892_HDR.jpg


IMG_20170510_211518694.jpg


Turns out rock lights serve many uses...

IMG_20170513_113039036_HDR.jpg


Shaping the dog leg sections proved to be a bit of a challenge, but it got done!

It was then time for some Bondo, sanding, more Bondo and sanding, and then some rubberized undercoating and paint!

IMG_20170513_180650000.jpg


IMG_20170513_231536556.jpg


I had started already on the fabrication of the sliders before this all went down, but that will be covered in the next post...

As seen in the pictures, yes I'm using the stock jack to hold the truck, no I didn't use jack stands, and yes I know that was extremely stupid...I have since purchased a set of stands and a 3 ton jack as I didn't own any and saw the need when I knew I was gonna tear apart the front (also to be covered)...

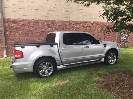
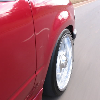
You'll also notice wheel spacers...I've heard good and bad things about spacers, but when I saw a set of 1.5" spacers off a TJ locally on Facebook Marketplace for $30, I jumped on it.


Join the Elite Explorers for $20 each year.
Elite Explorer members see no advertisements, no banner ads, no double underlined links,.
Add an avatar, upload photo attachments, and more!
.


Now, on to the sliders!

I had it planned to use 3/16" steel for it all, a 6' 4"x6" rectangular tube, two pieces of 10' 3/16" flat stock at 5-1/2"ish wide and 1-1/2" tubing would suffice...I wanna say the bill was only $170 (before all the welding wire and flap disks)...

To give the sliders that slight angle underneath, I went with the 4"x6" tubing and cut down both 4" side at 1-1/2"...I had planned on doing this with a cut-off wheel (got one of those steel ones for about $8, works quite well), but the kid at the welding shop offered to cut it for me (knowing what my plans were) with a plasma cutter...went quicker, cost me some $ for labor, and also bent the crap out of the two pieces. Bending it back was gonna be a chore, as the only rectangular stock they had was 1/4"...tried parking the Explorer on them, but that didn't do much, so I went with the next best thing at my disposal...

IMG_20170414_100832258.jpg


Turned them into ramps and drove our Heavy Rescue truck over them a few times...straightened right out! Next was to give some support inside the sliders to beef up the 3/16" bottom plate and then weld on the plate and cut the corners...(if you look close at the oil barrel, you may see a familiar sight...coincidence!)

IMG_20170415_104326673_HDR.jpg


IMG_20170415_110143453_HDR.jpg


IMG_20170415_115105634_HDR.jpg


Profile of the front/back that shows the angle I mentioned...

IMG_20170415_130354177_HDR.jpg


This is the point at which I started the rocker replacement project...after this I don't have any pictures until they were on the truck, but to walk you through the steps, I cut all the pieces to cap the ends (tried to use one piece per end and sort of wrap it, but that turned into a burned hand and making two pieces per end), welded the caps on and the whole length of the sliders. I then placed the sliders under the truck where I wanted them to sit using 2x4s as cribbing and shims, and then cut my tubing to attach the sliders to the frame...once they were welded to the sliders, it was time for bedliner and welding them to the frame.

Now, I originally wanted to bolt the sliders to the frame, but as I finished this project literally an hour past the time I originally wanted to set off for the KY trip, it was good that I didn't go that route. Do I wish I had bolted them? Yeah, but they worked great!

IMG_20170517_202518092.jpg


IMG_20170517_202623158.jpg


IMG_20170517_202647158.jpg


I'm really happy with them, just disappointed in myself for waiting so long and then rushing...I used rattle can bedliner and it seems to be flaking in some places...luckily I have plenty of time to address those little issues...see next post....


IMG_20170601_200925901.jpg


This is how Edgar sits right now as we speak...holding his radius arms out begging to hold axle beams again...

But I'll start at the beginning...

Took the trip to KY and had a really good time! Such a good time, that I really didn't get many pictures...rock sliders worked, had to get winched twice, but overall, the truck ran great!

Until the mud hole that gman can attest to...what I thought was a long puddle turned out to be a deep mud hole that we later witnessed swallow a UTV on the very last day. I sucked in some dirty water, soaked my air filter, dirtied the MAF I had just cleaned and we hoped it hadn't gone any further than that. So after pulling the plugs and praying the cylinders didn't pump out water when we cranked Edgar's heart over (in this time is when we witnessed the UTV plow into the same mud hole seconds after they yelled "hold my beer!"), we found no signs of water, and limped off the mountain...went into town and got MAF cleaner and a new filter and did the work the next morning before we left to travel back to OH. (Remember this story.)

As we rolled into Harlan, I noticed that the bottom bolt holding the driver side beam and RA together was way loose, like about to fall out loose...luckily I had brought my 1-1/8" wrench and went to tighten said bolt....worked a bit and then no-go...the pressed nut in the beam broke loose and all it did was spin. (If any of you recall much earlier posts, I had this issue when I first replaced RA bushings, and I believe once again when it was first lifted, and each time I just stuck a MIG welder in there best I could and tried to lay as much bead as I could to keep said nut from turning.) Well, now what?!? It was almost in the entire way, so I decided to just take it easy driving home, and that I'd stop and check it every 100mi. Well almost 100mi came and I decided to check it before hopping on I-75...it had started to back out again...

What to do? I figured that as long as the bolt didn't come out, I could just take it easy and we'd get home and I could deal with it there, but how do I hold the bolt up into the beam? Well, after cutting down a piece of 2x4 with a hatchet and lashing it to the beam under the bolt with some ratchet straps, I slowly made my way to the closest home improvement store to find something a little better and less janky than a 2x4 and straps, and boy did I ever!

IMG_20170521_224659055.jpg


Directly under the bolt are 3 blank steel switch covers, ziptied to two plates from the biggest u-bolts Lowe's had (was hoping to use the u-bolts rather that ties, but they didn't fit over the beam) all ziptied to the beam...I used the heftiest ties they had just so I had a little peace of mind. It actually worked quite well! We were doing a good 60-65mph up I-75 with no problems whatsoever! We were a little over an hour from home (10pm, 10hrs into a 7hr trip) and I needed gas...$1.99?!?! Heck yeah! Got gas, got coffee, and got in the truck...it was when we pulled to the stop light that I knew we had a problem...the truck would not move......forced it into the Dollar General on the corner across from the gas station, and hoped it was just a seized caliper that I could do something with. After pulling the tire and caliper, I noticed the rotor still wouldn't turn, removed the spindle nuts and learned the horrible truth.....

IMG_20170521_223407488.jpg


That picture is of what all was left of my passenger side inner wheel bearing (minus a few bearings...guessing the mud hole deprived the bearing of grease and instead of checking it and repacking bearings quick before we headed back up, I was left with this).....10pm on a Sunday, no luck in a parts store being open at all, so I called my brother-in-law (only 1.5hrs from home) and inquired if he could come get us with his truck and trailer. As they were getting on their way, I stuck the best bearings onto the inner race with some grease, put the wheel back on and hoped it'd get me on the trailer and back off. The people at DG and at the [nicer] gas station were cool, didn't care that the truck was parked there (DG) and let us hang out and even gave us a pizza (gas station). 2hrs later, we had Edgar loaded and ready to go home...

IMG_20170522_012829704.jpg


And now we come to where it is today...front beams are out and instead of doing the minimum, I'm doing it right. All bearings are being replaced, seals, pivot bushings, joints...

I have the beams now completely apart (as of last night)...

IMG_20170601_195232526.jpg


This is the "nut" that was the issue...it will be welded in a lot better than before...

IMG_20170702_210845118.jpg


Beams and knuckles are ready to be sandblasted...I did find when taking them apart that one of the sway bar mounts is cracked...planning on just repairing it when they come back...

IMG_20170702_210447661.jpg


I looked at the spindle from the passenger side and the inner race is stuck...might try heating it or attempting to cut it off, but I believe I'll probably have to replace the spindle...unless anyone has more ideas?

IMG_20170702_211513207.jpg


Anywho, that's where we sit at this moment...waiting for sand blasting before we can move any further...


Oh, and I almost forgot!! Biggest update? This little family of two and a dog will be a little family of three come November! :D


A man.... A truck...... A mud puddle.

All three in precise alignment, yeah... Everything was getting dirty. Not your fault I say. :D

Did make a nice big giant wave of mud go flying. Too bad I couldn't get the camera out fast enough. I really didn't expect you to do that, when it happened. lol

I almost want to say to replace that beam altogether for a used one. for some reason, I thought the nut had a center bore into the beam besides being tacked on? I could be wrong, and thinking of something else tho. Dunno.

I wouldn't even think of re-using that spindle. When that happened to me last year, I ended up buying an entire parts rig just to get the spindles and knuckles. I have pics on Pugly's thread showing what the rotor did to the knuckle when that inner bearing seized. Not pretty at all. That spindle is a precise machined part, and the entire weight of the rig rests on those bearings. Any deviation from true, and the new bearings won't last long. Even using too much emery cloth will mess them up. I just rebuilt a used good one, and called it a day.

Love the rocker repairs! That is pretty awesome stuff right there.


The nut does have an angle to it, like it was somehow pressed into the beam or something, so I figure I can put it back where it should be and place a few GOOD tacks around it to hold it in place...

I'm leaning more to replacing the spindle, just have to wait for the weekend...


I did the exact same thing on my rockers...cut out the rust. And I need to do what you did, weld in some new metal, it's just one of those things I "haven't gotten around to yet".


I have 2 to do the same thing on, except I'm thinking about cutting the rockers out completely and tucking sliders up a little higher than I would be able to if I patched the cut-outs.


Well, it's been quite a while since I wrote anything up on here...and I'll start with the good...

FINALLY got the truck back together! Well, it's been a few months, but it's moving! It came down to the wire (like always), as I took my time to get things right and looking good, and then decided I'd try and get it put together for the car show at our town's summer festival...

Started by getting everything sandblasted...luckily, my brother-in-laws family business not only sells and rents man-lifts that they buy and refurbish themselves, but they started in sandblasting and still do some to this day...

IMG_20170729_113709409.jpg


IMG_20170730_212729357.jpg


During this time of refinishing parts and reassembling stuff, I also had a side project...about 20 years ago, dad bought some school lockers at an auction and used a set of two to store his guns and a set of four for us kids to use at home...since we've all moved out and he's thought of getting more guns and also stores fishing gear in them, he got rid of the double locker, and I decided to refinish it...

IMG_20170710_220548506.jpg


I hand painted all the gold accents, replaced missing parts making the doors more secure, and used my wood working skills to fashion a board that comfortably and safely holds my shotgun (and future .22, muzzleloader and one other) in one set, and shelves for ammo and other hunting/shooting things and my bow in the other...

With that done, there were some things to address on the beams, but some grinding and welding took care of that...repaired some cracks and reattached the nut in the beam that was giving me problems...

IMG_20170729_121010771.jpg


IMG_20170729_121023715.jpg


IMG_20170729_165128466_HDR.jpg


IMG_20170816_212144893.jpg


IMG_20170817_194102947.jpg


I took the time to upgrade and replace all that I could. All bearings, ball joints, u-joints and bushings were replaced, and parts that could be were upgraded to including a grease fitting...I also opened the window on the passenger side beam, something I really should have done when I added the F250 towers and extended arms...

If you are wondering, yes, I replaced the spindle that was all buggered up...local yard had one 1st gen left and had all of it's front end parts...

As I was working late into the night for about a week without many breaks, I did not take any photos while putting it all back together, but I did get a pic next to our county's Hummer, owned and sometimes used by the Sheriff's office...

IMG_20170826_152507541_HDR.jpg


Other than that, not much new with Edgar, other than the now slipping clutch that will need replaced very soon....hoping it'll last through hunting season...


Now if you're wondering, I said I'd start with the good news....yes that means there's some bad news, and no, the slipping clutch is not the bad news.......

I threw into a previous post that my wife and I were expecting a little bundle of joy....a little over 6 weeks ago, at 34 weeks along, my wife said she thought something might be wrong, and a visit to the hospital and an ultrasound determined that our baby no longer had a heartbeat.

Our daughter was delivered 4 days later and was absolutely beautiful...with the help of a bereavement group, family and friends, we've got pictures, hand and footprints, and a few hours of memories...we're getting through, but it's still tough, especially the last week as the 5th was her due date...thoughts/prayers/anything helps and are felt every day...

This will probably be the last update for another month or so, but I figured that it's been long enough now that it's time to update everyone...


Oh man, I’m terribly sorry that you and your wife had that happen.

I know that pain well, as my ex wife and I had that experience in the summer 2010, and mine was a boy.

May God bless y’all all the way around.


Glad to see you making progress on this.

When I saw your post on facebook a few weeks back my heart sank. My brother went thru thru the same thing last year. Tracy and I lost a baby before we had Bailey though not nearly as far along as you two were.


I liked your post, only because I have been concerned for you both, and glad to hear from you. Give the wife a hug from all of us. We are your extended family Caleb, and here for ya.

The beams and knuckles look great!


I am so very sorry for your lose sir. My heart and prayers go out to you and all of your family.


Hey everyone! Thank you all for the kind words...it's been a trial, holidays sucked, and there were a lot of questions. Luckily, in the last two months or so, we've gotten answers and some closure. Turned out that it was blood clots in the cord that did it...just kind of a freak thing, there's no indicators that it is a chronic thing my wife has or that it would even happen again, but the Doctor is putting her on a baby aspirin to thin the blood, just to make sure it doesn't happen again.

Back to the truck, I've got a few things coming up that will have me in the shop (an empty space at our fire hall were I do most my work when it's cold, wet, or going to take a while) here soon.

Hunting season is over (one small doe and two squirrels, not much of a haul, but it'll do) and so now is the time to get the trans out and replace the clutch. Haven't bought one yet, as I have another vehicle and would like to get it out and inspect the condition of all the parts. Hoping I could just get a new friction disc, but I'll more than likely get a whole kit (disc, pressure plate, pilot and release bearing, disc alignment tool) from NAPA or RockAuto. Will probably get a new flywheel too. Anyone have experience with aftermarket clutch packs and/or flywheels? NAPA kit is almost $50 more than this kit (More Information for M-PACT 07077ST1) from RA, but for some reason, I'm not 100% sold on a cheaper aftermarket part, but on a budget, it's probably what I'll get. Same with the flywheel...

During this time, I'll probably do some touch ups and maintenance on other things;
-Ohio winters suck, so it'll get a good washing underneath to get the salt and road grime off.
-I didn't do the best with painting the sliders and I'm getting some rust on the frame. Wire brushing and painting will be in the works.
-After rebuilding the manual t-case, I just threw some cheap ATF in there, so I'll drain it and put in some Amsoil ATF.
-Since the front end rebuild, I've been getting a slight vibration up front when in 4wd, so I'll be pulling/accessing all bearings and re-greasing them.
-I've also noticed that the t-case is very loud at 40mph (only used when roads are snow covered)...not a terrible concern, but maybe some good fluid in there will ease the issue (not that it's in 4hi at those speeds often...just curious if anyone has answers as to why that might be...thinking I probably should have also replaced bearings when rebuilding as it previously was filled with gear oil.
-Had a little post connection issue earlier today, so battery posts will be cleaned and the worn out negative post will be replaced.

Have had a bit of a stumbling/lack-of-power issue when taking off or getting into a new gear, but isn't present when my foot is just barely on the gas. Part of this I want to attribute to needing to replace the clutch, but I'm wondering what else it could be? I'll be cleaning the throttle body and MAF (helped before), but I'm also wondering about plugs, wires, battery and that connection issue as stated before. Battery and wires were replaced when the truck was purchased (almost 5 years ago, wow!) and I can't imagine that they'd be bad already, but I've also had to put the battery on a charger twice this winter (attributing that to the miserably cold temps, and that with my battery shut-off switch, the only thing drawing power when disconnected is the radio memory). I replaced the plugs a year ago (probably didn't need to, but I did and it seemed to help a previous lack-of-power issue), so I'm guessing that's not it. Anyone else have any ideas of what it could be or things I should look at? :dunno:

Last, but not least, I had to deal with this slipping clutch/lack-of-power deal for about 4 hours today instead of taking it to the station and beginning work on all this.

Why you might ask?

I sometimes browse Craigslist (all over the country) for 1st gens (hoping to find a Sport still for some reason :crazy:), and came across an ad for a guy parting out a 91, just south of Fort Wayne (1hr 30 min drive).

$100 dollars later, I now have at my house 2 mirrors and glass for the front doors to replace the original ones to this truck, of which the Arizona sun and sand was not kind to before it became mine, and are hard to see out of...

I did not spend $100 on just that; I in-fact got 4 complete, almost rust-free doors for those parts, and to start a half-door project that I've sometimes daydreamed about for the last 4 years! :sawzall::bounce: 
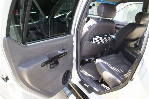
So if anyone needs switches and window motors, I'll have some up for grabs in the near future! And if you have any tips on how to remove window tint, that will also come in handy!:D


This is the pile of donor doors, just begging to be picked clean of parts, cut, capped and painted...

IMG_20180210_175941098.jpg


To be honest, seeing the paint scheme on them, kinda makes me want to paint the whole truck all over again, but maybe I'll just save it for the next project...but while they're waiting, and while I'm waiting for the time to start on this, I've got a few ideas on how to cut these, but wanted to share my ideas with you all and get your input.

I started with this old picture of the truck (notice luggage rack 1.0 and grass-less scenery)...

11042675_573634032735_1745921243526384844_n.jpg

I took that and went to paint...red lines are proposed cut lines/final opening size...

Cut option 1:

half doors 1.jpg

Cut option 2:

half doors 2.jpg

Cut option 3:

half doors 3.jpg


I'm using doors instead of just removing the doors or making tube doors for 3 reasons. Reason 1 being that while they're closed, they'll create a sort of "tub", keeping things from rolling out of the truck down the road and on the trails, which I could fabricate tube doors to do as well, but that's more work than I really want to do (along with mounting them to the hinges, etc.) The cuts also may not go as low as depicted, but I kinda like the feeling of there being no doors (drove my Sport with no doors for a month or so and loved it) and want to keep them low, but as mentioned, if something were to be placed on the floor, it wouldn't shift out or roll out of the truck. Reason 2, I'll still have mirrors, whether I have whole doors or half doors on, and they'll be relatively easy to swap. It wouldn't take much to mount mirrors to tube doors, but it would require me to purchase them on top of the cost of tubing. Reason 3, I won't have to locate a latch and then figure out and mess with mounting said latch as it's already in the door, I'll just have to figure out how to operate it (which I have a few ideas about already).

Onto the reasoning and thoughts about the options. In all 3 options, it allows for the front doors to utilize the opening for the speaker that is already in the door. I like option 1 as it's uniform and both the front doors and rear doors go to the same level from the floor. Option 2 will allow me to also use the speaker opening in the rear doors, but I'm not sold on the way they aren't at the same level. Option 3 I'm not 100% crazy about as it kinda looks like I'm trying to copy a Polaris RAZR, but I do kinda like it. An adaptation to option 2 that could be considered as option 4, is to match the cuts like in option 1, but to the level of the rear doors in option 2, but doesn't keep the opening as large as I'd really like. Another possible addition to each option is a piece of tube steel inside the opening, at about the height of the arm rest, for an arm rest and as some protection on the trails.

So what do you all think? Perhaps I should create a poll? lol


I like two then one. Though I would have to sit in the front and rear seats to see what I would really like.


The NAPA performance clutch kit I recently installed, was actually made by LUK. Works great, and was cheaper than getting it in a box labeled LUK. Weird, that Napa sells it cheaper, but it is the same thing.

Option #2


Join the Elite Explorers for $20 each year.
Elite Explorer members see no advertisements, no banner ads, no double underlined links,.
Add an avatar, upload photo attachments, and more!
.


Interesting...popular one seems to be my least favorite lol...just to give some reference, on option 1, the cut would be down to the same level as the top of the carpeting on the door panel, and option 2, the cut on the back doors would only be to the level of the arm rest o the door panel...keep them thoughts coming! It might be freakin cold right now, but I'm really itching to get back to modifying and fabricating!!

A bit of an update, I'm not sure if it's the winter weather or the fact that I know I'll soon have it apart and not moving for a while, but I drove the Explorer to my parents (maybe a mile away) for lunch yesterday...somewhere around 9, we decide I should probably run home and let the dog out. I kinda notice the headlights flickering, and it gives me flashbacks of when I first moved out west...I was traveling I40 in the Rockies, downhill between two curves, and the headlights in my 92 Escort flickered twice and then just went out at 3am. (Turned out to be a bad relay). Well the truck lights never went out, but it made me think, so on my way back to my parents, I watched the gauges as I got on the gas...my volt meter would bounce all over the place, my battery light would just start to come on, and behold; the engine would stumble. Go to leave their place, nothing would turn on at all...wiggle around the contacts on the battery, got a good connection (for now) and didn't have a stumbling issue on the way home, just a slipping clutch...

So, at least I have that narrowed down...now to actually getting around to doing the work...


Back
Top