DIY Explorer 302 Headers | Page 16 | Ford Explorer Forums - Serious Explorations

  • Register Today It's free!

DIY Explorer 302 Headers

My new EGR valve made it to Nebraska on Wednesday, but somehow still hasn't showed up at my house...ergh. I tried mocking things up with the old valve/pipe, but I don't feel comfortable basically guessing how the new pipe needs to be bent and risking going too far. I'll just have to wait for the valve which means the new EGR pipe won't get plated alongside the headers.

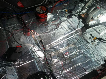
Instead, I played around with plug wire routing tonight. I bought a new set of Motorcraft wires and I'll be moving the wires and sheaths around to make them work with the headers. I'll be adding more sheaths too.
1000001490.jpg

1000001494.jpg

I think I also came up with a way to use the driver's side rear plug wire bracket (which can't be used with headers) on the passenger side. I'll keep y'all posted as I start playing with everything.


Join the Elite Explorers for $20 each year.
Elite Explorer members see no advertisements, no banner ads, no double underlined links,.
Add an avatar, upload photo attachments, and more!
.


I am sure you already know this because I talk about it all the time but
I route all of my wires towards the fender skirt not along the valve covers
Putting them behind the header makes it so much more difficult to work on the wires and it puts them very close to the header tubes


44356f50-aef6-4771-a055-3a2a2a507b75-jpeg.jpg


10a6f223-41b9-4821-b90d-c040b3094f06-jpeg.jpg


i do like the way you took 3 and 4 around the backside and then up by the fuel rail.... once the intake and egr and all of that live in that spot those wires get buried. I have spent waaaaaay too much of my life threading ignition wires onto our 4.0 and 5.0 engines hahaha I'm OCD at the coil pack
So glad you will have some headers when this is all done!!!


I am sure you already know this because I talk about it all the time but
I route all of my wires towards the fender skirt not along the valve covers
Putting them behind the header makes it so much more difficult to work on the wires and it puts them very close to the header tubes
Yeah, I've seen a number of folks route the wires out and up the inner fenders. I'm a big fan of removing inner fenders any time I work on suspension, engine, etc. though and don't really want more stuff in the way. I'll see if I regret it, but once I do some selective header wrapping and add more sheaths, I think I'll be okay from the thermal management perspective.

So glad you will have some headers when this is all done!!!
Me too. I'm glad there's finally seeming to be a light at the end of the tunnel, although I'm disappointed my "how to build headers" turned into "building headers is really hard, just go get any set of TMH you can find and try to make them work" haha. At least I've learned a lot and my MIG skills have improved dramatically.


Y'all might want to sit down fo this pic:
1000001503.jpg

The nickel plating came out better than I expected. Tomorrow, I'll work on getting them covered in clear ceramic so the nickel won't tarnish.

My tap for the EGR is supposed to arrive tomorrow too, and the EGR valve showed up today. Feels like I'm finally getting close to turning wrenches on the Mounty again!


What do y'all use on all the threaded bits and mating surfaces when you install headers?

I was thinking copper high-temp anti-seize on all the fasteners.

What about the EGR fitting? Good or bad idea to use ultra copper RTV on EGR fitting threads?

Should I use ultra copper on the ball flanges, or do they usually seal pretty well?


Sexy


No comments on sealing ball flanges or EGR fitting? I may go ahead and use ultra copper on the ball flanges because now is the only time I'll have good access to clean and seal them -- it'd suck to find out they leak after I get everything back together. EGR fitting is easy enough to get to later, so I'll skip that.

I looked at how much I need to modify my EGR pipe and I think it's going to be quite a bit. It looks like the valve side bend needs to be bent to less than the ~90 deg it is now and the header end needs to be bent from its current ~135 deg to more like 90. The bent "leg" on the header end may need to be sectioned and shortened too.
1706712576287.png

Here's the OBX EGR pipe for reference. Note the tighter bends and shorter "leg" on the header side:
1706712968936.png

What techniques have y'all had success with when it comes to bending these? I've bent small gauge aluminum tubing before by packing it full of sand and heating the area to be bent with a propane torch. The sand did a good job not letting the tube collapse in the bend, but you really have to make sure it's packed tight. That's what I'll try for this unless there's a better idea.


I have a piece of solid stock that fits right inside the egr tube… with a vise and map gas and that piece of solid steel I make the bends.. a little at a time
Bend, test fit, bend

If it requires too much you will have to chop cut and weld

I use anti seize on the header bolts and exhaust downpipe bolts… but it doesn’t last forever on exhaust bits

The ball flange header/ down pipe connections use tons of light and make sure it’s setup in the middle of the ball, even spacing all the way around

If the ball flanges leak past this (my bii the Downpipes were over tightened a time or two and stretched out a bit) so I used a Chevy exhaust ring donut to seal things up. It’s a ***** to get it in there and stay centered… but once the ring is in there it smashes flat and acts like a gasket


Ok, I'm finished admiring myself in the reflection of your headers. Those came out so nice I'd want them to spend a night next to my bed.


Ok, I'm finished admiring myself in the reflection of your headers. Those came out so nice I'd want them to spend a night next to my bed.
I'm very happy with how the electroless nickel plating turned out! I could've polished the headers way better, but knew it wasn't worth the time given how hidden they'll be after installation. They're just nickel plated (no chrome top layer) for corrosion protection, but I had clear ceramic applied yesterday so the nickel should stay as shiny as it is now even as the headers get hot and exposed to air/moisture/my greasy hands.

I have a piece of solid stock that fits right inside the egr tube… with a vise and map gas and that piece of solid steel I make the bends.. a little at a time
Bend, test fit, bend
I found a socket that fits the pipe ID nicely, but I'm still worried the pipe will collapse given how much it needs to bend on the header side. I'll probably just have to feel it out as I go.

The ball flange header/ down pipe connections use tons of light and make sure it’s setup in the middle of the ball, even spacing all the way around

If the ball flanges leak past this (my bii the Downpipes were over tightened a time or two and stretched out a bit) so I used a Chevy exhaust ring donut to seal things up. It’s a ***** to get it in there and stay centered… but once the ring is in there it smashes flat and acts like a gasket
I don't think my Mounty's exhaust had been touched since it left the plant, so maybe the sockets on the down pipes will seal fine. I'll try my best to center them up, but visibility isn't great on the driver's side.


You can see it you just have to look around the wheel / tire


I worked on the EGR pipe last night and got the valve side bent how I wanted, but the header side did not go well. I didn't have any issue with the tube collapsing, instead it just tore on the outside of the bend.
1706797337533.png

I'm thinking about buying another pipe and cutting off the tighter bend from the valve side and splicing together the two pipes. Sadly, I can't use my old EGR tube to splice in because it got damaged when I tried to take the valve off and I ended up cutting off the fitting (and thus the flare on the valve side bend).


What were you using to heat it? Did it crack while bending, or while cooling?


I was using a map torch -- it's the best I've got currently, but I was able to get the tube glowing red. The tubing stretched/necked down a bit when I did one round of bending so I made sure to heat a slightly different section of the bend when I came at it for a second round. However the necked down section tore open anyway.

For the record, the material of the Dorman EGR tube is noticeably worse quality compared to the original Ford part: lower grade steel (you can tell because it's magnetic and the original tube is not), less consistent bends, and WAY worse looking welds. Not trying to make excuses, just observations. I have to make cheap aftermarket parts work one way or another because the originals are probably all rusted in place for good by now.


Those headers are gear head ****ography! ( ha can't write P 0 R N)

Is that safe for posting?

What if you opened those at work?

So nice!


Damn, yeah MAPP gas is hot enough. It may just be a different type of stainless. 400 series is slightly magnetic, I believe.

Wish I was closer, I’d help you fab it up


Correct. Many 400 series alloys are magnetic, so that's probably what the Dorman tube is (I will get it X-rayed at work to confirm the alloy before welding together a custom pipe).

It's worth noting that 300 series is non magnetic and is generally more ductile -- probably why the Ford pipe has smoother bends and I was able to bend it without splitting when I was practicing my technique on the old pipe.

I got another Dorman pipe ordered, hopefully next week I get some progress made.


Hahaha oh man I just cut it up and weld on a piece of metal tube where needed I never checks the alloys or changed my mig to stainless wire or anything… seemed to work just fine! Usually I can bend them with no cracks but when they start to pinch or stretch I just cut chop and weld on a new piece of tube where needed… just grab some ol metal tube from the metal pile. Several ways to skin a cat I guess


Join the Elite Explorers for $20 each year.
Elite Explorer members see no advertisements, no banner ads, no double underlined links,.
Add an avatar, upload photo attachments, and more!
.


Hahaha you're a true mad scientist in the world of Ranger-based vehicle enthusiasts!


Back
Top