96 Explorer - Pulling the motor | Ford Explorer Forums - Serious Explorations

  • Register Today It's free!

96 Explorer - Pulling the motor

Okie2

New Member
Joined
January 29, 2020
Messages
7
Reaction score
2
City, State
South Ok
Year, Model & Trim Level
1996 4door xlt
I've pulled two motors in my life.

The first was a 283 Chevy engine. I used three tree stems about 12 ft long which I toted out of the woods and tied together into a tripod with a chain and pulled engine and transmission with a come-along, rolled the body back, lowered it to the ground, and went back together with a 230 or 235 straight 6. Best I recall (other than the tree trunk tripod) took about two days. No problems at all, they both fit the 2-speed Duraglide? racing tranny. That was in 75

The other was a 300 straight 6 Ford out of a 73 Econoline 300 Van. I can't remember for sure but believe my brother and I pulled that one out from inside the cab with a couple ropes wrapped around it. I pulled and reinstalled the auto-trans by myself using a rope tied between the door posts and a screwdriver to twist it up and down, worked great! That was maybe 1984.

These were very simple systems to manage, with my very simple mind.

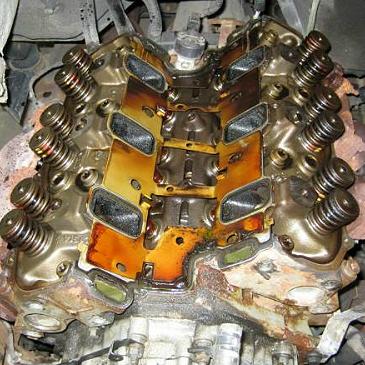
Now I've got a 96 Explorer and a 4.0L engine W/OBD2 which I need to pull and go into a 93 Ranger W/OBD1

I'm not positive but believe the short block OBD2 Explorer 4L should drop right in, and mesh into my OBD1 system?

But my primary question is.....
Are there any unforeseen probs with pulling that thing? Things that need to be removed prior to the engine? How much of the 96 can I retain to mix into the 93?

Any suggestions, etc, that could be helpful will be very much appreciated


Join the Elite Explorers for $20 each year.
Elite Explorer members see no advertisements, no banner ads, no double underlined links,.
Add an avatar, upload photo attachments, and more!
.


@Okie2

Read this, specifically with an eye to mixing the different year components.


Somewhere on the web is the original article that this write up was lifted from.

The original write-up has much bigger pictures - but somehow over the years even these have shrunk.


HTH -


I pulled my SOHC and it took a while...that said, it was a motor swap, so I cared about the vehicle. Most of the time was spent fighting seized/rusted/broken fasteners. I also left the TC mated into the tranny, and removing those nuts through the starter opening straight sucked.

If you can cut hoses and exhaust and stuff, it’ll speed the process up quite a bit.


@Okie2

Read this, specifically with an eye to mixing the different year components.


Somewhere on the web is the original article that this write up was lifted from.

The original write-up has much bigger pictures - but somehow over the years even these have shrunk.


HTH -
Thanks for this Dave. I had seen the first one but the last one there is a lot of help towards the engine.

Is there any need to move the brake booster or to take anything off the heater side to get necessary working/lifting room in there?


Another thing that worries me is the exhaust manifold bolts, afraid of twisting those off(of either vehicle) because I'm hoping to re-use both motors


I pulled my SOHC and it took a while...that said, it was a motor swap, so I cared about the vehicle. Most of the time was spent fighting seized/rusted/broken fasteners. I also left the TC mated into the tranny, and removing those nuts through the starter opening straight sucked.

If you can cut hoses and exhaust and stuff, it’ll speed the process up quite a bit.
I'm hoping to resell the Explorer as a parts vehicle(or more) as it has the airbags intact, and hoping to keep both engines. I'm actually amazed at that thing, it's got like 10 windows (most of them are large) and a large cargo rack and not a leak on it.
They'll just need a totaled Explorer with a good engine and tranny


I've also pulled both transmissions, but never removed either exhaust manifold, and that is the biggest worry I can foresee atm
I don't believe either has has ever been removed and both are high mileage (240k and 350k miles)


Another thing that worries me is the exhaust manifold bolts, afraid of twisting those off(of either vehicle) because I'm hoping to re-use both motors

@Okie2


Sorry to break this to you brother, but you aren't going to be re-using many of the original exhaust bolt manifold studs (exhaust manifold to head).

In fact, I recommend NOT re-using them - the reason is further down in this post.

If I remember correctly, out of (12) original studs, at least (6) of them broke. Good thing is they break OUTSIDE of the head (and within the "passage" through the exhaust manifold), leaving a stub.

When you pull off the exhaust manifold, the stub will be visible.

Soak the stud with penetrating oil, clamp on the BIG vice grips, and try to CAREFULLY lefty-loosy it.

You do not want the stub to snap again - this time INSIDE of the head...

If the stud won't budge, hit the stub with a torch - that'll do it ;)

It's a well-Known problem with the 20+ year old "work hardened" factory/oem studs breaking as soon as you try to take off the nut (despite how much KROIL/Penetrating oil and heat/direct flame from torch you use beforehand).

Here's what I had to do when I replaced my heads last years - the pics will tell the whole story.

Dorman Part 03411 and cut 4 threads off of the BOTTOM studs so they will bottom out in their hole - last pic clarifies this.

(NOTE: You'll need to buy (2) because they come in a 10 Pack - Go Figure).

Chase the holes with a M-8 Tap - don't bypass this very important detail unless you like to gamble :cool:

Make sure to coat the new studs with NICKEL anti-seize when re-installing them.

Nickle anti-seize is HIGH HEAT formula.

Any more questions - just ask.

HOPE THAT HELPS!

P9110133.JPG


P9110134.JPG


P9140169.JPG


P9140170.JPG


P9120135.JPG


P9120137.JPG


@Okie2


Sorry to break this to you brother, but you aren't going to be re-using many of the original exhaust bolt manifold studs (exhaust manifold to head).

In fact, I recommend NOT re-using them - the reason is further down in this post.

If I remember correctly, out of (12) original studs, at least (6) of them broke. Good thing is they break OUTSIDE of the head (and within the "passage" through the exhaust manifold), leaving a stub.

When you pull off the exhaust manifold, the stub will be visible.

Soak the stud with penetrating oil, clamp on the BIG vice grips, and try to CAREFULLY lefty-loosy it.

You do not want the stub to snap again - this time INSIDE of the head...

If the stud won't budge, hit the stub with a torch - that'll do it ;)

It's a well-Known problem with the 20+ year old "work hardened" factory/oem studs breaking as soon as you try to take off the nut (despite how much KROIL/Penetrating oil and heat/direct flame from torch you use beforehand).

Here's what I had to do when I replaced my heads last years - the pics will tell the whole story.

Dorman Part 03411 and cut 4 threads off of the BOTTOM studs so they will bottom out in their hole - last pic clarifies this.

(NOTE: You'll need to buy (2) because they come in a 10 Pack - Go Figure).

Chase the holes with a M-8 Tap - don't bypass this very important detail unless you like to gamble :cool:

Make sure to coat the new studs with NICKEL anti-seize when re-installing them.

Nickle anti-seize is HIGH HEAT formula.

Any more questions - just ask.

HOPE THAT HELPS!

View attachment 322370

View attachment 322371

View attachment 322372

View attachment 322373

View attachment 322375

View attachment 322376
Awesome Dave, thank you very much for this!


Remove or cut the manifold to downpipe bolts, as required. Remove the engine with the manifolds still attached—don’t try to remove them in the truck.

Having the extra work space to carefully extract them with the right tools will make all the difference in the world. Doing it inthe cramped engine bay would be awful.

No need to remove firewall mounted equipment. Pull the radiator and put a sheet of ply between the condenser and engine—it’s cheap insurance.

I was able to carefully get the PS and AC stuff out of the way without disconnecting.

This was all SOHC though.


Back
Top