Scott B.'s V8 Ranger Conversion | Page 4 | Ford Explorer Forums - Serious Explorations

  • Register Today It's free!

Scott B.'s V8 Ranger Conversion

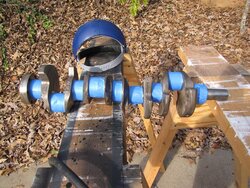
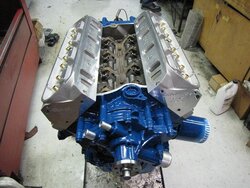
I purchased my Ranger XLT new in September 1993. I ordered it from Ford – even had to wait an extra 2 weeks for delivery due to the floods in the Midwest. After driving the truck for almost 18 years, (including 9 trips across the country) I have put 320,000 miles on the original 4.0L engine and A4LD transmission. The time has come to replace the drivetrain.

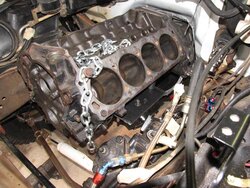
The new drivetrain will be a 5.0 L engine (SN95) with an AOD transmission. I am going to run my stock BW1354 transfer case. I have already swapped in a 31-spine 8.8 rear axle.

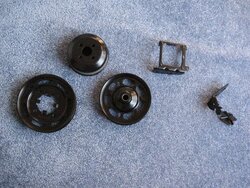
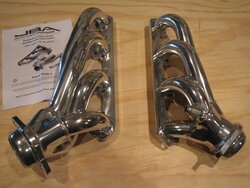
The objective of the engine build is reliability and reasonable performance. I am looking for 275 – 300 horsepower, lots of torque, and to start every time I touch the key.

I plan to keep the truck OBDI for simplicity, and use my existing column shifter for operating the transmission.

I will detail the engine build here, and the conversion/installation in my build thread. (Starting on page 10, post 192)


Join the Elite Explorers for $20 each year.
Elite Explorer members see no advertisements, no banner ads, no double underlined links,.
Add an avatar, upload photo attachments, and more!
.


Join the Elite Explorers for $20 each year.
Elite Explorer members see no advertisements, no banner ads, no double underlined links,.
Add an avatar, upload photo attachments, and more!
.


Yes, they are.

They are really too pretty to hide under a valve cover!

They have both a roller trunnion bearing and a roller tip - minimal resistance and no valve stem bending/flexing.


Don't cha' love boxes of new go fast goodies? I know I did:D

Looking good!


Crankshaft Prep

I did a little work on the crank before it gets ground, polished and balanced.

I removed the cast flashing with a burr, and sanded the counterweights with sanding rolls. I didn't remove a significant amount of material, but did smooth the surface. The smoother surface has less windage, and will carry less oil as it rotates.
 

Attachments

  • Crank3.JPG
    Crank3.JPG
    134.3 KB · Views: 1,054
  • Crank4.JPG
    Crank4.JPG
    82.8 KB · Views: 1,082
  • Crank5.JPG
    Crank5.JPG
    99.1 KB · Views: 1,026
  • Crank6.JPG
    Crank6.JPG
    99.3 KB · Views: 1,053


How To

Remove an AOD transmission from a crate when no one is around:
 

Attachments

  • MovingTrans2.JPG
    MovingTrans2.JPG
    85.7 KB · Views: 1,048
  • MovingTrans1.JPG
    MovingTrans1.JPG
    80.7 KB · Views: 1,063


Shiny!

I spent a little time playing around with the intake plaque.

Not finished yet, but looks so much better than when I got it.

The upper surface (around the Ford logo) is polished, the lower area is blasted and sanded.
 

Attachments

  • PrePolish.JPG
    PrePolish.JPG
    41.1 KB · Views: 1,097


Trial Fit

It will be about here...
 

Attachments

  • Preview.JPG
    Preview.JPG
    88.2 KB · Views: 1,055


PCed Parts

I got these back from Jon...
 

Attachments

  • pulleys.JPG
    pulleys.JPG
    122.9 KB · Views: 1,067


More Parts

Everything but the wiring harness is here from my recent trip to Summit.
 

Attachments

  • Wires.JPG
    Wires.JPG
    65.9 KB · Views: 1,042
  • Spacer.JPG
    Spacer.JPG
    64 KB · Views: 1,016
  • Headers.JPG
    Headers.JPG
    73.7 KB · Views: 1,011
  • Dist.JPG
    Dist.JPG
    63.9 KB · Views: 1,293


..When are you going to get some mud on them joints and bead?

attachment.php


It's on the list.

Feel free to come over and get started...


Crank Balance

The crank was balanced tonight!

Setup

CrankBalance1.jpg


First spin - need to remove over 100 grams!

CrankBalance3.jpg


Removing weight

CrankBalance2.jpg


Spinning

CrankBalance4.jpg


Done!

CrankBalance5.jpg


I fabricated a set of engine mounting plates, and mounted a "spare" small block in the truck this weekend.

(Details in my build thread.)
 

Attachments

  • MountLF.JPG
    MountLF.JPG
    111 KB · Views: 983


Short Block Together!

The short block is together! The cam gets degreed today, and everything should get painted tomorrow (in the warm weather.)

I'll get some pictures tonight, and post tonight or tomorrow.


Here is the short block.

You can see the H-beam rods. (The original pistons/rods are in the pan below the engine.)

The rest of the engine should be together now, but twice the parts supplier delivered the wrong timing set. Maybe tomorrow...
 

Attachments

  • Shortblock2.JPG
    Shortblock2.JPG
    77.4 KB · Views: 923
  • Shortblock1.JPG
    Shortblock1.JPG
    93.1 KB · Views: 934


Progress!

The cam was set up with the degree wheel, the timing cover and water pump installed, the oil pump, driveshaft, pickup and oil pan were installed.

The lifters, dogbones and spider have been installed.

And, it is painted!
 

Attachments

  • Engine1.JPG
    Engine1.JPG
    83.9 KB · Views: 1,167


Join the Elite Explorers for $20 each year.
Elite Explorer members see no advertisements, no banner ads, no double underlined links,.
Add an avatar, upload photo attachments, and more!
.


Here, you can the heads sitting on the shortblock.

The valves have been removed to check the seats and to powder coat the heads. I'm going with a glossy clear - got to let the aluminum shine through!
 

Attachments

  • Engine2.JPG
    Engine2.JPG
    88.2 KB · Views: 963
  • Engine3.JPG
    Engine3.JPG
    89.4 KB · Views: 912


Back
Top