Limited02
Explorer Addict
- Joined
- November 1, 2006
- Messages
- 3,574
- Reaction score
- 7
- City, State
- Gardner, KS
- Year, Model & Trim Level
- '02 Limited V8
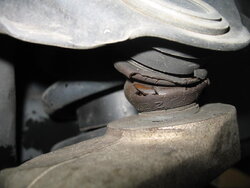
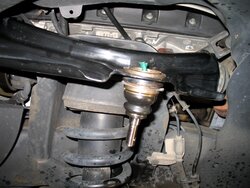
I'm planning on doing both the upper and lower ball joints this weekend. Yesterday the pictures were there but today they aren't? Any Idea's? I new I should have copied them into a word doc!
I've read that some of you have been able to remove the upper without removing the control arm. I did reserve the ball joint press from Autozone so will I be able to remove the ball joints without removing the control arm with the press?
If you are using the same one that I used(see my post #152) then yes you can change the ball joint without removing the arm. Just pay attention, use common sense and the project will go smoothly and easily