-
Performance Upgrades - Maintenance - Modifications - Problem Solving - Off-Road - Street Trucks.
Covering the Explorer, ST, Sport, Lincoln Aviator, Sport Trac,
Mercury Mountaineer, Mazda Navajo, Ford Ranger, Mazda Pickups, and the Aerostar.
Featuring H.I. - Human Intelligence.
Register Today It's free!
You are using an out of date browser. It may not display this or other websites correctly.
You should upgrade or use an alternative browser.
You should upgrade or use an alternative browser.
Buck's Explorer Audio pics
- Thread starter jtbuck92
- Start date
Elite Explorer members see no advertisements, no banner ads, no double underlined links,.
Add an avatar, upload photo attachments, and more!.
jtbuck92
Well-Known Member
- Joined
- June 9, 2010
- Messages
- 237
- Reaction score
- 0
- City, State
- Nashville, TN
- Year, Model & Trim Level
- '03 Limited 4.6L
---------- Post added at 02:51 AM ---------- Previous post was at 02:50 AM ----------
Fuse holders epoxied on the stock fuse box:
---------- Post added at 02:53 AM ---------- Previous post was at 02:51 AM ----------
Here's Bumpin' trying to cut off the factory ring terminals, had to use what tools were available:
---------- Post added at 02:55 AM ---------- Previous post was at 02:53 AM ----------
The 2 pos runs are cut, ready to go in fuse holder, factory wires have terminals on. Got those batt. terminals at Wal-Mart for 4 bucks a piece, I love them.
---------- Post added at 02:57 AM ---------- Previous post was at 02:55 AM ----------
With those ring terminals, I put my stock wire on the tension screw that holds it on the post and put my 0 gauge on the 2 extras.
---------- Post added at 02:59 AM ---------- Previous post was at 02:57 AM ----------
Final pics of night of work:
jtbuck92
Well-Known Member
- Joined
- June 9, 2010
- Messages
- 237
- Reaction score
- 0
- City, State
- Nashville, TN
- Year, Model & Trim Level
- '03 Limited 4.6L
Ran speaker wire today.

This was my only option, but it worked. **** parking break was in the way.

Got my SL80's in but I blew one of them now I'm in the market for new speakers.

My beautiful 9.2x sitting there testing everything making sure it all works.

This was my only option, but it worked. **** parking break was in the way.
Got my SL80's in but I blew one of them now I'm in the market for new speakers.
My beautiful 9.2x sitting there testing everything making sure it all works.
jtbuck92
Well-Known Member
- Joined
- June 9, 2010
- Messages
- 237
- Reaction score
- 0
- City, State
- Nashville, TN
- Year, Model & Trim Level
- '03 Limited 4.6L
Got the bus bars in today. F me I almost broke my chin in the process. I was drilling in them and the bit caught and rotated the bus bar around and clocked me right in the middle of my shin twice. I can't explain how much it hurt. It's like taking a dumbbell and hitting yourself in the shin with it. These are electrical taped because this is a daily driver and these bus bars have a lot of copper to be a good accidental grounding point. Anyways, here's the pics. Notice how the drill bit is eaten up.


jtbuck92
Well-Known Member
- Joined
- June 9, 2010
- Messages
- 237
- Reaction score
- 0
- City, State
- Nashville, TN
- Year, Model & Trim Level
- '03 Limited 4.6L
Got all my wires connected for the power/ground. Had to drill out the ring terminals because the bolts were too big for the whole on them.

Got my components today.
WoofersEtc.com - SLX 265 Deluxe - Rainbow SLX 6.5" 2-Way Component System


Got my components today.
WoofersEtc.com - SLX 265 Deluxe - Rainbow SLX 6.5" 2-Way Component System
jtbuck92
Well-Known Member
- Joined
- June 9, 2010
- Messages
- 237
- Reaction score
- 0
- City, State
- Nashville, TN
- Year, Model & Trim Level
- '03 Limited 4.6L
Maybe some rear fill will be going in, but that should be it as far as speakers.
---------- Post added at 08:27 PM ---------- Previous post was at 08:27 PM ----------
Got the amps in!


---------- Post added at 08:27 PM ---------- Previous post was at 08:27 PM ----------
Got the amps in!
jtbuck92
Well-Known Member
- Joined
- June 9, 2010
- Messages
- 237
- Reaction score
- 0
- City, State
- Nashville, TN
- Year, Model & Trim Level
- '03 Limited 4.6L
Moar pics


Got my speakers in today, my own made door adapters. Gotta find something to do with the tweeters, to make them flush. There wasn't enough space in the behind it. Anyways, a few pics.


Got my speakers in today, my own made door adapters. Gotta find something to do with the tweeters, to make them flush. There wasn't enough space in the behind it. Anyways, a few pics.
jtbuck92
Well-Known Member
- Joined
- June 9, 2010
- Messages
- 237
- Reaction score
- 0
- City, State
- Nashville, TN
- Year, Model & Trim Level
- '03 Limited 4.6L
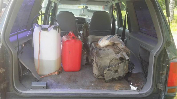
Here's the box and me (a slight fatty, not too bad). Met a cool guy at Home Depot, really gave me the special treatment so to speak with cutting my wood. It was DEAD on, couldn't ask for better. The bottom and top pieces overhang though because we couldn't get the boxes fully together, but it's only by 1/8" or so. BIG BIG BIG HUGE shout out to Bumpin' Goalie. He stayed with me until 3:30-3:45 in the morning and definitely would not have come anywhere close to done with this enclosure without his help. He figured out the wiring problem I was having, and lended an extra hand. He's a good guy, fun to work with. And for him doing that he got the first demo of my 18"s. Not going to lie, he was having trouble with the overload of sound, but I was too. Anyways on to pics:
Easy way to put wood together with limited equipment, use 90 degree braces.


Easy way to put wood together with limited equipment, use 90 degree braces.
jtbuck92
Well-Known Member
- Joined
- June 9, 2010
- Messages
- 237
- Reaction score
- 0
- City, State
- Nashville, TN
- Year, Model & Trim Level
- '03 Limited 4.6L
Also spray painted my box flat black. Yes it's not the prettiest thing in the world but this won't be my permanent box. Just to cover up the bare MDF.


Elite Explorer members see no advertisements, no banner ads, no double underlined links,.
Add an avatar, upload photo attachments, and more!.
Christaper
New Member
- Joined
- April 20, 2011
- Messages
- 3
- Reaction score
- 0
- City, State
- Edmonton alberta
- Year, Model & Trim Level
- 93 XLT
holy #### those r some massive subs what r they 15s
Featured images


Featured images
Similar Threads
- Replies
- 4
- Views
- 1,359
- Replies
- 11
- Views
- 1,654
- Replies
- 15
- Views
- 1,954