Hi all,
I just became an Elite Explorer and just (mostly) finished my semi-restoration of my 91. So I thought I would create this registry and give my story.
I lived in Northern California and owned a Honda Prelude (with 4-wheel steering). It was a blast to drive around in the redwood forests but I longed to go offroad sometimes. Then circumstances required that I move back East, so I sold my prelude, bought a nearly pristine 91 E250, and brought all my stuff back to NC.
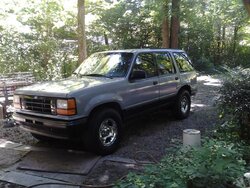
Fast forward several months and I am looking for a 4wd, setting aside dreams of converting my van to 4wd. I lucked out and found a guy looking to trade two manual 91 explorers for a van! One (the blue one) did not move (but engine ran) and the other (the red one) drove great but had a smashed up passenger-side rear quarter panel. I went ahead and did the trade.
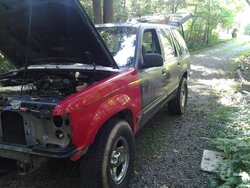
I drove the red one for a long time, while the blue one sat in my driveway. I tinkered with it and determined that the trans was torn up, so I took it out. Sure enough, gears were shredded all over the place, so I scrapped the transmission. BUT, the blue one had a manual transfer case, a straight body, manual hubs, a smoother running engine, and tighter steering and suspension. While the red one had beautiful paint, the quarter panel was unrepairable and rust was starting to bring the beast down.
So a few months ago, I decided to start my restoration of the blue one, using good parts from the red one. The plan was to use the tranny from the red one in the blue one. After two days and a few bloody knuckles (and un-quantifiable help from this community, the swap was complete and the blue one roared to life!
This is where I started photographing.
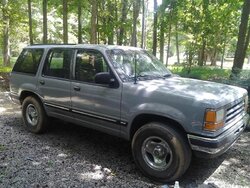
These images were taken right before the red one went off to the scrapper (I lucked out and sold it as pictured for $400 - without the transmission).
I just became an Elite Explorer and just (mostly) finished my semi-restoration of my 91. So I thought I would create this registry and give my story.
I lived in Northern California and owned a Honda Prelude (with 4-wheel steering). It was a blast to drive around in the redwood forests but I longed to go offroad sometimes. Then circumstances required that I move back East, so I sold my prelude, bought a nearly pristine 91 E250, and brought all my stuff back to NC.
Fast forward several months and I am looking for a 4wd, setting aside dreams of converting my van to 4wd. I lucked out and found a guy looking to trade two manual 91 explorers for a van! One (the blue one) did not move (but engine ran) and the other (the red one) drove great but had a smashed up passenger-side rear quarter panel. I went ahead and did the trade.
I drove the red one for a long time, while the blue one sat in my driveway. I tinkered with it and determined that the trans was torn up, so I took it out. Sure enough, gears were shredded all over the place, so I scrapped the transmission. BUT, the blue one had a manual transfer case, a straight body, manual hubs, a smoother running engine, and tighter steering and suspension. While the red one had beautiful paint, the quarter panel was unrepairable and rust was starting to bring the beast down.
So a few months ago, I decided to start my restoration of the blue one, using good parts from the red one. The plan was to use the tranny from the red one in the blue one. After two days and a few bloody knuckles (and un-quantifiable help from this community, the swap was complete and the blue one roared to life!
This is where I started photographing.
These images were taken right before the red one went off to the scrapper (I lucked out and sold it as pictured for $400 - without the transmission).


") ), but I may decide to go flat black on the bumpers too, it came out better than I expected.
), but I may decide to go flat black on the bumpers too, it came out better than I expected.