Hartman
Explorer Addict
- Joined
- October 16, 2001
- Messages
- 8,315
- Reaction score
- 13
- City, State
- Indianapolis, IN
- Year, Model & Trim Level
- 1996 5.0
Ok I have to credit snowbum for this idea. I did it slightly different than he did. This writeup will explain how to extract the amber reflector from your stock parking lamps. This does not involve putting your parking lamps into the oven and cooking at 300 degrees until tender.
You might be wondering why I just don't by a set of clears for $30. Well, aftermarket clears are horrible. They are made of poor quality plastic, and they turn yellow very quickly. This looks really bad, and it sticks out. Like someone took a piss in your corners.
I will say that I'm not going to be responsible for any ruined parking lamps. This can be tricky at times, so you must WORK WITH CARE!
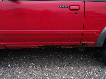
1. The easiest way that I thought of was to cut a slit on the back of the parking lamp, so that I could slide it out of the side. You do not have to cut out a big hole, just a small slit that is big enough to slide the reflector out.
Cuts:


2. Once you have your cuts made, CAREFULLY remove the portion of the plastic that you cut. Don't break this because you have to reuse it!
Once you remove that piece of plastic, the reflector is in plain view.

3. Here's where it gets a little tricky. The only part of the refector that is exposed is the end, which makes things difficult. Take a small, flathead screwdriver and begin to work your way in, carefully moving the screwdriver up and down to release the reflector from the housing. If necessary, take some needle nose pliers and break off pieces in order to get the screwdriver in. After you break the reflector from the housing, you should be able to pull it out in a large piece. That should leave you with this:

Don't be surprised if you find some little scratches behind the reflector. Mine weren't bad, but every truck is different, so again DO THIS AT YOUR OWN RISK!
4. Now that the reflector is out, you need to replace the piece of plastic that you cut out earlier and reattach it. You may find that the shiny surface of the plastic still has some amber reflector pieces on it. Try to get those off, and if you can't, paint over them with silver model paint.
Once that is painted, put the plastic back into place and seal around it with clear silicon. Make sure this is sealed tight so that no water or condensation can get in.

So now you're left with this:

Not only do you have an all clear lense, but you since the reflector is no longer there, you have sort of a clear euro look on the sides.

The cuts you make will not be invisible by any means. If someone looks for it, they'll be able to find it. But it's not visible at all from far away, and since the cut is only a slit, it's not too bad.

It's not a perfection mod, but IMO it looks a lot better than aftermarket clears that turn yellow in 3 months.
")
You might be wondering why I just don't by a set of clears for $30. Well, aftermarket clears are horrible. They are made of poor quality plastic, and they turn yellow very quickly. This looks really bad, and it sticks out. Like someone took a piss in your corners.
I will say that I'm not going to be responsible for any ruined parking lamps. This can be tricky at times, so you must WORK WITH CARE!
1. The easiest way that I thought of was to cut a slit on the back of the parking lamp, so that I could slide it out of the side. You do not have to cut out a big hole, just a small slit that is big enough to slide the reflector out.
Cuts:
2. Once you have your cuts made, CAREFULLY remove the portion of the plastic that you cut. Don't break this because you have to reuse it!
Once you remove that piece of plastic, the reflector is in plain view.
3. Here's where it gets a little tricky. The only part of the refector that is exposed is the end, which makes things difficult. Take a small, flathead screwdriver and begin to work your way in, carefully moving the screwdriver up and down to release the reflector from the housing. If necessary, take some needle nose pliers and break off pieces in order to get the screwdriver in. After you break the reflector from the housing, you should be able to pull it out in a large piece. That should leave you with this:
Don't be surprised if you find some little scratches behind the reflector. Mine weren't bad, but every truck is different, so again DO THIS AT YOUR OWN RISK!
4. Now that the reflector is out, you need to replace the piece of plastic that you cut out earlier and reattach it. You may find that the shiny surface of the plastic still has some amber reflector pieces on it. Try to get those off, and if you can't, paint over them with silver model paint.
Once that is painted, put the plastic back into place and seal around it with clear silicon. Make sure this is sealed tight so that no water or condensation can get in.
So now you're left with this:
Not only do you have an all clear lense, but you since the reflector is no longer there, you have sort of a clear euro look on the sides.
The cuts you make will not be invisible by any means. If someone looks for it, they'll be able to find it. But it's not visible at all from far away, and since the cut is only a slit, it's not too bad.
It's not a perfection mod, but IMO it looks a lot better than aftermarket clears that turn yellow in 3 months.