- Joined
- October 12, 1999
- Messages
- 6,568
- Reaction score
- 50
- City, State
- Pennsylvania
- Year, Model & Trim Level
- '17 F-150 FX4
Back when I searched for a post on tow hook installation, I couldn't find one that was start to finish. Therefore, I took photos and measurements from my installation yesterday for all 1995-1997 Explorer owners to follow.
First, I put the Explorer on ramps so that it made getting under the front end easier.
Dead Link Removed
I removed the lower plastic air flow director that usually sits in the opening between the fog lights. Next I removed the bumper assembly. The bolt size for the bumper is 18mm. There are four bolts that must be removed. Make sure you note the bumper's position (centered, as well as UP) since there are no holes. Rather, Ford used slots that allow the bumper to be positioned left, right, up, and down.
Next, a rear pilot hole (1/8th) and then a 3/4 inch hole were drilled about three inches in front of the stock frame oval. The front hole was drilled using the hook's predrilled holes. I was unable to use the oval hole since it caused the hooks to interfere with the bumper.
Dead Link Removed
At a junk yard I picked up a small steel plate that I used as a spacer to make the hooks lower and easier to access (The plates were cut to about 1"x3", sanded, primed, and three coats of black paint were put on. However, you can't see them so it was all for protection and to prevent rust). Each hook had two plate spacers, for a total of 3/4 inch spacing. The hook was then attached by taping the lock nut to the wrench, fishing it in the holes in the front of the frame, and fastening it. Each nut was tightened a little by little to allow both the front and rear to go on evenly.
Dead Link Removed
Dead Link Removed
Dead Link Removed
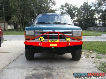
The same process was repeated for the other side of the frame, so I don't think it needs to be written step by step. The final result is below, and if I may say, looks pretty damn good. This is how the Explorer should have come from Ford.
Dead Link Removed
Dead Link Removed
First, I put the Explorer on ramps so that it made getting under the front end easier.
Dead Link Removed
I removed the lower plastic air flow director that usually sits in the opening between the fog lights. Next I removed the bumper assembly. The bolt size for the bumper is 18mm. There are four bolts that must be removed. Make sure you note the bumper's position (centered, as well as UP) since there are no holes. Rather, Ford used slots that allow the bumper to be positioned left, right, up, and down.
Next, a rear pilot hole (1/8th) and then a 3/4 inch hole were drilled about three inches in front of the stock frame oval. The front hole was drilled using the hook's predrilled holes. I was unable to use the oval hole since it caused the hooks to interfere with the bumper.
Dead Link Removed
At a junk yard I picked up a small steel plate that I used as a spacer to make the hooks lower and easier to access (The plates were cut to about 1"x3", sanded, primed, and three coats of black paint were put on. However, you can't see them so it was all for protection and to prevent rust). Each hook had two plate spacers, for a total of 3/4 inch spacing. The hook was then attached by taping the lock nut to the wrench, fishing it in the holes in the front of the frame, and fastening it. Each nut was tightened a little by little to allow both the front and rear to go on evenly.
Dead Link Removed
Dead Link Removed
Dead Link Removed
The same process was repeated for the other side of the frame, so I don't think it needs to be written step by step. The final result is below, and if I may say, looks pretty damn good. This is how the Explorer should have come from Ford.
Dead Link Removed
Dead Link Removed
")