ocmnelson
Member
- Joined
- January 3, 2012
- Messages
- 26
- Reaction score
- 0
- City, State
- Orange County, CA
- Year, Model & Trim Level
- 2006 Explorer AT w/RSC
I'm writing this because I have searched in many forums about installing Bi-Xenon lights in a 2006 + explorers and am not getting the answers I wanted. For all the people like me here is the post for you.
Many say yes, many say no, Hids in a Reflective housing without a projector? I say FO SHO. My retro-solutions HID kit fit, worked, and my beam is awesome.
What I bought off Retro-Solution.com:
55W-DIGI-KIT-HEAD 55W DIGITAL HID KIT for Head Lamps
Price: $175.99
Qty: 1
Amount: $175.99
Options:
Bulb Fitment: H13/9008 bixenon low/high beam (+$15)
Bulb Color: 4300k yellowish white
Vehicle Application: Ford Explorer 2006+ (+$23)
Ballast Type: Regular (all in one)
Bulb Capping?: No Thanks
***I entered in CLUBRSX for a 10% discount.
****Retro Solutions offers the 2006 explorer as an option in there drop down menu. Choose that.
Now for the Details discussing my problems and questions.
This kit is 100% plug and play. No cutting or splicing into wires needed. Just drilling holes and sanding good grounds.
What I got:
Bulbs
Ballasts
Wiring harness with a prewired capacitor (x2)
Another prewired capacitor harness for the other OEM plug.
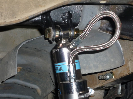
I attached the relay harness right by my Fan. The relay harness with give the ballast power and stop the 12v Pulsing. I drilled the first 2 orange capacitors attached to the relay harness right next to my battery and against the metal for heat dicepation (They get hotter than your momma ). Then sand the frame of your truck where you will ground out each capacitor. Run all your wiring where it should go. Retro has a pretty descent wire diagram online. I followed that for the most part. A lot of vehicles when hids are installed only one of the OEM headlight plugs are used, or at least thats what the diagram showed. For our truck the other wired capacitors are needed on the other oem socket to not throw a check light on the dashboard.
In short, the retro solutions kit was awesome other than letting me know what the hell the other prewired capacitors went to. In all the wiring diagram it shows to only use one OEM headlight plug and to tape up the other. Well for the 2006 you need the Pre wired capacitors that plug right into the other oem light socket. This will all come complete with the kits. Make sure to mount all 4 capacitors (2 for each side) against metal they get hot. Make sure you have a good ground contact. Screws are fasteners not ground connecters. You should sand the area you plan to make contact with.
After I installed the kit and did a quick mental checklist to make sure I did it right, I turned the lights on.
Ureeka! Flawless Hi beam and Lo beam lights. No flickering, NO Check engine lights or check headlights, High beams work perfect. No Sounds or buzzing noises.
Now this is aimed to all the people who post stupid comments about people putting HIDs in a reflective housing. Your Idiots. My hids in a reflective housing controls my beam better than 95% of all the pictures I have seen with people retro fitting projectors in their housings. Yes I do agree in most cases (cars and trucks that are older) need projectors to contain the HID light. For the 2006 + explorer it is not needed. Yes Im sure you can spend enough money to make it look better. But for what I have seen people spending over 500 for there lights to perform like crap with projectors. My reflective housing has a better light containment than most without a projector. There is also a screw on the back of the light which can control your light angle. Our lights have an awesome cut off. I slight adjustment and I can pull up behind a honda or toyota without lighting up there entire car.

Check em out for your selves.
http://i1241.photobucket.com/albums/gg520/ocmnelson/HID.jpg
I will post more pics of the actual finished install.
But for reference:
2006 Explorer HIDs are sold from RETRO SOLUTIONS 55w Kit
All plug and play. No flickering No dash lights. NO problems.
Sorry I never got the answers I needed reading three hours of people talking about projectors.
Many say yes, many say no, Hids in a Reflective housing without a projector? I say FO SHO. My retro-solutions HID kit fit, worked, and my beam is awesome.
What I bought off Retro-Solution.com:
55W-DIGI-KIT-HEAD 55W DIGITAL HID KIT for Head Lamps
Price: $175.99
Qty: 1
Amount: $175.99
Options:
Bulb Fitment: H13/9008 bixenon low/high beam (+$15)
Bulb Color: 4300k yellowish white
Vehicle Application: Ford Explorer 2006+ (+$23)
Ballast Type: Regular (all in one)
Bulb Capping?: No Thanks
***I entered in CLUBRSX for a 10% discount.
****Retro Solutions offers the 2006 explorer as an option in there drop down menu. Choose that.
Now for the Details discussing my problems and questions.
This kit is 100% plug and play. No cutting or splicing into wires needed. Just drilling holes and sanding good grounds.
What I got:
Bulbs
Ballasts
Wiring harness with a prewired capacitor (x2)
Another prewired capacitor harness for the other OEM plug.
I attached the relay harness right by my Fan. The relay harness with give the ballast power and stop the 12v Pulsing. I drilled the first 2 orange capacitors attached to the relay harness right next to my battery and against the metal for heat dicepation (They get hotter than your momma
). Then sand the frame of your truck where you will ground out each capacitor. Run all your wiring where it should go. Retro has a pretty descent wire diagram online. I followed that for the most part. A lot of vehicles when hids are installed only one of the OEM headlight plugs are used, or at least thats what the diagram showed. For our truck the other wired capacitors are needed on the other oem socket to not throw a check light on the dashboard. In short, the retro solutions kit was awesome other than letting me know what the hell the other prewired capacitors went to. In all the wiring diagram it shows to only use one OEM headlight plug and to tape up the other. Well for the 2006 you need the Pre wired capacitors that plug right into the other oem light socket. This will all come complete with the kits. Make sure to mount all 4 capacitors (2 for each side) against metal they get hot. Make sure you have a good ground contact. Screws are fasteners not ground connecters. You should sand the area you plan to make contact with.
After I installed the kit and did a quick mental checklist to make sure I did it right, I turned the lights on.
Ureeka! Flawless Hi beam and Lo beam lights. No flickering, NO Check engine lights or check headlights, High beams work perfect. No Sounds or buzzing noises.
Now this is aimed to all the people who post stupid comments about people putting HIDs in a reflective housing. Your Idiots. My hids in a reflective housing controls my beam better than 95% of all the pictures I have seen with people retro fitting projectors in their housings. Yes I do agree in most cases (cars and trucks that are older) need projectors to contain the HID light. For the 2006 + explorer it is not needed. Yes Im sure you can spend enough money to make it look better. But for what I have seen people spending over 500 for there lights to perform like crap with projectors. My reflective housing has a better light containment than most without a projector. There is also a screw on the back of the light which can control your light angle. Our lights have an awesome cut off. I slight adjustment and I can pull up behind a honda or toyota without lighting up there entire car.
Check em out for your selves.
http://i1241.photobucket.com/albums/gg520/ocmnelson/HID.jpg
I will post more pics of the actual finished install.
But for reference:
2006 Explorer HIDs are sold from RETRO SOLUTIONS 55w Kit
All plug and play. No flickering No dash lights. NO problems.
Sorry I never got the answers I needed reading three hours of people talking about projectors.