DIY Beadlocks | Ford Explorer Forums - Serious Explorations

  • Register Today It's free!

DIY Beadlocks


Join the Elite Explorers for $20 each year.
Elite Explorer members see no advertisements, no banner ads, no double underlined links,.
Add an avatar, upload photo attachments, and more!
.


Just about all of the DIY styles are the same. .25 wall, weld either inside the lip or outside. The difference is what style of outer ring you want. Im building a set of inside the lip style right now from www.diy4x.com and having some trouble with one of them. Ill get some pics and get back to ya.


Oh yea, as far as the bead is concerned, you could run a BFG 295/50/15 street tire and it wouldnt matter. Most MT style tires have thicker beads, thicker chafer around the bead, and ticker cord which wraps around the bead but it doesnt matter with the clamp-on style of beadlocks. Street tire or swamper either way they are going to get clamped to the rim.


Im plain and simple, we dont need no fancy beadlocks.

Im likin these more and more, I was lookin at alot of different bead locked rims and all of them were much more than i wanted to spend. I could just fit these to some plain steelies and be just as happy.

Let me know how yours come out, im really going to have to try these.


can a mod move this to tire and wheels, maybe it will get more attention there.


sumthin like that is what i plan to do.. someday down the road.. but i'm quiet adept to welding.. so i dont think it would be too hard. it always seems like welding is the easy part and mounting the tires and torquing the bead locks is what takes forever and a day.

they did a set of these on extreme4x4 for the cheap jeep and i think they used 32 bolt bead locks.... even in time lapse it took the guy forever.


id have a shop mount the tires, id do the bolts myself


Okay, i forgot all about this so i thought i would update.

I used the weld on type from www.diy4x.com. All weld on locks are the same. There are two types- weld outside the lip and inside the lip. I used the inside the lip style. If you use this style, make sure to take a grinder and bevel the inner ring real good so you get nice penetration. You need at least a 180 amp welder so no 110v style welders. The inside the lip style usually widen the wheel 1", the outside the lip widen it 2" so keep this in mind in your wheel selection. I used a junkyard set of ancient 15x8 white spokes so the end result is basically a 15x9.

Once you have the inner ring welded on, mount the tire. Its easy- no need to take it to a shop since you're only mounting the inner bead. A large flat head screwdriver and a large prybar will work fine. Lay the wheel on the floor and drop the tire on it. Soak all the bead area in very very soapy water. Work your way around the tire with the bars and its on.

Next, set the rim on a 5 gallon bucket. This will pull the tire downward and help seat everything as you tighten down the outer ring. You can also spin the thing around the bucket with ease. You need to tighten the ring down the same way you would do lug nuts- in a criss cross fashion. Use 4 longer bolts (2.5") to get the ring on and then use 2" bolts to clamp everything down. Tighten to 15-20lbs but make sure you do so in the criss cross pattern. You will probably have to re-torque everything several times. Yes, the outer ring will cone a little bit but its no big deal. If there still is a slow leak then find it with some soapy water and tighten the 6-8 bolts around it.
 

Attachments

  • wheel6.jpg
    wheel6.jpg
    83 KB · Views: 660


If you use a small outer ring style, then the stock valve stem location will more than likely work fine. However, if you use the larger outer ring style like i did, then you will need to move the valve stem. This is no big deal, you have two choices. If you can weld, then you can simply weld in the old hole and redrill a new hole closer to the inside which will make the valve stem point straight up towards the hub and thus make it so you can get an air chuck on it. If you dont want to weld them in, then you can get plugs at just about any tire shop. Simply block off the old hole and make a new one. I cannot remember the size bit for valve stems, but you can find this out on your own.

In the second pic you can see the welded old hole covered in paint, and the new hole. The first pic will show you how the valve stem is now easily accessible.
 

Attachments

  • wheel2.jpg
    wheel2.jpg
    83.5 KB · Views: 680
  • wheel3.jpg
    wheel3.jpg
    75.3 KB · Views: 967


do you think its worth it for the anti coning ring or not really?

Lets see some mounted pics


I dont think its worth it. They dont cone much, and the coning doesnt hurt anything. If you are the type that is going to totally freak out over some mild coning that you have to concentrate to see... then i guess you should get the anti-coning type. :p

Here they are mounted up. I cannot imagine doing a set of these without air tools. You gotta have an air ratchet. Either that, or a couple of cases of beer because if you are doing these manually then you are gonna be there a LONG TIME. Remember, you gotta tighten them down several times and there are 32 per rim.

They will hold 28 psi but will not hold 30. I dont care, im not going over 25psi on the street anyway. You will notice in your "air up, retorque" stage that they will hold air up to a certain point and then leak once you reach a certain psi. If they hold 25psi then screw it im done.
 

Attachments

  • wheel5.jpg
    wheel5.jpg
    99.3 KB · Views: 581


those are sexy, I think im gonna get the same outers.

those 39.5 IROKS?


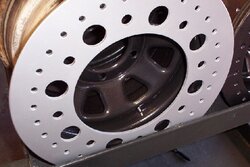
For the record, the tires are 36x13.50 Iroks, the paint is Rustoleum hammered black and hammered grey. I like the hammered paint because it dries super hard and sticks to anything- you dont have to have super clean and primered metal for it to hold. Knock the rust off, wipe it with mineral spirits and fog away.


BALANCING-

You can pretty much forget having these balanced at a tire shop. They are just too heavy. No biggie, as you can use several things inside the tire to balance it yourself. Golf balls, BB's, or airsoft pellets. The theory behind it is the same as the powder stuff- centrifugal force will sling the junk inside the tire to the lightest spot of the tire and it will self balance every time you take off. It really works. I chose the airsoft pellets for these reasons-

Golf balls are noisy at really low speed.

BB's will rust from the damp air inside the tire and possibly clump together or not roll right. There is a rumor going around that the BB's will tear up the inside of the tire. This simply is not true.

Going by the tire balancing chart, i needed 6-7 ounces to balance a 36" tire. But, that is concidering a stock steel or aluminum wheel. We've got weld on beadlocks, which add alot of weight. Each jar of airsoft pellets i used came up to 10oz, so i poured one jar into each tire. Too much isnt that big of a deal, it will spread out. Too little will not quite balance the tire.

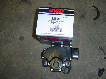
If you use airsoft pellets, make sure to get the really dense ones, like the ones i have pictured below-
 

Attachments

  • wheel4.jpg
    wheel4.jpg
    66.7 KB · Views: 619


I'm going to probably do a set myself...only difference is i'm going to cut the rings out myself (have access to the machinery to do it though). If coning is what I think it is i have heard of using a v-belt in between the inner and outer ring to help cut it down. Billavista over on pbb has a really good writeup on the rockstopme DIY bead locks, i'll be using it as a guide (even has some measured drawings).


If you use a standard style outer ring (regular Rockstompers for example) then the coning wont even be noticable. If you use larger outer rings (Rockstomper "mudrings" or mine for example) then the coning is noticable if you look at it just right, in the right light, under the right conditions, at the right angle. :D


Nothing extreme no but there was mention of it in that article...and since i'm a webwheeler i have to beleive everything i read LOL :p :confused: :D


Now can the regualr beadlock wheels hold more then just 25-30 psi?

oh james t, can you tell me how the tire drives off highway? Im thinking of getting 37's for the mounty when i sas my truck in may.


wouldnt you rather know how they do on highway? I have heard nothing but good things about IROKS, thats why there is a set of 37x14.00 in my future


thse 15" rims? ahve any problem clearing the d44 caliper? whats the BS


Join the Elite Explorers for $20 each year.
Elite Explorer members see no advertisements, no banner ads, no double underlined links,.
Add an avatar, upload photo attachments, and more!
.


sn0border88 said:
thse 15" rims? ahve any problem clearing the d44 caliper? whats the BS
Yes they are 15" wheels, they are 15x8's which are now 15x9's. They clear a D44 caliper just fine. I think you are thinking of the 8-lug D44 setup maybe?

Iroks work great offroad and they actually ride nice on road. I dont have them on my rig yet because i dont have it finished, however i have ridden in several vehicles with Iroks on them. The only issue i see is they wear kinda fast.


Back
Top