Flatbed & Sliders | Page 2 | Ford Explorer Forums - Serious Explorations

  • Register Today It's free!

Flatbed & Sliders

Got the majority finished. Just need to make a bracket for the fuel neck, modify the winch clutch lever, and mount the tool boxes.
The tool chest will actually be sitting closer to the cab then is pictured. It will be recessed into the flat bed frame about 1". Also will be installing a battery box, an ammo can storage box and fabbing up some way to mount the spare tire. And wire everything up.
Still need to hash out the design of the rear bumper area and possibly seeing if I have enough large scrap pieces to do up a front winch bumper.
 

Attachments

  • DSC00673.JPG
    DSC00673.JPG
    80.2 KB · Views: 1,596
  • DSC00674.JPG
    DSC00674.JPG
    86.3 KB · Views: 1,582
  • DSC00675.JPG
    DSC00675.JPG
    82.1 KB · Views: 1,589
  • DSC00676.JPG
    DSC00676.JPG
    77.4 KB · Views: 1,581


Join the Elite Explorers for $20 each year.
Elite Explorer members see no advertisements, no banner ads, no double underlined links,.
Add an avatar, upload photo attachments, and more!
.


nice...


Looking good. Have you thought about fenders or are you just going to leave it open wheel?


I'll probably just leave it open. Don't feel like trying to bend up 2 flat sheets with the same radius for them.
Now if I could just find some where around town that had some good battery boxes and not those cheap pastic one that Schucks has.


Haven't gotten too much done lately. Been waiting for payday and some parts to come in. Also need to get some more steel to finish the deck and to add few other ideas I have.
I do have the tool chest cleaned out and mounted and have the winch solenoid box mounted.
Current to do list:
-fab up battery box
-fab up tire carrier
-finish fab'n up rear fascia/bumper area
-wire up and mount tail lights
-re-install & wire OBA system and plumb air lines the the front and rear bumpers and to front ARB
-fab up front bumper for winch and 2 sets of KCs
-rewire all electrical accessories


For the fenders you gould just use some square tubing, notch it by cutting a pie out of three sides, bend the last side and then weld it up. Then you could just use some 20 gauges sheet mettal and self tapping screws to form it over the frame. The sheet metal would be cosmetic, the frame of the fenders would be your strength. Just a thought.


We will be glad to have you in San Diego, but the big question for me is..............why would you want to move here?? Its so darn crowded and expensive.


It's a Navy thing.


^^^ What he said. Uncle Sam says go, so I go.


On my own. I get an allowance, but still have to find my own place.


Now I know why there hasn't been any progress to this in the last week :thumbsup: :D


looks good,
Good to see you two, missed you guys at Moab,
keep up the pics the truck/jo looks great


Finally got some work done today. I got the fairlead mounted, a new clutch handle made and one tail light panel done and mounted.
 

Attachments

  • DSC00681.JPG
    DSC00681.JPG
    69.3 KB · Views: 1,351
  • DSC00680.JPG
    DSC00680.JPG
    91.4 KB · Views: 1,343
  • DSC00679.JPG
    DSC00679.JPG
    63 KB · Views: 1,343
  • DSC00678.JPG
    DSC00678.JPG
    47.9 KB · Views: 1,353


Looking good. It's all coming together now. :D


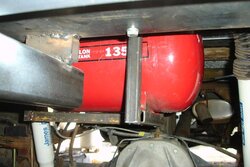
Got some things done the last two days. Got the tail lights/rear fascia area done and wired up. Got the a tire carrier made up, just need to find a piece of scrap plate for the mounting flange. Relocated the air tank.

Current to do list:
-fab up battery box
-re-install & wire OBA system and plumb air lines the the front and rear bumpers and to front ARB-tank in
-fab up front bumper for winch and 2 sets of KCs
-rewire all electrical accessories


-Got the tire carrier done, just need to drill some holes to bolt the spare down with.
-The air system it done with the exception of the line to the front bumper.

Still need to do:
-The battery box
-Front bumper
-Lay the deck down & Line-X it
-Wire up everything.
 

Attachments

  • DSC00687.JPG
    DSC00687.JPG
    67.3 KB · Views: 1,283
  • DSC00686.jpg
    DSC00686.jpg
    49.5 KB · Views: 1,288
  • DSC00685.JPG
    DSC00685.JPG
    64.4 KB · Views: 1,294
  • DSC00684.JPG
    DSC00684.JPG
    95.1 KB · Views: 1,285


Its been awhile since I posted any updates. So here you go.
The first is of the front bumper with the winch mounted and all 3 sets of KCs relocated and wired up. Yes, I know the lights are not aimed yet.
The second is of the almost finished decking on the flat bed. Still need to add one more piece on the back portion.

Left to do:
-Lay the deck down & Line-X it.
-Wire up switch for compressor.
-Wire up front 2 rock lights.
 

Attachments

  • DSC00688.JPG
    DSC00688.JPG
    74.6 KB · Views: 1,250
  • DSC00689.JPG
    DSC00689.JPG
    94.5 KB · Views: 1,258


Looks great.

I was just looking at the pictures of your El Camino. My first vehicle was a 1968 SS El Camino. Got it for $1200.00. Had that truck for about ten years and wish I never sold it. That 396 could pull anything!


Join the Elite Explorers for $20 each year.
Elite Explorer members see no advertisements, no banner ads, no double underlined links,.
Add an avatar, upload photo attachments, and more!
.


Got the rear decking done and Line-X'd. I'm happy to say that no Hootus was injured in the painting of the decking.:D
 

Attachments

  • DSC00691.JPG
    DSC00691.JPG
    95.6 KB · Views: 1,230
  • DSC00692.JPG
    DSC00692.JPG
    68.6 KB · Views: 1,219


Back
Top