Completed Project - Not a ranger but it is a "race truck" | Ford Explorer Forums - Serious Explorations

  • Register Today It's free!

Completed Project Not a ranger but it is a "race truck"

Use this prefix for completed projects that are not "How to" articles or threads asking for help.
I have my "whitey turns red" thread in here that I'm updating as my current expo build goes along but I've had enough PM's on info about the race truck and my prerunner truck I guess to justify posting this in here. Hopefully it doesn't upset the expo gods too much to post some japanese products in here. If it makes you feel better they're both running Ford rear axles! LOL


Race truck first... 99% built solo in my garage. It's a partnership deal. The actual owner of the truck is a 16 year air force enlistee friend of mine currently stationed in Washington DC working in the Pentagon. He's not rich by anymeans, he's just good with his money I guess! Unfortunately for our racing plans he's moving to London in a few weeks and likely to finish up his 20 years there and then move back here to Vegas. Our plans going into this were to race it 4-5 times a year, now we're hoping he can make it state side once a year and I may race it myself once or twice.

Enough jabbering... Pictures!!! I'll toss a bit of info between pics where possibly needed...

The basics, the truck started as his daily driver and was a fully loaded Tacoma 2WD prerunner model.

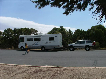
This is the day he brought it home used...

5929_544043874788_23707796_32255562_8000972_n.jpg


5929_544043924688_23707796_32255572_665932_n.jpg


Wanting a little bit of safety he had a local shop here in Vegas do some basic cage work to protect him and his wife.

OrigCabcage2.jpg


He then mounted some different fiberglass to make the truck feel more like "his".

NewBedsides.jpg


NewClipe.jpg


The bumper just wasn't cutting it so this is where I stepped in finally on the build. This was the first thing I did on the truck. He was a friend of mine and I'm pretty sure he paid me in Pizza and Mtn Dew which is my typical garage use fee...

Bumperb.jpg


He then won some long travel leaf springs in a raffle or something and well, that kind of snowballed. Why put the leafs on without good shocks too? Need something to mount those shocks too so why not cage the back half? If we're caging it, might as well toss in a fuel cell also. Remember, at this stage this is still his daily driver here in Vegas.

Bedcage7.jpg


Bedcage8.jpg


Bedcage13.jpg


All of that was to give us structure to mount some shocks too, this is where the leaf setup and shock mounts started. These leafs aren't direct bolt in so front hangers had to be cut off and refabbed and moved forward and new shackles were used that swung off the top of the frame rather then from under.

15.jpg


20.jpg


bedcage4.jpg


Not sure if there's a size limits on posts so I'm going to post this into seperate posts in this thread.


Join the Elite Explorers for $20 each year.
Elite Explorer members see no advertisements, no banner ads, no double underlined links,.
Add an avatar, upload photo attachments, and more!
.


I finished up the rear for him and he went back to life planning the next cool mods for the truck and using it as his daily driver and toy.

BedcageDone5.jpg


Lucerne1.jpg


At this point though, uncle sam knocks on his door via the US Air Force and tells him that him and his wife are packing and moving to DC. Weighing options and knowing he's 6 years from retirement at that point with full intention to move back to Vegas they decide to keep the truck but really have no use for it in DC so they leave it with me. I had the room to store it, figured I'd drive it once every month or two and just tinker with it as he had money come his way. Well, a deployment and some other job pay perks he has ended up fast tracking his daily driver build and after the two of us doing some real world math based on his budget he pulled the trigger on committing it to a dedicated race build. So this is where it gets pretty nutty if it hadn't already!

In basics, he had the cash to afford the parts but not the labor. I felt I had the skills to provide the labor but not the cash to build my own race truck. We both had what the other needed, we're already friends and we both wanted to race so the cards were lined up and we went for it.

We contacted a friend of mine here in Vegas that builds some pretty nice suspensions. Negotiated a deal and cut him loose on it.

401617_774233293348_23701568_35656546_2077832340_n.jpg


4.jpg


DSC_0189.jpg


Jump to memorial day weekend of 2012 and the truck is dropped back off at my house with a snazzy new front suspension system on it far from ready to run! It's sitting like this cause there's not even shocks on the front end.

100_0303.jpg


I verify one last time Jason really wants to dive in cause really soon we're fully committed, he gives me the green light, we finalize our agreement and out comes the saws, tools, metal and welder!

While most people spent memorial day weekend with family and friends BBQ'ing, I spent the weekend in my garage...

IMG_2465.jpg


IMG_2468.jpg


Cut out the inner wheel wells...

540318_355797361154028_1028175701_n.jpg


Notice in the picture above, there's a coil bucket on tacomas that the upper control arm mounts to and the shock bolts to. Well, that wasn't going to hold up to the abuse the truck was going to see so off it went along with everything else on the frame rails! I wanted a bare template to work off.

100_0359.jpg


You don't want to know the amount of grinding involved to get it to that stage. The long bolt was a temporary mockup so I wouldn't loose placement of my upper control arm during the rebuild.

100_0360.jpg


So set with that look on both sides I wanted to get going on hanging the upper control arms back in place. First up though was plating the frame rails. This truck isn't going to be babied. I want to drive it how I'm used to in race trucks and that's as hard as we can physically handle the abuse. So I made these plates for the frame...

100_0385.jpg


I also capped the HUGE holes from the ends of the factory crossmembers I cut off and got the first of the upper control arm mounts positioned.

100_0388.jpg


100_0389.jpg


100_0461.jpg


Tacoma's typically align off the lower control arms but because the heaviest forces are also seen thru the lowers they tend to move and get knocked out of alignment so I plated over the factory crossmembers, aligned it how I wanted and made the lower mounts permanent. It now aligns off the upper hiem joints in the upper control arms which is much more stout.

100_0460.jpg


Upper mounts still aren't done but you can see the adjustment I'm talking about.

100_0459.jpg


For reference at this point, here's the before picture again...

a.jpg


Trophy trucks run on up to 42" tires these days, we're running 35's. Cause of that, there's a good chance we will be scraping the crown of the dirt roads after they've made their trenches so I wanted to make sure everything up front was tied in. Here's what I did...

100_0464.jpg


Now I wanted the whole cage to flow and work the shock mounts into the cage work as well. So at this point I was ready to mount shocks but had no cage work to mount off yet. Wanting it to all flow and work together like I actually meant to do it I jumped to the interior because the engine cage work would all tie into the cab as well.

Remember way up above in my first post I said he had a shop do some cage work? Well, that work was awesome!!! Honestly, better then my fab work. Problem was, it wasn't built to race rules using race materials so it had to be cut out. This posed some challenges though cause I'd already tied the rear cage work into that cab cage so whatever I did forward I really wanted to tie back into what I'd already did to save reworking the whole rear. So... Empty the cab and all the other fab work!

100_0494.jpg


I would imagine hitting your head on a steel tube hurts so I wanted to get the tubes tucked as tight as my fab skills would allow. This meant cutting out all the inner sheet metal structure of the cab to allow space for tubes.

100_0498.jpg


Starting to toss in the metal, race rules, if your truck is over 4000 lbs, your main cab cage structure needs to be 2" tubing. We just assumed we'd be 4000+ so what you're seeing here is 2" x .120 wall DOM tubing.

DSC00050.jpg


100_0514.jpg


100_0505.jpg


100_0507.jpg


Notice in this next picture the jog in the tube above the B-pillar area. That's so that I could keep it way from my head in the door area yet still tie into the existing rear cage work. This might look easy but in reality, doing it took A LOT of measuring, double and tripple checking and a little bit of luck!

100_0509.jpg


At this point I needed to figure out where to drop the A-pillar tube down to the frame rails. I had an idea of what I wanted to do but needed to make sure it wouldn't interfere with tires and suspension and turning and stuff... So naturally, you go to full bump and full lock and check everything!

100_0548.jpg


100_0546.jpg


Tube in the back is the a-pillar tube coming thru the floor board.

100_0547.jpg


Fitting new cage to old cage...

Picture040.jpg


Picture041.jpg


Picture.jpg


Overkill???? Not sure... But if you endo your truck at 60-90 mph, would you want anything less?

Picture049.jpg


Picture050.jpg


So... How do you weld around the top of those tubes at the roof you ask? Typically there's two ways to do it. One is to build the whole cage, tack it all in place. Then cut the tacks at the frame and lower it down thru the floor and weld it. Then push it back in place and weld it to the frame. Well, in my case I was physically sleeved into existing rear cage work so that option wasn't physically possible so what's option B? Well, you know, the obvious...

Picture055.jpg


Picture059.jpg


Now you may say, race trucks have more door bars then that! You're right... I didn't want to climb thru a jungle gym though a million times so I left those till the very end!

Picture057.jpg


See, the roof knows it's home! Almost like it belongs there!

100_0609.jpg


100_0612.jpg


Now happy with all of that work and structure I can go back to my shock mounts. Remember, that was the whole point of the cab cage!!! LOL I wanted it to look like it all belonged and was actually planned and thought out so there was an intentional process in my head of what I was doing. I actually had a printed out "to do" list in a relative order along with a white board for on the fly mental notes during the build.

Starting to route tubes to eventually become shock mounts...

100_0619.jpg


100_0618.jpg


Bumper cars anyone?

100_0614.jpg


At this point though, the ADD kicked in and I really wanted something that I could at least sit in and make race truck noises so I jumped back into the cab a bit. I built a steering column.

100_0650.jpg


And mounted some seats...

100_0646.jpg


Okay, actually that's BS, well mostly, I did make engine noises and pretend drive a bit but the reason for that is I realized my brake booster and master were right in the way of where my shocks needed to go. So I put the seats and stuff in to do some figuring out on what to do about that. Once I had a plan in place I started back on the shocks pulling out the brake stuff to deal with that later.

Yeah, something like this should work!

100_0656.jpg


Temporary plates to physically hold them in place after a lot of cycling to make sure everything was where I wanted it. What you're seeing are both king shocks, the coilover is a 2.5" x 10" stroke shock and the bypass is a 3" x 10".

100_0666.jpg


Starting the real mounts...

100_0676.jpg


100_0675.jpg


Less then a finger? Yeah, she's tight!

100_0683.jpg


100_0678.jpg


100_0680.jpg


Boxing them in...

100_0709.jpg


100_0711.jpg


And BAM!!!!

100_0725.jpg


100_0731.jpg


Some ARP wheel studs and safety wire on the hub assembly for piece of mind!

safety1.jpg


At this point I buttoned up the engine cage work and decided it was time for final welding. Getting to the inside of the tubes isn't easy with an engine in there so one option is...

100_0761_zps5c7ac93b.jpg


Paint her up!!!

100_0803.jpg


Hopefully these will keep us gliding across the dirt!

100_0781.jpg


100_0816.jpg


Sometimes you slip and punch yourself square in the nose while working on a truck!

And it's a band, I don't hate religious people or anything...

100_0815.jpg


So remember that brake situation with no clearance for the stuff that needed to fit? Well, after discussing options with Jason and making him spend some more cash we ditched the power setup for an old fashioned manual brake system. Some measurements and phone calls and we found ourselves a CNC brake pedal assembly to work with the calipers. Up front we're using stock Tacoma 4 piston calipers. In the rear we knew we were going with ford explorer discs and calipers, so we thought at least at that point... In goes the brakes!

100_0732.jpg


I'm a firm believer that race trucks should be functional first but if you can give them some sexyness why not right? Fitting a dash...

100_0738.jpg


100_0831.jpg


100_0833.jpg


So Tacoma's supposedly jump out of gear on hard hits with the auto trans cause the shifter doesn't really lock into place. Not wanting to find out the hard way we opted for a gate shifter. We also don't like getting lost so a GPS found a home in the dash too.

100_0842.jpg


Since I was back in the cab at this point I'd been procrastinating filling the holes where the cage went thru the floor. I hate this stuff but finally sucked it up and dealt with it.

100_0844.jpg


100_0846.jpg


Knowing what jason had in mind for body work, we decided going with black being fairly neutral was a good choice for a lot of the truck.

100_0857.jpg


Gauges...

100_0861.jpg


Let's detour really quick though... Remember that picture WAY up above when we first ripped out the stock interior? Remember all those wires? Well I'm wiring dumb and I'm also color blind. By luck though, I've got an uncle here in town that knows a bit and isn't colorblind. I really wanted to clean that all up and get the wiring to bare minimum of only what we needed.

This is most of the cab harness torn apart and ready to minimize...

100_0765_zps7b1bb101.jpg


And this is less then half of what he pulled out of it.

100_0766_zpsa82353fd.jpg


And I'm beyond stoked to say this is what was put back in the cab!!! I'll touch on this a bit more further down in the build here though...

100_1237.jpg


Every truck needs a center console if you're not rocking a bench seat!

100_0904.jpg


But remember I said if possible a truck should look good to and be functional? Well I didn't want to see the ugliness under that console!!!

100_0896.jpg


100_0907.jpg


100_0911.jpg


Also notice some door bars started appearing somewhere along the line and here I tossed in the intercom system and race radio for coms to the pits and for help into the center console.

100_0921.jpg


It looks tweaked but trust me it isn't... The box at the rear is a police siren to alert people we want by and the two power points are for our on board camera systems.

100_0922.jpg


Almost sorta legit like right?

100_0925.jpg


Filtered air systems to pump into the race helmets...

100_0930.jpg


Remember the "tax payer funded" racing team? TPF!!!??? Well, what's a tax payer funded race truck without Uncle Sam on board?

100_0933.jpg


Time for some rear end lovin... Yeah, I totally just went there!!!

What you got here is a currie housing with 3/8" thick axle tubes and a ruffstuff specialties truss that I fitted to work and welded up.

Picture003.jpg


Stuffed inside that is a Strange Nodular 3rd, 6.0 gears and a 35 spline spool with a daytona pinion support.

100_0953.jpg


Currie axles will get slid into it...

Dropped the motor back in Somewhere along the line I guess...

100_1198.jpg


And then turned it around to start that rear end lovin!!!

100_1199.jpg


Doing some rear end cycling for shock placement. In the rear we're running 3" x 18" king bypass shocks.

100_1207.jpg


Cause of details not expected the rear brake setup got changed to factory rear toyota FJ rotor and caliper. Luckily the calipers were similar to the expo's and our pedal assembly worked fine with them too.

100_1236.jpg


Starting some simple upper shock mounts in the rear.

100_1246.jpg


And hanging new wider fiberglass fenders to cover the new wider 9" rear end.

100_1243.jpg


100_1244.jpg


It gets beyond dusty when running behind another racer so to help the engine breath cleaner this was my solution!

100_1239.jpg


Went back and added some additional engine cage support that unbolts for future motor removal tasks.

100_1242.jpg


Also I guess I skipped over it but along with the front shocks we're running some 2.5" king bumpstops too for the extra hard hits!

100_1240.jpg


Got switches? Or is... Switches get the...

Picture006.jpg


Thank you again Uncle Dave!!!!

Picture007.jpg


Let me touch a bit more on his wiring job. The center console above is held in by 6 bolts. Along with that there's 2 master plugs and a single ground wire that has to be pulled. At that point the whole entire unit comes out as one. The dash seen in the pictures is similar. 4 bolts and 3 master plugs and it all comes out as a single unit! Makes interior removal for clean up really really nice!!!

Picture009.jpg


HID positive...

Picture010-1.jpg


And wired to stay bright!

Picture011-1.jpg


What's hiding under the dash...

Picture013-1.jpg


At this point it got pushed out to the street so we could trailer it for a new driveshaft. My personal prerunner truck is the black one behind it.

Picture020.jpg


Picture022.jpg


With the truck out for driveshaft I didn't want to waste time twiddling my thumbs so I tore into the shocks to put some initial shock valving in them so that we'd have a starting point for when the time came to actually take it out testing.

Picture027-1.jpg


Picture028-1.jpg


And the shiny new driveshaft from Adam's driveline here in Vegas who I'd recommend to anyone along with a badass diff skidplate that's already earned it's keep from S&S fab out of Oregon!!!!

100_1295.jpg


BTW, the SDHQ stickers you keep seeing here and there!!!! Support those guys out of Phoenix!!!! Serena over there has taken amazing care of us during this build in just pure faith that we'll continue to support them! We're a team starting from scratch and getting support on pricing for parts with no resume to speak of other then some guys from opposite coasts with promises is hard and they stepped up big time!!!

For some reason, I felt like filling in the extra cab windows. LOL

100_1294.jpg


100_1297.jpg


100_1301.jpg


Added a little extra support to the rear upper shock mounts just to be safe.

100_1300.jpg


We got juice!!!!

100_1302.jpg


100_1304.jpg


And well, what's the whole point of all this??? Well I guess it would be for this moment!!!

TPF-4_zps1543784f.jpg


TPF-5_zps61147089.jpg


TPF-6_zps381232c2.jpg


TPF-7_zps6400df47.jpg


From those pictures of the interior ripped out to these pictures above, you've blasted thru May 25th of 2012 till Early Dec 2012 of my life. I have a regular 40 hour per week job, this is my nights and my weekends!!! Within the first 5 minutes of what you see pictured here I knew it was all worth it and we were onto something really fun and really good! It wasn't finished but I finally got a taste of it's potential! The bummer, Jason who's in DC this whole time spending bucks like the rich man he isn't wasn't even here to experience it! He lived thru the whole thing via his bank account and my pictures and words.

This is day 1, with ZERO shock tuning. Only gonna get faster and smoother from here. Quality sucks but the pictures below show what we're going thru in this video. While watching this short video, ignore that the steering wheel isn't centered, it isn't aligned yet. But do notice how VERY little feed back I'm getting in the wheel!!! That's proof of a very well designed suspensions system by our friend Matt and MCM FAB here in Vegas!!!!

https://www.youtube.com/watch?v=zvVZFximhsM

According to GPS we're running about 60mph thru this...

DSC_2451_zps93c30401.jpg


DSC_2452_zps26885b39.jpg


DSC_2454_zpsec7d5aaf.jpg


DSC_2455_zps875693f9.jpg


DSC_2456_zpse3c03be7.jpg


DSC_2457_zps18e255be.jpg


DSC_2462_zpsf64233af.jpg


DSC_2463_zps54493e56.jpg


DSC_2466_zps7313d130.jpg


IMG_3018.jpg


IMG_3012.jpg


IMG_2995.jpg


Got 9 minutes to kill and want to see in car, suspension cams front and rear, and all sorts of random angles from our testing? Here you go...


http://www.youtube.com/watch?v=EgebrxhBru8


...


So testing is done. It's a success!!!! Seriously, only issue we found was a 5 minute fix. During testing we put probably 150-200 miles on the truck. We had the shocks tuned and eventually got it to where we were pushing 70mph thru those whoops pictured above. Our biggest limit is the engine. It's a stock 3.4L tacoma with a stock auto trans. Has doug thorly headers, no cats, magnaflow muffler. My home made intake is probably hurting more then helping. LOL


From here though, we weren't ready. I still had driveshaft loop and lots of other small items to finish up before we would be race ready. The check list to get to the starting line that first time is beyond massive!!!

But here's the truck just a week or so before race day.

100_1327_zps5fc0593c.jpg


At this point we're talking early Jan 2013 and our race is late Jan.

100_1331_zpsf7e6ac1c.jpg


100_1339_zps15781912.jpg


100_1337_zps4a4d905f.jpg


Okay, ready for this now??? Jason who owns the truck wanted it to look badass at least once in it's life!!! We discussed this and though we didn't see eye to eye, it's his truck so by all means go for it! I'll admit it turned out absolutely badass!!!!

734709_450436681690095_1355567533_n_zps6b207e0f.jpg


177856_457538617628459_629222040_o_zpsd58277db.jpg


483954_269230076538016_1356988523_n_zpsc854e026.jpg


race3_zps3ea9649d.jpg


120382_zpsc2de17ad.jpg


That's all from the HDRA Southpoint 250 race a few months ago... This is Jason's words...


After 30+ years of daydreaming and 2 years of hard work, my wife and I along with our truck builder Khris Kading were able to make the transition from spectators to racers this weekend. For the last two years we've obsessed over this thing and I can't count the hours I've spent sitting on the bus riding to the Pentagon, starring at the wall of my cubicle, etc, planning what this weekend would be like.

Khris Kading did an amazing job building our truck in his garage after hours, almost entirely by himself. I think a lot of people who had the chance to see the truck would agree that it doesn't look like your average garage built truck. We were fortunate enough to cross paths with Serena Pruett and SDHQ and her help in gathering everything we needed to make the truck work was invaluable. And I am forever indebted to Serena, Dan200, and the whole SDHQ crew for allowing us to associate ourselves with them. For our first race, being able to showcase our truck in front of their trailer at tech/contingency was awesome.

Race day was full of nerves and last minute trouble shooting. Thankful to have made friends with people like Danny Fraire and Gregg Hempel and their crews. They're always eager to lend a hand and they sincerely embody the spirit that makes this sport so great.

My wife and I ran the first lap and after trailing our competitor off the start we were able to get around them in front of the spectator area and had a great lap. My wife did an amazing job co driving even though we couldnt get the course file loaded in the GPS. All those nights making her sit through Dezert People paid off, she was awesome! We had a great time watching Brandon Arthur fly by us and had the pleasure of getting a rock shower from one of the Herbst trucks. Hopefully we didn't hold anyone up too much, we were just excited to be out there and be a part of it.

For lap two my wife jumped out and Khris Kading took over driving duties and I took the right seat. Khris ran a blistering lap and without the time in the pit for the driver change, a quick stop for a visual inspection, and a 10 min stop for a flat, I'm confident his lap time was on pace with the 1400 trucks. Unfortunately at the end of lap two we discovered a broken motor mount that allowed the motor to shift around a lot. We were able to ratchet strap it up and solve the problem so we took off for our third lap with about 5 hours of time to go.

Just past Pit A a coolant hose that had gotten pushed up against the header burned through. Took us a lot of time to get help out to the truck but we were able to rig up a fix and with about two hours left decided to push on. Picked up another flat going up the mountain that cost us some time and we were cruising around 35mph to hold the truck together. Pretty sure we were one of only two vehicles on course still running and we appreciated the waves and cheers from the course workers ready to call it a day.

Made it through the rough section and were looking good on time until I blew it and took a stupid line in to some deep rutted silt and buried the truck. With the help of some course workers we were able to get unstuck and run the last 10 miles home but made it back to the line 7 minutes too late.

In spite of the challenges our friends and family never gave up and busted their butts to give us a chance to finish our first race. No money, no glamour, just the pride of seeing the job through. We won't be listed as official finishers but crossing the line to the cheers of our "fans" made the entire day worthwhile. Thanks to HDRA and everyone who helped us fulfill the dream. I couldn't have asked for more. Thanks to the nature of my business, this weekend was probably the last race I'll get to enjoy as a racer for some time as I found out Thursday on my way to Vegas that I'll be moving to England for an assignment starting in April. So excited we got this one in!

Even though its a low res cell phone video, I think this really captures the spirit of the day for us. Thanks to everyone who has supported and followed TPF Racing! Hope to see you all again in the desert soon!

https://www.youtube.com/watch?v=uEqWmMELoLY


Some carnage pictures to go along with his words...

image-1844214520_zps4141ec0a.jpg


image-1431096783_zpsb9380355.jpg


Motor mounts are TOTALLY over rated!

image-3249938042_zpscef69ddb.jpg


And you'd think I'm done right? Nope, during the race we realized we had some spare tire fitment issues so some changes were made and since I was redoing it I dropped them to sit much lower in the chassis.

100_1406_zps2fb268ee.jpg


100_1408_zps930aaeb2.jpg


100_1403_zpsee703304.jpg


100_1400_zps766103f2.jpg


So what's next??? Well here's the kicker... Our agreement was I provide sweat, labor and cuss words and Jason provides a bank account to fund the truck. We split drive time. In the first race he ran two laps, I ran one. But I also got a lot of testing seat time before races and will likely always get a lot of seat time between races so I'm cool with giving him priority on race day seat time.

The kicker... Our original plans going into this was 4-5 races per year. We knew cause of how his career is that there was a really really really good chance of him getting shipped to Korea for a year possibly in 2014. No biggie we figured, we'd race 2013, take 2014 to relax and then come out swinging in 2015! Well, literally on his layover in Chicago on the flight out for the race he got orders that him and his wife are being relocated to London in about 2 weeks from my typing right now today!

Uhhhhhhhhhhhhhhhhhh, that's a bit of a change!!! And on top of that, it's a 3 year assignment!!!! Okaaaay.... So basically at this point flights are a bit more substantial from london vs. DC or anywhere state side. We're hoping at this point maybe once a year a stateside vacation based around a big race weekend for them. Then I'll probably race the truck myself once or twice a year. He will retire in 2016 and move back to this area so at that point we can really start the racing fun. For now, it is what it is and we both knew the chances going into it even though neither of us really expected it.


I was going to go back to back on this with another build of my prerunner but honestly, the build above is better done and better documented thru pictures. Let's just say that this is another toy I've built that is 100% solely mine.

538315_872409168108_23707796_36019343_1431436756_n.jpg


100_0521.jpg


5.jpg


11.jpg


2.jpg


DSCI0905.jpg


DSCI0903.jpg


If you made it this far, congrats... Or I'm sorry!!!! Whichever is more fitting for you! LOL If you want more though, I'm in the middle of building my explorer!!! It's going to be a dual purpose built daily driver that will also be used to support/chase for the race truck. Check out my "whitey turns red" build thread in this same section for what I've got going on with it. It's not nearly as extensive as what I just showed here but hopefully it'll do everything I ask of it whether I'm just cruising the dirt roads, trying to hang with the jeep friends or just cruising around Vegas wanting to stand out from the norm and commuting to work!

Thanks for looking, if you got questions, don't hesitate to ask, I'll answer what I can with what I know as best as I can. I'm no pro, I don't build trucks for a living. I'm purely a hobbiest who bought some tools when I was about 21 instead of paying someone to do the work while also raiding my dad's garage collection. I'm now almost 36 and well, it is what it is...


LOL, why subscribe, the build is done! :p:


HAHAHAHAHA, just looking back thru this thread I just created and realized one of the pictures I used actually isn't of the race truck but actually is a picture I kept for idea purposes... LOL whoops! Oh well, it looks identical to what I did anyways so I'll leave it. It can be like a where's waldo game, find the one picture that's not actually of the race truck!


Join the Elite Explorers for $20 each year.
Elite Explorer members see no advertisements, no banner ads, no double underlined links,.
Add an avatar, upload photo attachments, and more!
.


...Hoping you will have more races and modifications to share with us of this truck in the future..:biggthump


Back
Top