Replacing solid brake lines | Page 2 | Ford Explorer Forums - Serious Explorations

  • Register Today It's free!

Replacing solid brake lines

If you can't bend lines, you will need to take the truck to someone who can.
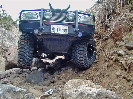
IMO, bending nickel copper line by hand is easy. Flaring is the greater issue but along with practice, depends on a fair quality tool. First time I tried, had no luck with the junk loaner flaring tool from (Autozone or Advance Auto, I forget which).

Rather than having to take it to someone (if having to pay to tow it in the case of a brake line out), probably would be cheaper to get a mobile mechanic to come to it... depending on location.


Join the Elite Explorers for $20 each year.
Elite Explorer members see no advertisements, no banner ads, no double underlined links,.
Add an avatar, upload photo attachments, and more!
.


Thanks guys. So it seems the flex lines are factory and are a necessary component of the ABS system. My leak is at the bottom connection on one of the flex lines, so that line cannot be re-used or attached to AFAIK. I can't find these lines or a generic replacement. It appears that these lines are to allow flex movement between the body-mounted brake component lines and the lines mounted to the frame. I may have to use some loops in the solid lines to provide for this.


^ Yes loops will work. The flex lines are there to provide strain relief, but it doesn't really have anything to do with whether there is ABS, and you do want a minimal amount of strain relief, but this can also be accomplished by putting a few (about 3) ~ 2" or larger diameter coils/loops in the line instead. This is even more true with nickel copper line opposed to steel because it can flex more before it reaches the point of fatigue.


Thanks guys. So it seems the flex lines are factory and are a necessary component of the ABS system. My leak is at the bottom connection on one of the flex lines, so that line cannot be re-used or attached to AFAIK. I can't find these lines or a generic replacement. It appears that these lines are to allow flex movement between the body-mounted brake component lines and the lines mounted to the frame. I may have to use some loops in the solid lines to provide for this.
Yes. It really has nothing to do with abs, but rather to accomodate the cab flexing wrt the frame. The cab is mounted on rubber "donuts", so a few loops can easily accomodate the motion. The nicop is easily formed take these loops.

This is a kind of strange location to have a first corrosion problem. I'd warn you to carefully inspect the rest of the brake system as the long lines going to the rear brakes are surely toast as well.

You might check the YouTube channel called "South Main Auto" for brake line replacement videos. Owner/Mechanic Eric O runs an excellent auto shop in upstate New York. The state quite liberally salts the roads in his area, this seems to destroy most cars and trucks there in 10 or 12 years. His videos frequently feature problem solving challenges associated with heavy corrosion.


Looks (to me) like the convoluted black tubing contributed to the corrosion problem. The rust is worse at the junctions with the stainless braided flex lines and a few inches above and below. Essentially the area where it was covered with the tubing. About 6 inches below the lower junctions, the rust is not as bad. I'm pretty sure I'll end up replacing all of the lines end-to-end before this little project is over.


So I bought tools and brake line and my project is going slowly but smoothly. I'm replacing the rear brake line and found it a PITA to remove the flare nut. I got it, but I'll run in to the same thing on reassembly.

The bracket is in the way. I can't see the flare nut without a mirror so working blind here. I considered removing the bracket but the bump-stop would have to come off first.

Any assembly tips or tricks here?

The picture of the bracket is taken from the floor, looking up into the driver's side rear suspension.

Brake-line-bracket.jpg


I have always been bad at trying to interpret perspective/angles on pictures at close quarters, so I don't know what to make of yours.

it seems like the wheel is still on? I probably removed mine when I did the front to rear, and rear across the axle to right side. I replaced that left rear soft hose in the pic, at the same time as doing the hard lines. Maybe that made it easier but I don't recall that being difficult. I had a high quality, not very long, flare wrench. Biggest annoyance I recall was removing the tank shield and cross member for easier access to string (secure it to my satisfaction every so many tens of inches including getting it into the factory frame clips) the front to rear line.

I definitely detached the bracket piece pictured below, from the old hose's frame(?) mounting point, because it was part of the old soft hose being replaced, and part of the new soft hose. Just can't recall if I attached the new hard line to it before, or after bolting that hose bracket onto the vehicle.

Wagner BH132766 Left Rear Brake Hose_.jpg


1.png


So I bought tools and brake line and my project is going slowly but smoothly. I'm replacing the rear brake line and found it a PITA to remove the flare nut. I got it, but I'll run in to the same thing on reassembly.

The bracket is in the way. I can't see the flare nut without a mirror so working blind here. I considered removing the bracket but the bump-stop would have to come off first.

Any assembly tips or tricks here?

The picture of the bracket is taken from the floor, looking up into the driver's side rear suspension.

View attachment 445561
The bump stop should come off pretty easily. Taking the bracket off would be the way I'd proceed. You can the clean it off & repaint if needed. Easier to get that end ofvthe flex hose in first and then reinstall the bracket I think.


Thanks guys, I think I will try to take the bracket loose. It's pretty rusty down there. Problem with the bracket is that it "wraps" around the nut I can't see. The first picture is a weird angle, taken just ahead of the rear axle. It went sideways when I posted it. Only way to access the bracket is with the wheel removed. I can get at the tube nut with my arm under or over the frame there, but clearance is little to none for wrenching. I was able to snake the new line inside the frame with some collisions with the zillion lines/brackets already in there. I'll inspect/secure that later. I haven't made my bends/ends on the pipe yet.

This problem bracket is where the solid spiral armored pipe (hidden) transitions to a rubber flex line. The rubber line goes on to the 3 way fitting to feed both sides. Here's a hopefully better pic with hi tech annotation.

Brake-line-bracket2 (c).jpg


@J_C I really wish it was the bracket in your picture that I was fighting. That bracket attaches where the leaf spring joins the axle. Easy to get to. One of those flex lines connects to the exposed side of my problem bracket.

Removing the bump stop should have been easy but it was a ROYAL PITA. The folks at Ford had cleverly obstructed the bump stop stud with 3 solid pipes and a securing block directly above the stud. No clearance for a shallow socket wrench. Only after sliding to the securing block down a few inches (another PITA) I could get about 1/8 of a turn using a flat wrench, so I bought a 15mm ratchet wrench which helped.

This stud was pretty rusted so plenty of PB Blaster and overnight soaks were in order. Even then, the nut was hard to turn. Finally my worst fear came true. The stud was rotating inside of the bump stop. Fortunately I had loosened it enough to allow a hacksaw blade between the frame and metal plate on the bump stop. Then, it only took a couple of hours of sweating and cussing with a short saw, chisel, BFH, and crowbar.

I would have chased the rusty threads if there had been sufficient clearance but not. I probably could have saved a lot of pain if I owned a reciprocating saw, and I was considering going shopping, but eventually I won. That's some hard steel.

The rest of the job should be a piece of cake now....:banghead:


^ Yeah sometimes a saw helps, but be sure to get carbide toothed blades for hardened fasteners or you'll ruin a blade in about 5 seconds. More often I grab for an angle grinder, with a cutoff wheel if I have good access, or a grinding wheel if access is bad and I don't feel like having the cutoff wheel shatter from the funny angle.

Wish I understood better what you're dealing with, but on my '98 I'm 100% certain I didn't have to take the bump stop off when replacing all 3 pieces at once, front to rear line, soft hose junction, and rear across axle.


I have the bracket and new brake line installed (at the back). It wasn't too difficult. Most of the original problems (for me) were removing rusted blind fasteners with all kinds of stuff in the way. Of course if I had a lift... and the cutting tools... and...

I'll see if I can get a good pic or two before I take it off the jack stands tomorrow. The problem bracket is attached with nut/bolt until I can get a replacement bump stop.

I appreciate the words of wisdom and encouragement on this. I'm no stranger to the toolbox but this is my first round with a Ford Explorer and first rodeo fabricating and flaring.


^ Yeah sometimes a saw helps, but be sure to get carbide toothed blades for hardened fasteners or you'll ruin a blade in about 5 seconds. More often I grab for an angle grinder, with a cutoff wheel if I have good access, or a grinding wheel if access is bad and I don't feel like having the cutoff wheel shatter from the funny angle.

Wish I understood better what you're dealing with, but on my '98 I'm 100% certain I didn't have to take the bump stop off when replacing all 3 pieces at once, front to rear line, soft hose junction, and rear across axle.
I agree with the Sawzall or cutoff recommendation. My too most used tools on old cars are my smoke wrench and my cut-off grinder. I have a few corded models but I find I can do virtually anything I need with my Makita lxt (18v) cutoff these days


Okay I went out and looked at my '98, and the bracket I was thinking about, is not the one in question. The bracket I was thinking about is very easy to get to on the back of the axle as this first pic shows. Hard to believe this (repair) doesn't have that many miles on it, fewer still on the axle U-bolts yet covered in rust already:
one.jpg


It's ironic (or autofocus gone wrong) that the more important pic ended up blurry. I mounted that hose in the bracket with the clip on it, then used a flare nut wrench, positioning it upwards and towards the front of the vehicle, probably only moving it a few degrees at a time but it was a standard/hex flare wrench. The key thing may be that this wrench was only 6-1/4" long. The wrench does not have substantially angled heads like the diagram suggests, is pretty close to flat. 15' angle? IDK... "maybe" but I doubt that much. To get this pic where (if it wasn't so blurry) I can see the nut, all I had to do was poke my head behind the rear tire as I did for the first pic, but just scoot under a little more and look up.

two.jpg


wrench.png


Wright Flare Tool Wrench 31614.jpg


Well it's back together, brakes bled, no leaks. Thank you all for you words of wisdom, advice and encouragement. I'm now an amateur novice pipe flaring apprentice :)

As luck would have it, the ABS warning light has come on. My scan tool says C1230 "Wheel Speed Sensor Rear Center Input Circuit Failure". It's always gotta be something. I may have disrupted a connection back there.

I'll search this site and start a new thread on the ABS issue if I can't figure it out.

@J_C Yep, that top pic of the rear bracket looks familiar, and so does the rust. I'm a little confused about the second pic. Coil spring? Front brake?

Here's a couple more pics of my "problem" bracket. I've got a temporary bolt holding to the frame right now. The bump-stop had about the same amount of exposed thread as the bolt, but pointing upward inside the frame.
The upward facing bump stop threads crashed into the (once was) white plastic support making using a box end (or socket) wrench impossible. I wasn't going to use an open end wrench on it due to the rust.
I was able to slide the plastic support a few inches out of the way once I got the old armored brake line out of it. You can see the "clean" tubing where the bracket was originally.

The Bracket Bottom pic just shows the concave shape of the bracket which made it even harder to get a wrench in there.

Thanks again all!!!

looking-up.jpg


bracket-bottom.jpg


^ The second pic has the bracket you were fighting with, and the connection at the hose, with a green rectangle around it. Mine seems oriented a little differently, or I just came in at a different angle. It was no trouble at all to get off and on with the wrench I pictured, which was a bit surprising because of the rust... well it was also because I didn't need to save either piece, was replacing both the hose and hard line so just cut the line and had a new clip with the new hose.

The spring is on my coilover rear shock, is a view from poking your head behind the rear driver's side tire. The extra stress from that on the lower shock mounting plate, plus it was rusting out anyway, is why I ended up replacing the U-bolts when I put on new lower shock mounting plates.


I'm going to need something done with my Mounty, the lines are rusted a lot(born in Milwaukee).
Same here on my 97... mine lived in northern Indiana too long...


well done!


@J_C Thanks for the clarification. I like your rear bracket better. Mine is parallel to the ground, hiding the fasteners.

I had to crawl under there one more time to looks at the ABS sensor. Sure enough the wires and convoluted tubing are all (cleanly) broken. The break is right where these wires are secured to one of the solid tubing lines that I had push out of the way. My bad. Can fix.


Join the Elite Explorers for $20 each year.
Elite Explorer members see no advertisements, no banner ads, no double underlined links,.
Add an avatar, upload photo attachments, and more!
.


Back
Top