Here it is...Roof Light Bar...New Pics | Ford Explorer Forums - Serious Explorations

  • Register Today It's free!

Here it is...Roof Light Bar...New Pics

Here it is. The finished roof light bar projects with many pics. Long story short, I welded a piece of 1" steel pipe to two brackets I made out of 2x2 steel angle. I then bolted them down into the roof, with rubber spacers in between to keep vibration down. I was also able to take the plastic molding piece loose and get my hand inbetween the sheetmetal roof and the headliner so I didn't have to take the whole headliner down.
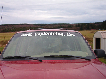
Front View:
CIMG3877.jpg


A Couple Side Views:
CIMG3876.jpg

CIMG3875.jpg

CIMG3884.jpg

CIMG3885.jpg


Inside View From Sunroof:
CIMG3878.jpg


Where I Bolted It Down (The outside of the angle was flush with the rain gutter before I put the rubber between them):
CIMG3880.jpg


How I Ran The Wire (Down the inside of the weather guard thing):
CIMG3881.jpg

(Then under the windshield wiper plastic piece)
CIMG3882.jpg


Here It Is In All It's Glory:
CIMG3883.jpg


And Here Was My Birthday Cake That My Wife Made (With safari rack and custom bumper):
CIMG3819.jpg

CIMG3817.jpg


Couldn't have done it without the help of a lot of you guys.


Join the Elite Explorers for $20 each year.
Elite Explorer members see no advertisements, no banner ads, no double underlined links,.
Add an avatar, upload photo attachments, and more!
.


Look's nice... What brand are the lights? I've been wanting to do something like that for awhile but it won't fit into my garage. Like the way you ran the wires.


Thanks. They are just some cheapo ones that I picked up at Harbor Freight for like $14 a pair. You could probably make something that is quick disconnect, like the bar and wires would be removable for when you are not using them. Just a thought though.


Nice work!! I don't know what I like better, the lights or the cake!! :salute:


How do you have em wired up? My guess is the high beams.


Actually I have them all wired to the stock fog light knob switch. Since I took off my stock bumper, I had no OEM foglights. So I wired the two 100w lights on my new bumper and the four 50 watters on top all to my stock fog light switch (relays and fuses definitely included). Thanks also about the cake, it was great. Here are a couple pics of the lights. Very very bright. Sorry for the crappy pics though, they are cell phone quality. Should get more up soon.

0510002032a.jpg


0510002032.jpg


That is the coolest cake ever.


Thanks. It also tasted great too.


I bet having that sunroof made the installation a lot easier ;)


I'm diggin' the cake...


Oh hell yeah. The sunroof made it extremely easy to wire the lights up. The only problem I really had was was once I mounted the light bar onto the roof, I had to cut down two of the bolts on the individual lights because they would rub the sunroof and the sunroof wouldn't close when it sensed something blocking it.

I couldn't have made a cake like that in 20 years. lol. it was great.


good job. i have 4 of those harbor freight lights stashed away coz i had to put all my projects on hold till i fix the engine issues.


did you you Conduit for the light bar?


Yes my friend, I did drill through the roof. However, it's nothing a little duct tape won't fix if I decide to remove the light bar. Haha.


And, No, I did not use electrical conduit for the light bar. I used 1/2 inch schedule 40 steel weld pipe for the bar. I work at a plumbing/mechanical outfit, so we had plenty of material laying around...plus a welding machine to weld it all together.


hm i want that cake. also where did you get the rubber spacers btw? i hear of people having these but i have no idea where to get them though.


I just made my own spacers. I used an old Fernco coupling (it connects pvc or cast iron pipe together) (it is basically a rubber cylinder shaped coupling that you stick two ends of pipe in, and it has bands on both side that you tighten down). But It was like 1/2" thick rubber and I just cut it into little squares and drilled some holes through it. Simple enough.


Back
Top