4.6 V8 Power Steering Pump Leak | Ford Explorer Forums - Serious Explorations

  • Register Today It's free!

4.6 V8 Power Steering Pump Leak

Paul Fithian

Elite Explorer
Joined
October 12, 2016
Messages
336
Reaction score
106
City, State
Long Beach, IN
Year, Model & Trim Level
2007 Job 1 RWD V8 Limited
I replaced the entire power steering system with new rack/hoses/reservoir/fluid in my 2007 4.6 V8 last spring. See Power Steering System Replacement 2007 V8

Just discovered the Cardone 20-329P1 pump I installed is leaking at the shaft seal, even when not running.
Cardone PS Pump Leak1 8-2023.jpg

Cardone PS Pump Leak2 8-2023.jpg


Any tips on replacing this with a better quality unit?


Join the Elite Explorers for $20 each year.
Elite Explorer members see no advertisements, no banner ads, no double underlined links,.
Add an avatar, upload photo attachments, and more!
.


I would go with a Ford OEM part since they seem to be quite reliable overall.


How long do you think it'll take to replace again, now that you've done it once already?

If not long, I'd consider gambling again with a warranty replacement. Cardone lists 3yrs/30K mi warranty.


If bought from Amazon, they list a 1 yr "Amazon Renewed Guarantee", which makes me wonder if you could a refund and then go with another brand. If bought from Rock Auto, they list only a reman Motorcraft (not new Motorcraft) but I wonder if they would give you credit for the purchase price of the Cardone to apply towards the Motorcraft.


Thanks fellas, looks like this part only fits 2006-2010 Explorers with 4.6 V8's. The one I got from Amazon had a 1 year warranty, so no recourse on a replacement expcept to buy a new one.

After looking at several options, going with this part from Autozone: https://www.autozone.com/suspension...urance-power-steering-pump-63182a1/212351_0_0. Lifetime warranty, we'll see how it holds up.

Pulled the old one out today, waiting for the replacement to arrive. Tough and messy job, oil filter has to be removed to get at the pump discharge fitting nut from below. Pull the left front wheel and the forward fender liner for better access from the side. Pump drops out the bottom after removing the discharge line. Tools needed to remove pump are 10 & 13mm deepwells, plus 18mm crowsfoot for the discharge fitting nut.
PS Pump Discharge Nut-Oil Filter.jpg


Are you sure about leak location?ford design shares problematic high pressure line teflon seal.

If installed not following the exact manufacturer instruction (using special tool and avoiding from touching the threads)or overtighten or OEM seal installed on aftermarket line or whatsoever reused teflon seal it will leak
Anyways.ive used the motorcraft reman piece with zero issues

Dont forget to purchase pulley installation tool if you dont have one.

IMG_20230705_085403.jpg


Yes, there was no indication of HP line leak, since there is no fluid on the line or fitting. It would have leaked when installed and pressurized on first run.

There was a uniform coating of fluid on the inside surfaces of the pulley.

Pumps I purchased came with the pulley installed.


I wouldn't dream of using anything but Motorcraft here, but I don't like doing that horrendous job twice. Cardone is Mexican rebuilt garbage; AutoZone is Chinese. Good luck with that. That's a tough job on that truck. Thanks for sharing some very useful information on removing that thing.

I found a 1/4" drive with a deep socket is helpful for that lower bolt, working from the front.

I wasn't able to budge the pulley off my 2010's pump shaft and had to get a new one when doing a timing job on mine.


New pump from Autozone received, looks nice. Box label indicates product of Mexico. Ford dealer I checked with showed no nearby availability in their system.
TruGrade 63182A1 PS Pump.jpg


Roll pins that came with this pump were too short (bottom of picture), bracket installed with correct pins taken from old installation.
PS Pump Roll Pins-Bracket.jpg


These roll pins must protrude from the bracket to fit in the receiving pockets machined into the head. Note third bolt screws into timing chain cover. Although pump has 4 bolt bosses, there are only three threaded holes on motor to receive bolts.
PS Pump Mounting Bosses.jpg


High pressure seal appeared to be in good condition and showed no apparent leak path. This will get replaced with a new one that came with the pump

PS HP Seal Old1.jpg


Seal mating area on the pump looks like this:
New PS Pump HP Seal Land.jpg


Should be back in service in a day or so.


Those photos are great. This is a tough little job on this truck. Sorry to see you having to deal with it. Good luck with the pump. It's hit-or-miss these days with foreign rebuilt parts. The pump's so simple you have to wonder how they screw them up. Your write up will be very helpful one day for someone trying to replace one of these. They are hidden so well below, I wonder how you got that photo of the block.


Installed the pump and found it leaked at the HP line flare nut going into the pump. When I installed the seal that came with the pump on this flare nut, it looked too big.

After some digging, discovered correct seal is smaller than what came with the pump. Ford has made these in several different sizes, this part number is correct one for this application, 388898-S, 13 mm. I found no reference to this part number in ALLDATA
Seal 388898-S 13mm.jpg


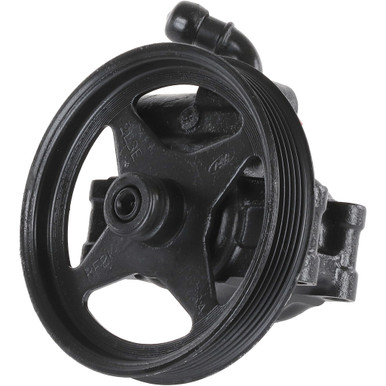
Made up this installation tool to put the seal over the flare nut threads without damage:
Yuengling PS Pump Seal Tool.jpg

Yuengling Tool on Seal.jpg

Yuengling Tool on Nut.jpg


One upgrade I made was to discard the wiring bracket and cut off the stud protrusions on the mounting bolts, then put some wire wrap on the wiring running down the left side of the head and block. Cleaner install and now the wiring doesn't contact other parts like the exhaust manifold or steering shaft boot:
Wire Routing Without Bracket.jpg

PS Pump Installed.jpg


No leaks, works great now. Although Ford procedures in ALLDATA call for pulley removal, I can advise it is not necessary and a real pain to do this, as access is very limited even when moving the reservoir out of the way. The only tool I found to tighten the 18mm flare nut was a flare crows foot on several extensions.

Here's what I suggest for this job:
Removal
- Remove oil filter
- Drain reservoir of PS fluid and remove feed line from reservoir into pump
- Loosen 18mm HP flare nut with crows foot
- Remove 10 mm nut holding HP line to frame
- Remove bracket and bolts holding the PS Pump in place
- Drop pump with pulley out the bottom and remove HP line fitting from pump

Install
- Finger tighten 18mm flare nut HP line to pump
- Install pump to engine from bottom. Be careful to use correct torque on these bolts, 15 ft-lbs. These will easily strip out the threaded aluminum bosses on the head or timing chain cover
- Tighten 18mm flare nut HP line to pump with crows foot on extension
- Install and tighten 10 mm nut to hold HP line to frame
- Install feed line from reservoir into pump. I double clamped this to make sure it doesn't leak
- Replace oil filter
- Fill reservoir with correct fluid, I used Mercon V
- Pull vacuum on the reservoir to remove air from the system, fill reservoir as necessary
- Start engine move steering wheel back and forth, make sure reservoir stays full. Top off as necessary
PS Pump Torques.jpg


The OEM teflon seal (the exact you get per your VIN)fits only the OEM hose..you have the aftermarket one


The flare nut and the hp line could be assembled prior to pump on vehicle install


Hold the pump on vice or similar way and tighten to specs no problem

There is enough space both for the line and the pump to be assembled together instead of fighting with the issue on the vehicle


The second way (on motorcraft lines only)is to replace the flare nut only (cut with dremel) ,then you only have to click the line on the pump


I only assembled the HP line nut finger tight before mouting the pump on the engine. Final tightening of the nut on the vehicle insures correct stress free alignment of the line on the pump as determined by the bracket holding the line a foot or so away from the pump.

Can you define further the "second" way mentioned above? What parts are needed for this?


The only part you need its the motorcraft repair flare nut (see rockauto steering section)

Then follow the same procedure as the f series and many other ford models shares (like aerostar or even a focus)

Cut the old flare nut (not the tube) with dremel cutting disk,your cut line should be parallel to the tube flow line,then replace the old flare nut with the new one (flare nut sitting on kinda inner retaining one way lock ring),while the new nut should be first tighten on the pump with regular socket head wrench

Then the only thing you need to do it is to insert the tube to the flare nut until you hear click sound.

The flare nut is actually works as a factory assembly line quick connector


Got it, thanks Bazz! I had to search a bit to learn more about these fittings work, check

This pic from the video shows the internal O-ring seal and snap ring that holds the nut in place.
IMG_3170.jpeg


Rock Auto part you referenced, Motorcraft PSH373
IMG_3171.jpeg


Logical that Ford installs the nut on the pump and snaps the HP line into the pump during vehicle assembly.

This is a free rotating sealed assembly when the flare nut is torqued to spec on the pump, so there is no issue with alignment when mounting the line to the pump before mounting the pump to the engine.


Back
Top