Project X: Rear Wing Spoiler | Ford Explorer Forums - Serious Explorations

  • Register Today It's free!

Project X: Rear Wing Spoiler

X~FACTOR

Name is Ray
Joined
January 4, 2003
Messages
6,613
Reaction score
4
City, State
Valley Stream, Long Island
Year, Model & Trim Level
'97 XLT 4-dr SOHC
This is from a late model Toyota 4Runner. I will try to make it fit to our beloved Explorer. The package includes the following:

The Wing
3rd brake light
Nuts and bolts
Foam moulding
Instructions (useless)

From all the factory spoilers out there this was the one I liked the best. The Sequoia spoiler was good as well I thought.

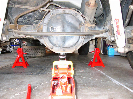
When I thought this project up, I knew it was gonna be a lot of work, I didn't know it was gonna be A LOT of work. :)
 

Attachments

  • x wing 003.jpg
    x wing 003.jpg
    20.4 KB · Views: 1,257


Join the Elite Explorers for $20 each year.
Elite Explorer members see no advertisements, no banner ads, no double underlined links,.
Add an avatar, upload photo attachments, and more!
.


Test fit shows that the spoiler is 2.5 inches too long. So it was cut in half and re-attached with a new hole to make room for the 3rd brake light.
 

Attachments

  • x wing re-doing  bondo on middle cut 031.jpg
    x wing re-doing bondo on middle cut 031.jpg
    36.4 KB · Views: 1,219


Raw fiberglass were added to make the spoiler fit flush to the rear hatch.
 

Attachments

  • x wing fiberglass added at left end.jpg
    x wing fiberglass added at left end.jpg
    16.9 KB · Views: 1,207


This piece of trim will have to be removed to make the flush fit work.
 

Attachments

  • x wing 005.jpg
    x wing 005.jpg
    27.5 KB · Views: 1,210


While I was at it I shaved the lower trim as well. Shaved Emblems were taken care of from previous project.
 

Attachments

  • x wing all primered 029.jpg
    x wing all primered 029.jpg
    42.4 KB · Views: 1,212


And this is the final result. Not an easy install by a long shot. Lots of sanding, prepping, re-sanding, priming, re-sanding again, more fiberglassing, re-sanding AGAIN,... well you get the point. ;)
 

Attachments

  • x wing 8.24.3 004.jpg
    x wing 8.24.3 004.jpg
    36.1 KB · Views: 1,192


Ofcourse, the final paint would have to be done by the professionals. But that won't happen until I get done with Project X: Hood Scoop. ;)

Another angle:
 

Attachments

  • x wing 8.24.3 010.jpg
    x wing 8.24.3 010.jpg
    32.4 KB · Views: 3,451


Thanks BM. It's nothing like the Saleen Wing that you have but its pretty nice I thought. I will have to do the trick that you did with the strut bar (where's the link to it again ;) ). As you could figure the rear glass can no longer open all the way.


Nice work. I just saw that the same type of wing was used on the Highlander. I'm not sure how wide it is, but it might be easier to use. It definetly looks good with out the trim around the window. A nice finishing touch would be you use the trim on the gates of '98+ X's to fet the finish look at the end of the window. Know where I'm talking about?

Looks good though, could you get a side shot? Can't wait to see it painted!!


woops, forgot one thing....


RICER!!! running around with primer on thinking its cool!!


Originally posted by IAmTodd
RICER!!! running around with primer on thinking its cool!!

Ohhh, you don't know how much it bothers me driving around with primer paint. Arrrrrrgggghh!


A nice finishing touch would be you use the trim on the gates of '98+ X's to fet the finish look at the end of the window. Know where I'm talking about?

Great minds do think alike! Haha! I know exactly what you are talking about. I was just wondering if the '98 - '01 rear quarter glass is the same size as the '97.

Here you go X: http://stlouismtb.tripod.com/saleenwingshock.html
I am happy that someone gets to make use of it!

Thanks again, BM. It will take the guessing work out and save me some time. :)


that looks good. cant wait to see it painted. :)


I know the glass is the same, I'm just not sure of the contours of the hatch. But it should match up! That would look sweet if it did!


nice job, it looks sweet. Do you have a close up shot of where the wing meets the hatch?


How many holes were there behind the upper and lower trim?


SilverX-
I'll find one when I get home tonight.

Hartman-
There is a hole at both ends of the trim. 2 trims, 4 holes in all. You should see how I plugged those holes in :). I got the idea from JamesT.


Join the Elite Explorers for $20 each year.
Elite Explorer members see no advertisements, no banner ads, no double underlined links,.
Add an avatar, upload photo attachments, and more!
.


Not quite, BM. I used a penny with some JB Weld (shown below) and then sanded down and painted. Cool trick.
 

Attachments

  • x wing 8.24.3 006.jpg
    x wing 8.24.3 006.jpg
    7.2 KB · Views: 1,109


Back
Top