96limitedX said:
PICs!!! lol thats great news!
I think they are holding the pics hostage...You would need to convince the 3 of these guys. There are a few things that still need to be done to make the install "done right" and they said something about holding the pics until we take care of these issues. But I prolly could squeeze some pics from the install outa them.

My cousin has some pics on his camera but he left the PC link cable over his girl friends house. As soon as I get them I'll post.
adarkang said:
That's awesome to hear! I cant wait til next weekend to put mine on! So, did the kit bolt right up? Any major modifications? How did you weld the perches in the rear? Did you angle them or move the rear axle forward?
There are "light" mods which need to be done to both the kit and your truck:
-One of which depends on how old your kit is. The front diff bracket that comes with the kit seems to have been redesigned since RedRanger bought my kit. We had quit the scare when the manual was showing parts to install which we did not have.
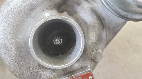
Grinding was needed on the "older" diff bracket to clear the engine oil pan.
-The stock front bump stops need to be trimmed/removed to clear the coil-overs
-If you have a '95 or '96 with a vaccume disconnect front end, the vaccume lines/electrical connector will not reach your disconnect module without relocating the vaccume seloniods located on the passenger side of the truck near the vaccume boost canister. They need to be moved about 6 inches closer to the radiator to get enough cable to reach the axle.
-Front brake line mounts need to be relocated to clear the coil-overs. This can be a pain if your trying to get a nut and bolt through the enclosed frame. We probably would have been better off welding them.
-Welding must be done to the front upper shock mouts to reinforce them. After welding the metal pieces that came with the kit to the shock mount, depending on how you weld it, you will need to grind away some to make room to install the upper coil-over mount bolts. Holes must be drilled into the shock mount to install the coil-over mount. On the drivers side, when drilling holes for the coil-over mount, you must be extremely carefull not to punch through the brake lines mounted on the other side of the shock mount.
-The rear brake line is not long enough to reach the axle after installing the SOA. You will need a longer hose to run from the hard line connector on the frame to the axle.
This was where we ran into a problem. It was 11:00pm and we almost decided not to finish because it wouldn't be done "right" if we made it work. After looking over the steel brake line and its bracket, I decided against everyones better judgement to remove the bracket and driverside bump stop (the bracket is bolted to this) to see if we could bend the steel line enough to reach. It actually didn't need to be bent much to reach the axle with the leaf fully extended but I definately won't go offroading until I fix this.
There is probably a bunch of other stuff I have forgot to mention...
We did not get to install the gears. As it was the 4 of us worked on it from 12:30pm Saturday to 12:30am Sunday morning. Usualy, at any given time, there were two to three of us working on something. I will be ordering the new leafs, shackles (since they are rusted pretty bad too) and the longer rear brake line. We will be installing the rest of this in a couple weeks.
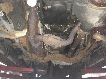
The front end itself came apart pretty quickly, after about an hour and a half we were trial fitting the drop down bracks for the front diff and lower control arms. Air tools rock!
I will be doing a full write up on this once I get the pictures to help organize my thoughts.