410Custom's builds a 2007 Ranger V8 - custom truck build - Project "Ranger Premier" | Page 3 | Ford Explorer Forums - Serious Explorations

  • Register Today It's free!

410Custom's builds a 2007 Ranger V8 - custom truck build - Project "Ranger Premier"

Nice, I hope that welder does everything you need it to. I have the first TIG Eastwood made, but haven't gotten time to get the stuff to try it yet. I'm hoping it will do AL also, making plenums for a blower is my big project.

BTW, those seats, do you have the old 07 Ranger seats, or in power? I'm going to retrofit Explorer seat tracks into my Mark VII, to gain the memory seat function(the magic is in the motor set). So I'm intending on cutting off the track feet from both tracks(from each vehicle), and welding those four swapped feet back on.


Join the Elite Explorers for $20 each year.
Elite Explorer members see no advertisements, no banner ads, no double underlined links,.
Add an avatar, upload photo attachments, and more!
.


yes I have the 07 60/40 seats they are manual tracks with the auto tension seat belts. We will likely use them in another project as they are in decent shape and people love the 60/40 bench.
I have many sets of Explorer and Ranger seat tracks, manual and electric....


Very good, and I hope you get a lot done this holiday.


SOB Fn Comp Cams WTF??? When I placed the order they said it would be here on the 25th.....well now its the 4th of Sep and no cam... Drive me nuts waiting this long! Not happy....
Anywho the kids go back to school today, then my Dad and I are taking his 2014 Shelby GT500 to harbor freight and welding supply store I ran out of Argon/CO2, good thing I haev a 20# bottle it might actually fit in his trunk!
Think he'll let me drive???

I started mapping out the seat wiring for the 2014 seats, see what systems I can remove and what needs to stay.
I did get one part in the oil pump to pickup tube gasket!! Hooray! I ordered 10 of them since the oil pan gasket sets do not include this gasket?????
Hoping the cam ships this week, I have called them 3 times and they keep saying its coming.......
once it gets here should only be a few days before the V8/trans/t case are installed.......PITA!

/Rant


Box arrived!! More goodies for our build!
The 360 degree camera system looks so cool!!
I love to install custom electronics

Working on a certain other truck project while we are waiting for the camshaft...my 15 year old welder crapped out...long story short, today I went to HF and I got a NEW WELDER!! WOOOO HOOOOOO

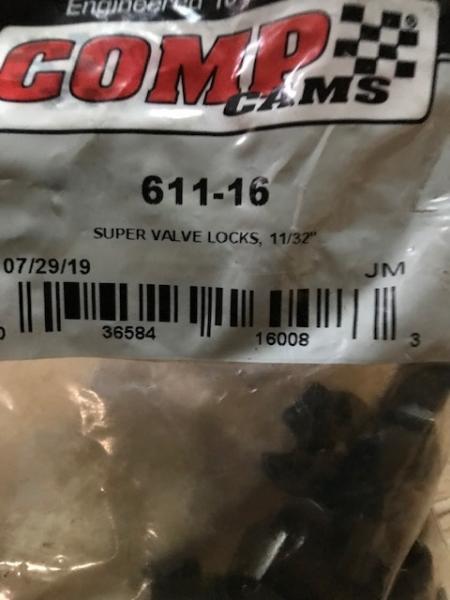
Just in time............ while we wait on cam parts??!!?!?!?!?! (What gives my whole life I spend waiting for parts...I was told it would be here on the 25th.........I called them they are waiting on parts?? should ship next week.....)

Anywho I plan to begin the seat install this weekend

TOOL REVIEW:
I am excited to use this new machine, so far I took it out of the box, set it up and laid down some practice mig welds...it makes my old Hobart HH180 look well....old.
The new welder feels much better in the hands (heavier lead), it "sounds" better while running, had about 100X the features, and made some nice crisp clean welds
ME LIKEY VERY MUCH!!
shopping

I have it setup for MIG, 240V, run from a generac 1800w genset (we live off grid I do not use the house LifP04 batteries to run my welder) c02/argon mix. Took about 30 minutes to setup including wiring to my 50' 240v extension cord. I ran some welds on 10 gauge and then 1/4" thick practice pieces. Very nice!!
Before I can try the Tig welding I need some tungsten, some filler rod and pure argon gas.
I doubt I will ever use it as a arc/stick welder, but its nice to know it there if I need it.
It also came with a simple mig torch and I can get a decent Chinese spool gun for running aluminum for $99
Lots of reviews of this machine online, but I am so happy with the purchase I thought you guys might like to hear also ($699) /REVIEW

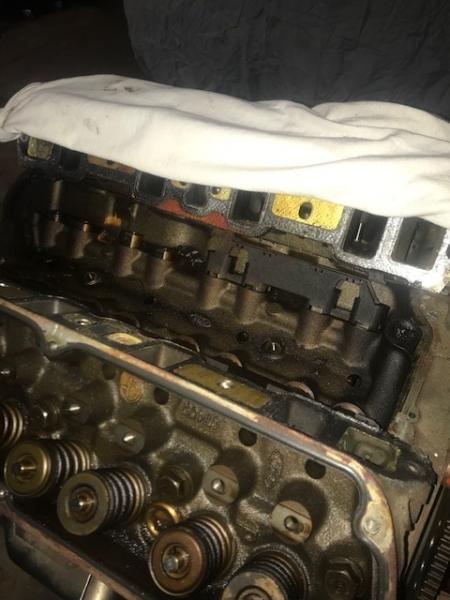
Seat install involves chopping up the factory Ford Edge seat mounts and fabricating brackets to correctly position the seats on the 07's floor pan and connect to the factory bolt locations.
This usually means lots of welding! Of course there is also wiring for the tracks and heat functions, as well as sorting out the seat belt situation.

Stay tuned! TGIF Labor day weekend....good time to wrench!!!!
I also have this welder its great!


Yep, I totally get it. Definatly want that engine and trans in before you start the suspension lift!!


CAMSHAFT finally arrived! Hooray! Stay tuned....next I will assemble the engine and trans and get them ready to be installed
Then the truck will be ROLLED outside for another washing, the engine bay and undercarriage will be prepped and washed, detailed and ready for the SBF to be set in place.
Finally time to start putting the v8 together!!

oh yeah trip to HF was awesome, get to spend time with my dad!
and HE LET ME DRIVE on the way home.....ooooooo lala!! 660 hp @ 6500 rpm
We spent some time checking out the dash features on this 2014 Shelby, I set his shift indicator on the tach audible tone and light (the SVT light in the tack glows orange when you hit the programmed redline, this engine can sustain 7000 RPM for 8 seconds before limiter kicks in!) , then I set his gauge halo led lights to ice blue to match the accent lighting and finally we found it has a boost gauge :)

Car has 1062 miles on it now.....good grief that thing is so awesome.....5.8L DOHC 2.1L supercharger with Tremac 6 speed, dual clutch and 8.8 solid rear axle torsen 3.31 gears, 15" 6 piston Brembo front brakes....I could go on and on... I may or may not have hit 90 mph in the passing zone very easily...... most powerful production Mustang until the 2020 comes out.

I probably used about 25% of the cars power and maybe hit 3500 rpm...
that car is soooo sick
coming from old big diesel trucks, 6 speed with the short throw hard to get used to......but I think I could if I had to :)

171_050916_170000001.jpg

/OFF TOPIC


Okay back on topic here I have good news! The dismantling phase is over!
On these 302 engines there are 4 bolts that go through the timing cover and into the engines water jacket. These 4 bolts are famous for being a PITA because they touch the coolant inside the engine the threads get quite corroded and they will snap off at timing cover or engine block when you try to remove them.
On our 104K donor engine here we were lucky, only one of the bolts broke.
So it is my job to extract the broken stud.
171_070944_540000000.jpg

Over the years I have had to battle many of these both on the engine stand and sometimes in the truck, they can be a real nightmare.
Here is my method for extraction:

First CLEAN the area, clean all threads that are visible and all debris from the area, I use a wire brush
Then SOAK the bolt head and surrounding area with PB blaster, unicorn tears, or whatever lubricant you favor.
Next CLEAN the area again
Now its time for the blue wrench (Torch), the purpose here is to heat the bolt as much as possible without getting the engine block too hot
171_070944_550000001.jpg

When the bolt gets really hot it will expand and hopefully break the bond the corrosion has on the threads.
Let it cool down! No point it trying to turn the bolt while it is expanded and hot (tighter in the hole)
Next we find a nut that kind of fits the remaining threads and using lots of heat with the mig welder, hopefully weld the nut to the exposed bolt bit
CLEAN the tip of the exposed stud, bare metal is what we are after here for a good weld

171_070944_550000002.jpg

Smack the stud with a hammer to hopefully jarr any corroded bits off of the threads (break the seal)

171_070944_550000003.jpg

Attempt 1, failed

171_070944_550000004.jpg

Attempt 2, failed

The nut just twists right off, not enough heat in the weld to grab the broken stud., not enough room to get the tip of the mig welder in the hole.

So the next approach is to use a piece of flat stock with a hole drilled in it. CLEAN the area to be welded, bare metal. DO NOT USE BRAKE CLEANER
Many people do not realize when you clean metal parts with brake clean that are to be welded the brake cleaner can produce a toxic gas. So we use acetone or alcohol, even just soap and water.
I added a little bit of metal to the top of the broken stud, placed the flat stock over the broken stud and make a nice weld all the way around.
Let it cool! a little bit of cold water on the weld will only help you here.
171_070946_130000000.jpg


That did it! The flat stock gave us the weld we needed and the leverage to get the stud turning. Work it back and forth slowly, more PB blaster
and finally....unthread the broken bit!
171_070946_130000001.jpg


171_070946_130000002.jpg


171_070946_130000003.jpg


SUCCESS

Now the last bolt is out
The build up can begin..........


Engine build up begins now!
First the factory lifter spider is removed as well as the lifter keepers, followed by the lifters and the stock cam.
Keep everything properly numbered orientated, etc.

171_070952_420000000.jpg


171_070952_420000001.jpg

Now I will bring each cylinder piston to the top and using a valve spring compressor remove each spring, keeper and spring retainers. With the piston at the top the valves cannot fall into the engine

And now I get to CLEAN CLEAN the engine block, all mounting surfaces and parts.
As each part is installed onto the engine all threads and hardware will be chased with the proper tap or dye.

Finally we get to start installing new parts!!!
171_070952_420000002.jpg


This COMP cam (XE264HR) is PERFECT for the explorer engine in a Ranger, the cam profile is emissions friendly while still making all of the torque down low and provides that nice throaty 302 cobra exhaust note we all know and love


I like that method of bolt extraction. I've never seen it done that way before:chug:


Nice build! I'm curious what the final cost will be?


The overall budget for all labor and parts is around $15K +
The longer it lives here the more $$$ Eddie Money will put into it
We have been talking about the goals and budget build for about a year before it ever even hit the shop.
This build is a living breathing thing, most of it is planned out on paper but some big decisions still need to be made

I have a very detailed budget and plan, I am keeping the books, my wife is double checking every $$$ spent.
Funds drive the build, planning is very important, I have many many builds under my belt and I work cheap since this is my hobby (for now) I do have a desk job, although it is working from home about 40 hours a month (for 20+ years it was 40-60 hours a week! I gave up summers and weekends to build trucks/my shop for more then 10 years now)..... NOT ANYMORE! in the famous words of Judge Judy: "I'm the boss applesauce"

I love these trucks I would almost do this for free :) But then I would be single and miserable HAHAHAHA

The valve seats, springs and new cam are installed! The long block gasket surfaces and engine parts are being cleaned.........

Comp cams sent the wrong retainers I had to re use the stock bits, no biggie just little metal pieces.
But I get to return the wrong retainers, get refunded like $14 ship them back, etc etc small hassles that go along with running a shop and parts logistics.
Everything else fit perfectly.

The PTFE valve seals are nice! I wish they told me they require a special tool for install, but its all right I improvised and built a tool/install method.
- 3 points for Comp Cams: parts arrived a week late -1, wrong retainers -2 , and no info about press tool for PTFE seals -3.

Now that the 07 project is moving along it will go together very quickly over the next few weeks. Pics coming!!
Looking forward to putting this same cam in my BII


Can't wait to see how that Cam works out. I have mixed feelings over it.

A) Excited that it will be a great power adder that should work well in our 5.0L, and looking forward to possibly doing this same setup in mine.

B) Angry that you gave me something to spend more $$ on the rig, as now that I know about it, it will be a constant finger tap on my brain.


Comp cams sent the wrong retainers I had to re use the stock bits, no biggie just little metal pieces.

im not claiming to be a motor builder, but use the recommended retainers. it can turn costly if you dont. the reason i say this is what happen to me once was that i used retainers that were different then what was recommended. end result was one slipped and hung the valve open. you know how that story ends. this was when i was still pretty green to motors and such. when i opened the motor up, the stem was jammed into the head, and bent over, 2 holes in the pistons, the cylinder looked like rocks were bouncing around in it, and a dog crewed the head. the valve itself was nowhere to be found either.
it may look solid when the motor is on the stand, but at 5-6K rpms, its a different story. for the record when this happen to my motor, i was driving down the highway and the motor was maybe turning 2300 rpm. dont let a 20 dollar part be the weak link.
sorry for my little rant


I agree, I rely on experts for head work. It takes a long time to learn the ins and outs of what makes various parts work together well. As an example, buying the valve spring kits takes care of a lot of that, but not always.

Staying to near stock components also solves most of those worries. I plan to rebuild a set of GT40 heads kind of soon, and I'll buy an aftermarket VS kit to have installed. There are lots of choices to replace the OEM head parts, those are not hard to find, and your stock retainers may be perfectly fine to reuse. Some OEM retainers are oddball rotating devices, and it's more reliable to change those out, along with slightly different springs etc. For mine I just need to get away from the GT40P heads, but keep the stock specs for a base tune/test. My stock 302 has 227k miles and eats too much oil, I hope a lot of it is from the valve guides etc.


im not claiming to be a motor builder, but use the recommended retainers. it can turn costly if you dont. the reason i say this is what happen to me once was that i used retainers that were different then what was recommended. end result was one slipped and hung the valve open. you know how that story ends. this was when i was still pretty green to motors and such. when i opened the motor up, the stem was jammed into the head, and bent over, 2 holes in the pistons, the cylinder looked like rocks were bouncing around in it, and a dog crewed the head. the valve itself was nowhere to be found either.
it may look solid when the motor is on the stand, but at 5-6K rpms, its a different story. for the record when this happen to my motor, i was driving down the highway and the motor was maybe turning 2300 rpm. dont let a 20 dollar part be the weak link.
sorry for my little rant
That is a good point. I bought a set of world products heads for the 2.9L that was in my 87 ranger. The head shop installed 1 incorrect retainer and the valve ended up laying on the piston, the head was replaced but the life of the engine was over shortly after.


The retainers or I guess I should call them the little metal "keepers" (valve locks) they sent do not fit inside the new spring cup, not even close. The factory keepers fit just like they were supposed to go in there.
Ill get pics then you guys help me decide
I will also contact Comp Cams today about this

Thanks fellas that is EXACTLY why I post up my builds.....two billion heads are better than one


here

Factory bits as installed:

171_091006_520000000.jpg


171_091006_520000001.jpg


The wrong bits
171_091006_520000002.jpg


171_091006_520000004.jpg


171_091007_020000000.jpg


Which is correct? on hold with Comp cams.........


Join the Elite Explorers for $20 each year.
Elite Explorer members see no advertisements, no banner ads, no double underlined links,.
Add an avatar, upload photo attachments, and more!
.


Very good, you did the right thing. The keepers they sent are not a match to the retainers. Those are available in a couple of angles(such as 7* and 10*), plus various diameters, and number of grooves. They are very reliable parts, but they just have to fit together properly. As you installed the VS's, it looks correct, good fitting. If the springs are made for the stock lift range, then the new cam may need a check of the coil bind and installed height.

Each cam should come with specs to state what the spring height needs to be, and sometimes mention the spring rates etc. What was the new cam's lift again, stock is under .500"?


Back
Top