My 99 EX-Camper Build | Ford Explorer Forums - Serious Explorations

  • Register Today It's free!

TsherryUSA

Well-Known Member
Joined
March 16, 2019
Messages
102
Reaction score
84
Location
OREGON
City, State
PORTLAND
Year, Model & Trim Level
99 Ford Explorer 4WD 5spd
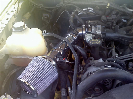
Been working on this build on and off for a few months now. We finally got a chance to take it on a 6 night dispersed camping trip through southern Oregon about a month ago. Things are getting dialed and I wanted to share.
First, some nice photos of the kitchen area:
20200827-DSC00299_IG.jpg


20200828-DSC00356_IG.jpg


20200828-DSC00598_IG.jpg


20200828-DSC00671_IG.jpg


Okay onto specifics. Did a 2 drawer system 36" deep x ~42" wide to fit between the wheel wells. I used heavy duty 300lbs. rated drawer slides, which at the time of building felt like overkill. After the trip though, definitely worth it. Can set my 7 gallon water on a fully extended drawer no problem. Wood is 3/4" ply sande from home depot. As of now it is unfinished, but I may clear coat it in the future.

I don't have a table saw, so used a circular saw and the kreg straight cut jig. Worked okay. Good enough for me, but I don't know if I'd make and sell these.

Fit test:
20200628_161049.jpg


Drawers assembled, with fronts:
20200707_174827.jpg


I anchored the drawers with Harbor Freight D-Ring hardware and tie down straps under the rear seats:
20200716_161227.jpg
20200716_161143.jpg


Somehow I don't have a good photo of the the bed insert support, but it follow the methodology of this design from Solid Wood Worx:
This photo also shows the false top that is sized to fit my stove.
20200816_160822 - Copy.jpg


I plan on building a second false top for the right drawer, but need some 1/2" ply. For now, one of our cutting boards works perfect as a second surface:
20200831-DSC01271_IG.jpg


Right now both drawers mostly hold the kitchen. The left drawer holds the camp stove, fuel, cast irons, percolator, plates, and other odds and ends. The right drawer holds other kitchen stuff and emergency supplies.

Next post, I'll go into the electronics and lighting. Thanks for reading!


Join the Elite Explorers for $20 each year.
Elite Explorer members see no advertisements, no banner ads, no double underlined links,.
Add an avatar, upload photo attachments, and more!
.


Nice! Hope you enjoy the hell out of your setup.
Is that a full moon in the first pic?

I believe it is, or at least close to it.

Nice! I would definitely seal all that wood up. Even just a clear coat will help tremendously.

Those LEDs on the hatch, are wicked bright.

Noted, would you use a PU or clear coat spray can?

LEDs are cheapos from ebay. They really don't like to stick on the hatch. Combo of heavy duty mounting tape, glue gun, and super glue finally got them a good stick.


For all my box builds, I used a brush on polyurethane clearcoat to seal with. Bare wood finish or over stain.

After the first coat, give it a light hand sanding. Wipe or shop vac clean, and you can roll or use a sheepskin/lambswool applicator pad, as the 1st coat sanding leaves it smooth. It goes faster than you might think. I use at least 3 heavy coats.

That will not only protect it from the elements, it will also keep bugs out of it. Easy to keep clean, and looks good too.


Wish I had the skills you have when it comes to wood

Do you watch living the van life on YouTube great resource for this kind of thing


Wish I had the skills you have when it comes to wood

Do you watch living the van life on YouTube great resource for this kind of thing

Thank you on that compliment. Grew up helping my dad on his woodworking projects, but I'm having to re-learn a lot. It's been a while. Still hoping for the space to get a table saw at some point.

Just checked out the YouTube channel, specifically the winter camping one. Makes me want to build a canopy!


For all my box builds, I used a brush on polyurethane clearcoat to seal with. Bare wood finish or over stain.

After the first coat, give it a light hand sanding. Wipe or shop vac clean, and you can roll or use a sheepskin/lambswool applicator pad, as the 1st coat sanding leaves it smooth. It goes faster than you might think. I use at least 3 heavy coats.

That will not only protect it from the elements, it will also keep bugs out of it. Easy to keep clean, and looks good too.

Good call, I have some PU from another project. Have you had any issues with the smell? Last time I used it it took almost a month and a half to stop offgassing.


Poly acrylic works just as good, and cures in a day. It's also easier to work with. Minwax makes some that is available just about every where. It doesn't go as far, and will end up using twice as much, but will not gas or smell at all. Dry times are less than an hour. 1st coat needs to be heavy, as wood will suck it up. Top coats will apply very easy, and will take way less for coverage.


Nice! I would definitely seal all that wood up. Even just a clear coat will help tremendously.

Those LEDs on the hatch, are wicked bright.
Put a 12v PWM Dimmer on those led lights for total control of the brightness. I've used these for years now and can be mounted anywhere. I've seen them for $3-12.
yffgxk1364970973339.jpg


Fine design and execution. The ability to sleep in car provides tremendous freedom when traveling. Just need the drop-down shower enclosure and you're all set. :p

Side note; "dispersed camping" is allowed everywhere on USFS land unless posted otherwise (same for many state forests). So drive there, camp there. (But don't leave the Lincoln Log poopie on roadside.)


Fine design and execution. The ability to sleep in car provides tremendous freedom when traveling. Just need the drop-down shower enclosure and you're all set. :p

Side note; "disbursed camping" is allowed everywhere on USFS land unless posted otherwise (same for many state forests). So drive there, camp there. (But don't leave the Lincoln Log poopie on roadside.)

I like to use ioverlander.com to find sites or areas to camp. On this trip we used some old large heavy duty material sample zip-lock style bags from my GF's work as our trash bag. It rides in the rocket box on top. I was raised on burying your own poop, but these days it seems pack it in pack it out is the way to go. Always got wag bags on hand.


Fine design and execution. The ability to sleep in car provides tremendous freedom when traveling. Just need the drop-down shower enclosure and you're all set. :p

Side note; "dispersed camping" is allowed everywhere on USFS land unless posted otherwise (same for many state forests). So drive there, camp there. (But don't leave the Lincoln Log poopie on roadside.)
Bumper Dumper!
1600611537605.png

1600611289449.png


Y'all are lucky! When we had our '91 we did about the same as you.
It sure makes "breaking camp" easy!

Now the only problems here are, it's 192 degrees in Texas! The bugs are so bad
not only do they eat your food but they eat you too!
LUCKY LUCKY LUCKY!


The ability to sleep in car provides tremendous freedom when traveling.

Especially during COVID. I helped my daughter move in to her dorm in NY. Her move in time was 5 pm. By the time I drove up (DC area), moved her stuff in, going up and down stairs 384 times, built a bunch of IKEA furniture and started home, it was midnight. Hotels didn't want to rent to Marylanders. I laid the back seats down and spread out a foam mattress pad and slept like a baby at a truck stop... until some idiot left their 10 year old in the car while they went to the bathroom. The child beeped the horn on and off for 10 minutes straight. It was 6:30 am, so I just got back on the road.


Thanks for the comments all, glad ya'll are as stoked as we are on the build. It does make breaking camp easy, we fold/roll up our foam mattress and sheets onto the bed platform, lift the platform and slide it back on top of the drawers. Here's some better photos of the bed platform system, then I'll get to the electrical.

Support: T-shape with a hinge so it folds down when not in use. Extra wood pieces give it added stability. The Left and Right rear seats don't fold down perfectly even.
20200921-DSC02139_IG.jpg


With platform installed: The platform is a 3/4" sheet with a metal L-Angle piece screwed & super glued to the edge of the ply. Full platform+drawers sleeping length is 6'. Our bed is a 3" thick foam mattress topper that we had and weren't using. I cut it to size. I think one more inch would make it perfect, but free is free.
20200921-DSC02143_IG.jpg


I realized that I didn't give ya'll a photo of the drawers out 'n empty. I may add more slots for dividers in the future. As you can see the right side drawer front is a little crooked. Oh well. BTW The drawers are 36" deep with 34" inch drawer slides because I'm cheap. Should I have gone for full 36" slides? Probably.
20200921-DSC02124_IG.jpg


Okay, on to what everyone has been waiting for: ELECTRICAL

I got my feet wet modding the wiring by first adding a switch to the aux port. I hate having to pull out the plug charger every time I park. Switch feels cleaner and I like that.
20200921-DSC05378_IG.jpg


My next addition was some reverse lights. I remember once trying to park us at night on a forest road turn around with a bike rack and my dim old rear lights. No more!
20200827-DSC00308_IG.jpg

They make great "camp lights" too. I tied the reverse lights to a relay that is switched by the existing rear lights. So throw it in reverse, they switch on. They're the <$20 NiLight kit from Amazon. Came with everything and would've been plug and play if I hadn't sliced up the harness kit so I could tie it to the rear lights instead of a switch.
20200921-DSC05368_IG.jpg


Here's how the battery is looking right now. Things are getting crowded and I'll probably end up adding some new terminals with more accessory room when I install my HAM radio.
20200921-DSC05332_IG.jpg

The "house" electrical is all run off the starter battery. I was tempted to put in a second battery, but there's just no room under the hood without modding. If I was removing one or both rear seats I would definitely have options for a second battery. That may be a project in the future. For now this 750CCA battery does the job. I picked up one of those jump starter packs just in case. With our normal evening/nighttime use the car started up right away with no issues.

Okay, so the house electrical gets power on a 10 gauge fused wire coming from the starter which goes through the firewall to a relay. The relay is switched on manually with a bright led switch (leftover from the reverse lights install) so I know when the house has power and when it doesn't.

20200921-DSC05339_IG.jpg

I like having the switch here, we park, I slap it on, and we can get our cooking on.

From the relay, the house power runs along the floorboards to the rear storage compartment that houses the jack. I chose to put it there because I could easily open that storage and check the fuse box if needed.

20200921-DSC05344_IG.jpg


The driver's side rear trim panel houses all the switches for house leds, rear hatch leds, phone charger usb port, and my custom window fan.
20200921-DSC05358_IG.jpg

This switch controls the rear hatch leds:
20200921-DSC05346_IG.jpg

Hatch lights wire:
20200828-DSC00680_IG.jpg


Full panel:
20200921-DSC05362_IG.jpg


As a side note, these $5 cargo nets are awesome. Highly recommend installing them. They're perfect for holding clothes, jackets, extra blankets, or whatever.
20200921-DSC05364_IG.jpg

On to the window fan! These "sock style" mesh screens are great for having the windows down and keeping the bugs out at night. The fans are computer fans, bought the large one for $13 on amazon. Had the small one on hand. They're quiet and add a nice gentle breeze.

20200828-DSC00353_IG.jpg


20200801_150723.jpg

20200801_150708.jpg

The fans are on 1/4" MDF and two MDF pieces are glued which create a slot for the window to slide in. The window gets rolled up until the top slots into the window frame. The fans are powered through a plug that sticks out at the top of the rear panel above the seatbelt.

Well that's all I got for now. The drawers are great for holding all our kitchen stuff. I do have a rocket box up top which really helps for storing gear for these longer trips. Let me know if you have any questions or critiques on the set up. Thanks for reading!

20200830-DSC00888_IG.jpg


Oh thanks, some nice inspiration there! Love the idea with the window fans, although that won't work on my 2door Sport withy the flip out windows.


Join the Elite Explorers for $20 each year.
Elite Explorer members see no advertisements, no banner ads, no double underlined links,.
Add an avatar, upload photo attachments, and more!
.


No additional mods, but found a pretty sweet dispersed campsite with a view today while I was driving around the forest playing radio.
20201205-DSC05682_IG.jpg


20201205-DSC05695_IG.jpg


Back
Top