410Custom's builds a 2007 Ranger V8 - custom truck build - Project "Ranger Premier" | Page 23 | Ford Explorer Forums - Serious Explorations

  • Register Today It's free!

410Custom's builds a 2007 Ranger V8 - custom truck build - Project "Ranger Premier"

@410Fortune @Josh P Everyone. I'm looking for plates from every state. Of course I have Alabama. I need Alaska, Arizona and Arkansas next. know Jamie can fix me up with some northwest U.S. plates. I'm still waiting to here back from my step daughter-in-law about plates from her home state and her parents home territory. I need two to 3 of each state. One for me, one for Bro and one for the Shop. Josh aren't you in Arizona? I have a cousin in South Carolina that I haven't contacted yet.
altnplates.jpg


Join the Elite Explorers for $20 each year.
Elite Explorer members see no advertisements, no banner ads, no double underlined links,.
Add an avatar, upload photo attachments, and more!
.


This Ranger build is unbelievable. Love the artistry and awesome mechanics.

Well done!!!


More on the t case you can see the 4406 fits a ranger perfectly
You can also see why I shave the ears off so we get good clearances all around

333A83DB-F9F1-41BD-952C-F09DBB34D969.jpeg


EB01436A-A17C-408E-8133-BBC81FD0B8DD.jpeg


06585324-8954-434D-974D-7F07CE44396F.jpeg


569396C3-30B4-4C84-B70A-36C820B791E1.jpeg
40873863-CB68-4D4C-915E-535E968FE5FE.jpeg


More of the finished drivers rear, pre leaf spring


40B6FD74-5253-4B0D-A342-12E35D82B944.jpeg


A2BDDAC1-703F-45E8-9AEB-9DEB7D514957.jpeg


3E9B538B-E220-4D87-B65B-92FAC4B4DC37.jpeg


598820FC-2350-48BE-A20C-F10A0797D666.jpeg


@410Fortune @Josh P Everyone. I'm looking for plates from every state. Of course I have Alabama. I need Alaska, Arizona and Arkansas next. know Jamie can fix me up with some northwest U.S. plates. I'm still waiting to here back from my step daughter-in-law about plates from her home state and her parents home territory. I need two to 3 of each state. One for me, one for Bro and one for the Shop. Josh aren't you in Arizona? I have a cousin in South Carolina that I haven't contacted yet.
View attachment 427454
I think I have a few plates


This Ranger build is unbelievable. Love the artistry and awesome mechanics.

Well done!!!

Thank you very much what a nice thing to say! I hope to help and inspire others with my builds


@410Fortune @Josh P Everyone. I'm looking for plates from every state. Of course I have Alabama. I need Alaska, Arizona and Arkansas next. know Jamie can fix me up with some northwest U.S. plates. I'm still waiting to here back from my step daughter-in-law about plates from her home state and her parents home territory. I need two to 3 of each state. One for me, one for Bro and one for the Shop. Josh aren't you in Arizona? I have a cousin in South Carolina that I haven't contacted yet.
View attachment 427454
Got 2 from Wisconsin when you want them...Really like the front end styling of the Ranger, pleased it's on the retro side.


20220319_100033.jpg

Ohio is from the donor Explorer I stripped.
Four Wheeler plaque is from the first Explorer Forum Truckhaven run.
Bottom one I got out of my dad's workshop. 1928 California trailer plate.


Thinking about plates, I saw a personalized plate last week that should have been rejected on principle. It read "EXPLORE". Problem was, it was on ... .. a

Jeep.


FYI for anyone needing very good 4WD front hubs, Rock Auto has the SKF BR930252 hubs on sale for $103 each. I like those a lot and the Ford hubs are the only ones I've paid more for. The SKF hubs were about $150, I've got four of them on my last two 98's. So another pair lets me rebuild my 99 again that I think may be the original hubs at 153k.


Update time! Rear suspension is ready to rock and roll, which is good I need to flex it out so I can do final measurements for shocks.
It looks like we will be using a 12" stroke King 3.0 in the back but it might require a 14" stroke depending on how she sits when finally ride height adjusted and aligned in the front. Either way we are going to have to strap this rear to keep from overextending the shocks. There is a lot of action in the shackle as the spring takes the trucks weight.

Daddy like

First things first... I have a ton of pictures to get through!
When we left off I was ready to hang the drivers leaf spring and shackle, final weld the rear axle, finish up the new drop bracket brace, weld up the modified sliders (while the welder it out), final torque the front suspension, adjust camber and toe (preliminary) and install rear end with brakes.........

shop was a mess, but only because parts we no longer need are finally being purged to storage
rear axle in the middle of all the mess...it's all cleaned up now :)
171_262043_050000000.jpg


we are starting to get an idea of the track width with the plus 2.5" mid travel kit
171_262043_050000001.jpg


Turns out the True travel supplied brake lines are too short when turning (no pun)
So some nice Rough Country parts to the rescue, these are for 6" lifted IFS rangers
171_262043_060000003.jpg


mounted
171_262043_060000004.jpg


retained to coil w zip ties in effort to keep brake line out of coil spring
171_262048_130000000.jpg


drivers done, ready for final torque and alignment
171_262048_130000001.jpg


171_262048_140000002.jpg


passenger similar
171_262048_140000003.jpg


perfect length now

Onto rear axle


Now that looks great!


drivers leaf spring and shackle were installed
time for some welding

First up the Superlift drop bracket support brace built from stock parts, custom cut tabs of 1/4" plate and plenty of love
171_262101_020000000.jpg


Parts in place for final time, final cutting and fabrication was done, and tack welded.
171_262101_020000001.jpg

Sleek!! Small, sleek, easy to clean, simple, strong, serviceable, built from recycled parts..... what's not to love about this?

171_262113_180000003.jpg

171_262113_180000002.jpg

Removed and final welded
171_262101_020000003.jpg


171_262101_020000002.jpg


I should have pre heated the torsion bar! This was pointed out to me.... that's okay I know we got some heat into those welds with the 220 mig. Lesson learned
Lots of welding to do on this prototype!
171_262101_020000004.jpg


Good practice for when I do the rear axle next

more fab on front support tab
171_262119_420000002.jpg


These tabs actually fit up inside the old torsion bar pad structure and transfer the load into the frame at the trans crossmember
We wanted them to be strong..
171_262119_420000000.jpg


Parts were wire brushed, cleaned, primed and painted with 3 coats of black enamel
171_262119_420000003.jpg


brace complete!
Sun is out
171_262119_420000001.jpg


Done and finally installed, bolts on at the lower control arm rear bolt. We added a second smaller bolt for more strength
171_262129_260000002.jpg


171_262129_260000003.jpg


171_262129_260000001.jpg


171_262129_260000000.jpg


Lets get her rolling
First up we are welding the axle tubes to the center chunk in an effort to keep them from spinning. With heavy truck, heavy foot, big tires and a locker the factory plug welds have been known to let go and you can spin a tube
Welding now can prevent that. Weld 1" at a time, let cool, to prevent warping


171_262135_480000004.jpg


moving around the rear axle, spring perches, tubes, and shock mounts were done final
171_262138_580000000.jpg


171_262138_580000001.jpg


until it is all welded
171_262138_580000003.jpg


Axle was then moved outside, cleaned, wire brushed, and cleaned some more. All old paint was removed, welds cleaned, prepped for primer and paint

171_262141_100000000.jpg


all this had to be knocked off...crusty
171_262141_100000001.jpg


rust eating primer was used and allowed to cure
171_262143_120000000.jpg


spring around here, the ice pack was melting.... its long gone now being replaced with green grass!

171_262146_360000000.jpg


and maybe a little mud
put that v8 bronco to work! DAILY..... yes my door is blue, long story, this summer she is getting a fresh coat of liner
171_262146_360000001.jpg


we wont be using my wheels tires for mock up....at least not like this


rear axle was painted from 3 sides, 3 times at least.... 3 coats of black satin enamel

171_262149_390000000.jpg


time to go back under the truck for the final time
171_262149_390000002.jpg


171_262149_400000003.jpg


Spring plates and factory blocks were also painted

171_262149_400000004.jpg


rehab rear calipers
171_262149_390000001.jpg


time to do the oh so fun 8.8 E brake setup. I have gotten much better at setting these up over the years. When do you enough of them you learn some tricks
whole area cleaned with wire brush and compressed air, don't forget to lube the contact points
171_262200_030000000.jpg


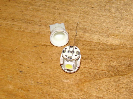
This is how I hold the retainer clips, set the shoes in place, hold with one hand, insert clip with the other
171_262200_030000001.jpg


in place, time for top spring
171_262202_140000000.jpg


fish spring in from one side to the other, staying under the cable adjuster assembly
171_262203_160000000.jpg


Here's the shortcut
Use a tool to pull the spring over to the other shoe.... this is the easiest way, takes some pulling for sure
171_262200_030000004.jpg


This piece of rod is actually for dropping turkeys into the fryer, but hey at least I found something that worked!
not easy
set in place on the hook and carefully slide tool out. Push spring into pad hook and you are golden
171_262200_030000002.jpg


171_262158_130000002.jpg

time to setup bottom spring and star adjuster

171_262200_030000003.jpg


Done
171_262158_130000001.jpg


Make sure you set shoes in proper location on the backing plate, the backing plate has a raised circle that acts as a guide. This ensures your rotor will fit over the brake easily.

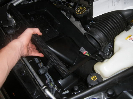
Now for the good stuff, rear rotors, calipers, and carbon fiber ceramic brake pads!
171_262210_360000000.jpg


next round of parts
171_262210_360000001.jpg


171_262216_220000000.jpg


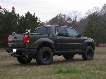
rear axle coming along!
171_262216_220000003.jpg


4 rotors!! truck supported by springs!
171_262216_220000001.jpg


Time to turn attention back to the front suspension, final details before tires!

Starting to look at mounting of limit straps. I picked up some upper adjusters, so we can adjust limits as the straps stretch. Must limit the droop travel to keep the cv axles, tire rod ends, and uniball iupper and lower joints all within travel limits.

171_262220_280000000.jpg


7" of shock travel from full compression suspension travel (1/2" past stock bump stop) puts limit strap somewhere in here. (per True travel instructions)
171_262220_280000001.jpg


sorry for the dust!

Rock sliders have also been getting some fab
171_262226_150000002.jpg


major fab
171_262226_150000001.jpg


171_262226_150000000.jpg


that can wait until later


Final torque on front suspension so we can mount some wheels and roll her into bay 1 on the lift
so earlier we installed camber shim adjusters on UCA heim joints
It was pointed out to me earlier in the thread that the True Travel kit needs the heim joints threaded basically all the way in to get decent camber readings.
I found this to be true.
A little bit of a pita to remove the upper camber shims/bolts.... remove UCA from mounts, loosen jamb nuts and run them all in....
Done now and we have acceptable camber for a prelim alignment

Jacks were used to bring control arms up and the king coil overs took the weight of the truck, this is somewhere around our final ride height. Lower balljoint/uniball and upper uniball were torqued to 140 ft lbs. Lower control arm and upper camber shims tightened also to 140, CV axle nut torqued to 220.
Ready for tires!
171_262229_460000000.jpg


171_262229_460000001.jpg


Each time the upper control arm heims need adjusting all of this must be removed, I'm hoping camber and caster are within spec and I wont have to do this again.

Way too far out, all 4 heims were threaded all the way in
171_262229_460000002.jpg

better

171_262229_460000003.jpg


171_262244_040000001.jpg


171_262244_040000000.jpg


Heim jamb nuts torqued down, camber shims back in place

171_262216_220000002.jpg


The zip ties on the brake line gives off a turd in a punch bowl vibe. A pair of loop clamps with a rubber insulation is what I'd suggest. Get one the diameter of the coil spring and one to fit the brake line. Bolt them together.

Loop clamp.jpg


Join the Elite Explorers for $20 each year.
Elite Explorer members see no advertisements, no banner ads, no double underlined links,.
Add an avatar, upload photo attachments, and more!
.


Truck is on tires! This was a huge day for me
So nervous! How will it sit? Will ride height be correct? What about alignment? Rear tires in the right spot how will the rear springs and shackles sit etx etx
Losing sleep over this stuff

And then the moment came
Everything was ready, nothing left to do, shop was cleaned and ready to accept the truck in bay one. The only thing I wanted to do that I did not get done was to go get the 07 wheels and tires from storage, that didn’t happen in time so I had to use these “rollers” we keep around, don’t mind the dirty wheels and tires just focus on the awesome

I was so happy
Happy to see the ride height is just about perfect and the alignment is close enough to roll her around. She rolls easily and it was not difficult to change bays even without steering or brakes. I have a 2500# winch mounted to the wall in the shop just for pulling disabled trucks in

I then spent some time jacking up the different corners to get an idea of the suspension flex. I can tell you this thing flexes like mad it was barely even working, maxing out my jack and wood block without even lifting a tire

So now she’s in bay one on the lift and ready for the next round
Plumbing the drivetrain

Want to see the pics? Or should I just keep all this good stuff a surprise? Lol lol


Back
Top