cifer
Active Member
- Joined
- May 13, 2004
- Messages
- 67
- Reaction score
- 0
- City, State
- San Jose, CA
- Year, Model & Trim Level
- 2000 XLT
This how-to is for installation of a billet grille insert (cutout type). I don't remember seeing one on this site, so this may be useful for those who are reluctant to purchase the cutout types due to their relative difficulty of install in relation to overlays. The instructions which came with the grille were quite obtuse, but after reading them again and again, I finally made sense of them. The install took longer than I had expected (five hours), mostly due to the fact that I wanted to take my time and am an annoyingly absurd perfectionist. I have included links for you all to follow along.
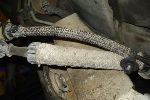
1. Remove the grille - the grille is held on with six screws and four clips. The first two screws are found under the flaps you access to get to the headlights (one on each side). The other two screws are to the left and right of the hood latch, on perpendicular tabs that stick up from the plastic cover. I also unscrewed the two plastic screws that held on the plastic cover. You will also need to remove both corner light assemblies. Lift the flaps (to the headlights) to remove the screws holding the corners in place. Pop the corners straight out and twist off the bulb sockets. You will uncover two more screws (one on each side) behind the assemblies. Immediately below the screws is a clip (again, one on each side). Carefully unclip these. Move toward the center of the grille, and you will see two more. Carefully pop these out, and you can then pull off your grille. There are four screws which hold the extensions to the grille. Remove these and set aside so as not to damage them. It should now look like this
2. Cut out center bars - using a cutting tool, cut out the center bars. Your first cuts don't have to be exact, as it will be much easier to make cleaner cuts once the majority of it is gone. I have access to a shop, so I was using air tools. Fun....and easy. Make your cuts like this
3. Cut out sides - because your new grille is actually longer than the space you just cut out, you will need to cut out the sides to make them fit. Luckily, Ford has given you a line to follow when making these cuts. Before you do this, take your new insert and hold it up to your grille. Note where the tabs are going to mount onto the plastic. You will need to make your cuts OUTSIDE of these mounting points. Failure to do this will result in a crooked grille and consequent grille litter on the side of the highway. Cut where the chrome ends, and the grey (or whatever color you have) begins. Cut as close as you feel comfortable without your hand slipping. Remember you can still go over these again with some sandpaper or a grinder. Here's what it looks like after cutting and sanding.
4. Minor detailing (test fit) - Take your insert and center it behind your grille. You will have to push back the remaining plastic parts to get it in there. From the front, look for any gaps between the grill and insert. If there are any (and there probably will be), you will have to grind down the grille at the top (fortunately, the unseen) part of the cutout in order to get the grille to move forward and close the gap. This was the most time consuming part for me. Grind down the remainder of the center bars from the grille, sand the edges of the cutout, just make it look professional so you can show off to your friends later. When prep is done, it should look like this . Note that the only parts of the cut area remaining are the at the top and bottom.
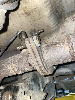
5. Mount insert to grille - Center insert back into grille, and drill holes through the insert's mounting tabs and grille plastic. Attach using the screws and nuts provided. Here's what you got.
6. Finishing up - Screw on the grille extensions with the four screws. Push the grille up to your truck, aligning the two center-most clips. Clip those in, then the two outside clips. Insert the screw behind the assemblies. Twist the bulb sockets into the corner assemblies, push the assemblies straight in, and secure it with the two screws (each side). Finish up with the four screws on top of the grille and the two plastic screws on the cover.
7. Admire your work - Polish up your brand new insert and crack a beer, you deserve it! Job well done!
1. Remove the grille - the grille is held on with six screws and four clips. The first two screws are found under the flaps you access to get to the headlights (one on each side). The other two screws are to the left and right of the hood latch, on perpendicular tabs that stick up from the plastic cover. I also unscrewed the two plastic screws that held on the plastic cover. You will also need to remove both corner light assemblies. Lift the flaps (to the headlights) to remove the screws holding the corners in place. Pop the corners straight out and twist off the bulb sockets. You will uncover two more screws (one on each side) behind the assemblies. Immediately below the screws is a clip (again, one on each side). Carefully unclip these. Move toward the center of the grille, and you will see two more. Carefully pop these out, and you can then pull off your grille. There are four screws which hold the extensions to the grille. Remove these and set aside so as not to damage them. It should now look like this
2. Cut out center bars - using a cutting tool, cut out the center bars. Your first cuts don't have to be exact, as it will be much easier to make cleaner cuts once the majority of it is gone. I have access to a shop, so I was using air tools. Fun....and easy. Make your cuts like this
3. Cut out sides - because your new grille is actually longer than the space you just cut out, you will need to cut out the sides to make them fit. Luckily, Ford has given you a line to follow when making these cuts. Before you do this, take your new insert and hold it up to your grille. Note where the tabs are going to mount onto the plastic. You will need to make your cuts OUTSIDE of these mounting points. Failure to do this will result in a crooked grille and consequent grille litter on the side of the highway. Cut where the chrome ends, and the grey (or whatever color you have) begins. Cut as close as you feel comfortable without your hand slipping. Remember you can still go over these again with some sandpaper or a grinder. Here's what it looks like after cutting and sanding.
4. Minor detailing (test fit) - Take your insert and center it behind your grille. You will have to push back the remaining plastic parts to get it in there. From the front, look for any gaps between the grill and insert. If there are any (and there probably will be), you will have to grind down the grille at the top (fortunately, the unseen) part of the cutout in order to get the grille to move forward and close the gap. This was the most time consuming part for me. Grind down the remainder of the center bars from the grille, sand the edges of the cutout, just make it look professional so you can show off to your friends later. When prep is done, it should look like this . Note that the only parts of the cut area remaining are the at the top and bottom.
5. Mount insert to grille - Center insert back into grille, and drill holes through the insert's mounting tabs and grille plastic. Attach using the screws and nuts provided. Here's what you got.
6. Finishing up - Screw on the grille extensions with the four screws. Push the grille up to your truck, aligning the two center-most clips. Clip those in, then the two outside clips. Insert the screw behind the assemblies. Twist the bulb sockets into the corner assemblies, push the assemblies straight in, and secure it with the two screws (each side). Finish up with the four screws on top of the grille and the two plastic screws on the cover.
7. Admire your work - Polish up your brand new insert and crack a beer, you deserve it! Job well done!