Body Mount Shrinkage and Compression | Ford Explorer Forums - Serious Explorations

  • Register Today It's free!

Body Mount Shrinkage and Compression

swshawaii

Staff member
Moderator
Elite Explorer
Joined
April 3, 2009
Messages
9,838
Reaction score
838
City, State
Kailua-Oahu, Hawaii
Year, Model & Trim Level
'05 Sport Trac XLS (RWD)
Body Mount Compression

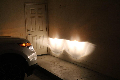
Just wanted to give OffTrac (Hugh) a big thanks for the incredible deal on the OEM bushings. Bought 7 of 8 new foam cab mounts from him for $75 shipped, and priced them from a reputable Ford online parts dealer for $786. :eek: Having minimal corrosion, this job was extremely easy by myself using two essential tools OffTrac had mentioned in his sticky. 1/2" impact wrench, preferably 120V electric with 7 to 8 amp minimum, and a propane torch to soften the blue factory thread locker. Heated the tip of the bolts from the bottom for 20 seconds and they zipped right out without issues separating from the lower mount. Loosened the radiator core mount nuts until almost off, and removed the remaining three cab mount bolts while leaving all the the drivers side mounts tight. Removed ALL the blue factory thread lock with a wire wheel and torqued to spec. Pics below show over 1/4" of shrinkage or compression after 10 years. The top mount center sleeves were flared and bottoming out on the lower flange causing noise.

DSC04537.jpg
DSC04536.jpg

DSC01964.jpg
DSC04679.jpg


Join the Elite Explorers for $20 each year.
Elite Explorer members see no advertisements, no banner ads, no double underlined links,.
Add an avatar, upload photo attachments, and more!
.


:thumbsup:Great job Steve! I'm jealous. I've yet to tackle this one.


Glad to see you got it done. Happy to pass along what little help I can offer.

That's some good info regarding compression. Even if they haven't rotted, you know they've lost some isolation effect based on that compression.

[MENTION=200090]Markaprice73[/MENTION], if you're waiting because of the level of involvement, don't, it's really not very difficult. If you're holding out because of the cost of OEM, that's understandable. The Prothane kit is very reasonable, though.


Thanks Hugh. I only replaced the foam cab mounts, the OEM rubber front and rears are in perfect condition.

Go for it Mark, you probably don't have a corrosion issue living in Texas. I was shocked how easy this was, my total time was under four hours. Most difficult part for me was getting the lower firewall mount past the parking brake cable conduit. Tried removing the cable from the bracket, even after pinning it at the pedal to get slack. If either of you two need my eight cab mount metal "shells", let me know.


Thanks for the vote of confidence guys:)
You nailed it. The level of involvement has put this at the bottom of the "to-do" list for quite some time. Also, I thought I remember Todd Z mentioning something about breaking a bolt and had to search the entire country for a OEM replacement. (NY rust I'd imagine) That scared me off fore sure. Also isn't the torque needed to install some crazy high number? My torque wrench only goes to 150#ft I believe.

I definitely am saving up for a impact and also would be going aftermarket per the cost.

So, Steve, why the decision to go OEM? Are they the same exact ones that failed? Am I missing something? I'm not quite sure how many years went by before they crumbled. Maybe 7 or so before I noticed? Not sure? So I suppose that's maybe why you used the OEM's? Also the great price from Hugh:)

I think last time I checked the fronts and rear were still fine. But yes, the cab mounts are toast. Cant even touch them with out some falling out. I didn't realize they were foam and the front and rear are rubber. Is that correct?

Also, my 02 Sport rears are completely missing. Clucks over every bump. My ST hasn't had any creeks or anything yet.

This project is now moved up the list. Thanks guys. I would love to feel the difference it makes!!

Looks like I've got some reading up to do on this.


Mark, no other reason than the price Hugh sold them for. I did have to buy the missing "B" pillar upper mount on line for $135 making the total $210. My other fear with the Daystar KF04015 or Prothane 6116 polyurethane kits was squeaking. I've read a couple of isolated installs where the owner could not get rid of the noise, regardless of torque or lubrication. The rear "D" mounts under the ST's storage panels are rubber and rarely fail. The "B" and "C" mounts are orange colored Micro Cellular Urethane (MCU) foam, and notorious for disintegrating. Outer appearance is very deceiving, they almost seem to rot from the inside out. OEM mount torque spec for all cab mounts is 59 ft/lbs, and 41 ft/lbs for the radiator core supports. Check out the links below for instructions and torque specs for both poly kits. If I can, glad to help in any way.
http://www.daystarsuspensionparts.com/Installation_Instructions/Daystar/p21012.pdf
http://www.prothanesuspensionparts.com/Installation_instructions/Prothane/6-116.pdf

Not sure of the article date. Nonetheless, a huge mistake. 2007-10 Gen 2 ST's use only rubber mounts.
Trucks, SUVs Turning to Microcellular Urethane; Vibracoustic Uses Innovative Material to Revolutionize Automotive Body Mount Performance

AGCO Automotive Repair Service - Baton Rouge, LA - Detailed Auto Topics - Ford Explorer and Sport Trac Frame/Body Cushions


Thanks for the clarification. Yup, I was just looking up the specs a moment ago in the FSM. You are correct. Thanks for the links. I'll be studying up. Again, very happy for you that you got this done. I know you've been researching and helping others with this for sometime.
I just read Hughs sticky. Great stuff! Always nice to know trustworthy folks who have done the leg work already before diving in.


I keep seeing post about this…well this 1 and the sticky. I really need to do this also, the cab mounts are gone with slight touch. I was looking at the front bumper mount and it is orangish in color, was that the color for the oem or has this been replaced to the poly kind? I only have a dewalt cordless impact 1/4, will that work…I will for sure get a torch. My main concern is the bolts and hardware. I don't want to take apart to find I need new hardware and can't do anything so would like to know what bolts and hardware kits I can buy beforehand.
You really don't need to replace all? I can take some photos to see opinions on my bushings


Sorry to tell you these bolt in the body mounts are much tighter then any 1/4 inch or even 3/8 inch electric impact will remove. Best would be a good 1/2 air impact but a electric 1/2 inch should work..


Sorry to tell you these bolt in the body mounts are much tighter then any 1/4 inch or even 3/8 inch electric impact will remove. Best would be a good 1/2 air impact but a electric 1/2 inch should work..
Ditto. The most important tool for loosening the body mount bolts is a PROPANE TORCH. The factory thread lock is heat
activated and states in the TSB linked below, "BOLTS CONTAIN LOCTITE AND MAY REQUIRE UP TO 350 LB-FT. TO REMOVE" :eek:
http://www.revbase.com/BBBMotor/TSb/DownloadPdf?id=114372

Removing the bolts after heating can be done without an impact wrench, but space is very confined using a ratchet and cheater pipe, especially if the front seats are only unbolted and not removed. The front four legs on the rear bench seats must also be unbolted and folded up to move the rubber flooring to access the "B" pillar mounts. The "C" pillar mounts under the rear storage compartments require an 8" to 10" extension to reach the bolts. I avoided using too much heat on the bottom "C" mount bolt, they are made of rubber and I was reusing them. The radiator core nuts need an even longer extension from the top access holes. I used a standard length 18mm SIX POINT socket to loosen, and also to hammer the bolt heads after threading them a few turns into the lower sleeves to separate from the upper mounts. The "A" pillar firewall upper mounts require lifting the cab a minimum of 1 1/2" to 2" to remove, due to the length of metal hex sleeves.

If I used either the Daystar KF04015 or Prothane 6116 poly bushings I would NOT use Loctite when first installing. Poly compresses very slightly and will sometimes squeak over time. Daystar recommends retightening after 500 miles, Prothane 1000 miles. If you are going through the trouble of accessing the bolts again to retorque, remove the clean bolts and Loctite them after they're compressed.

Why the decision to go OEM? Are they the same exact ones that failed? Am I missing something? I'm not quite sure how many years went by before they crumbled. Maybe 7 or so before I noticed? Not sure? So I suppose that's maybe why you used the OEM's?
Two more reasons. Couldn't see how ANY polyurethane could cushion better than the MCU foam, regardless of the durometer. Loved the ride previously, and didn't want to sacrifice comfort. If I get 10 years from the replacements I will be very be happy.
Also read this quote in the AGCO article linked above.
The Ford replacement part does appear to have been improved. We have seen no repeat failures using the replacement cushions, and there is no other source of supply that we have found.
Regarding this threads subject of mushroomed upper sleeves stated in the Daystar KF04009 and Prothane 6116 kit instructions.
The lip on the bottom stamped washer/sleeve assembly may become mushroomed, especially on older vehicles.
Before reinstalling this part, remove mushroomed lip to avoid any interference fit problems.
Contact marks shown on the LOWER mount base causing the mushrooming shown in the first two pics. The upper and lower mount foam compresses or deteriorates, then the upper mount hex sleeve bottoms out on the lower flange causing the flaring. This is the main source of noise. Ford's lower mount sleeves have less than 1/2" of thread for the 72mm (2 3/4") bolts, yet they apply Loctite to the entire bolt thread instead of using a slightly longer bolt with a lock nut and washer. If the threads are damaged when separating the upper and lower mount sleeves by threading the M12 bolt from the top, and hitting the bolt head, the threads would be difficult to retap to a larger size and maintain strength due to the thin wall of the lower sleeves.


Back
Top